Archives

Tips and Tea on Tuesdays

On Tips and Tea on Tuesdays, I will cover a topic and hopefully provide you with some tips that will be helpful! And just as an afterthought, tea may occasionally be a cup of Joe!

tea cup

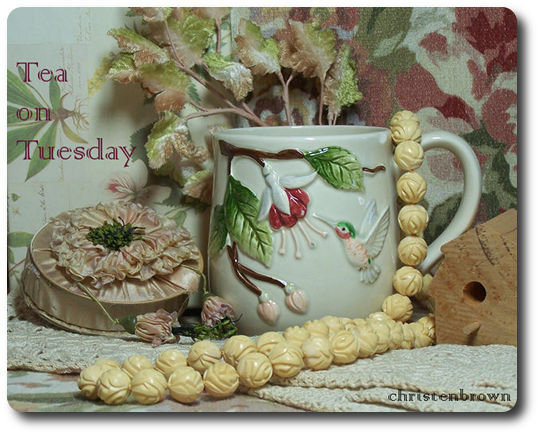
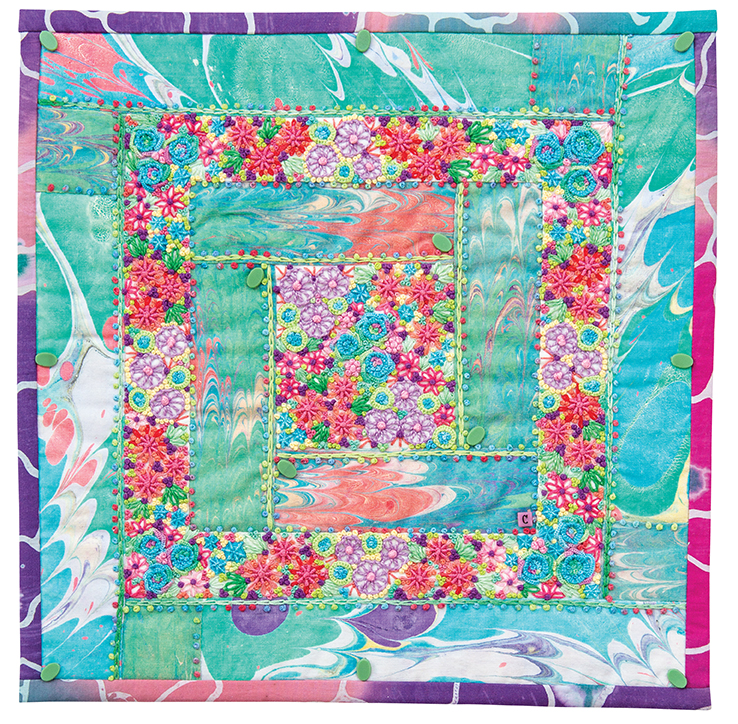
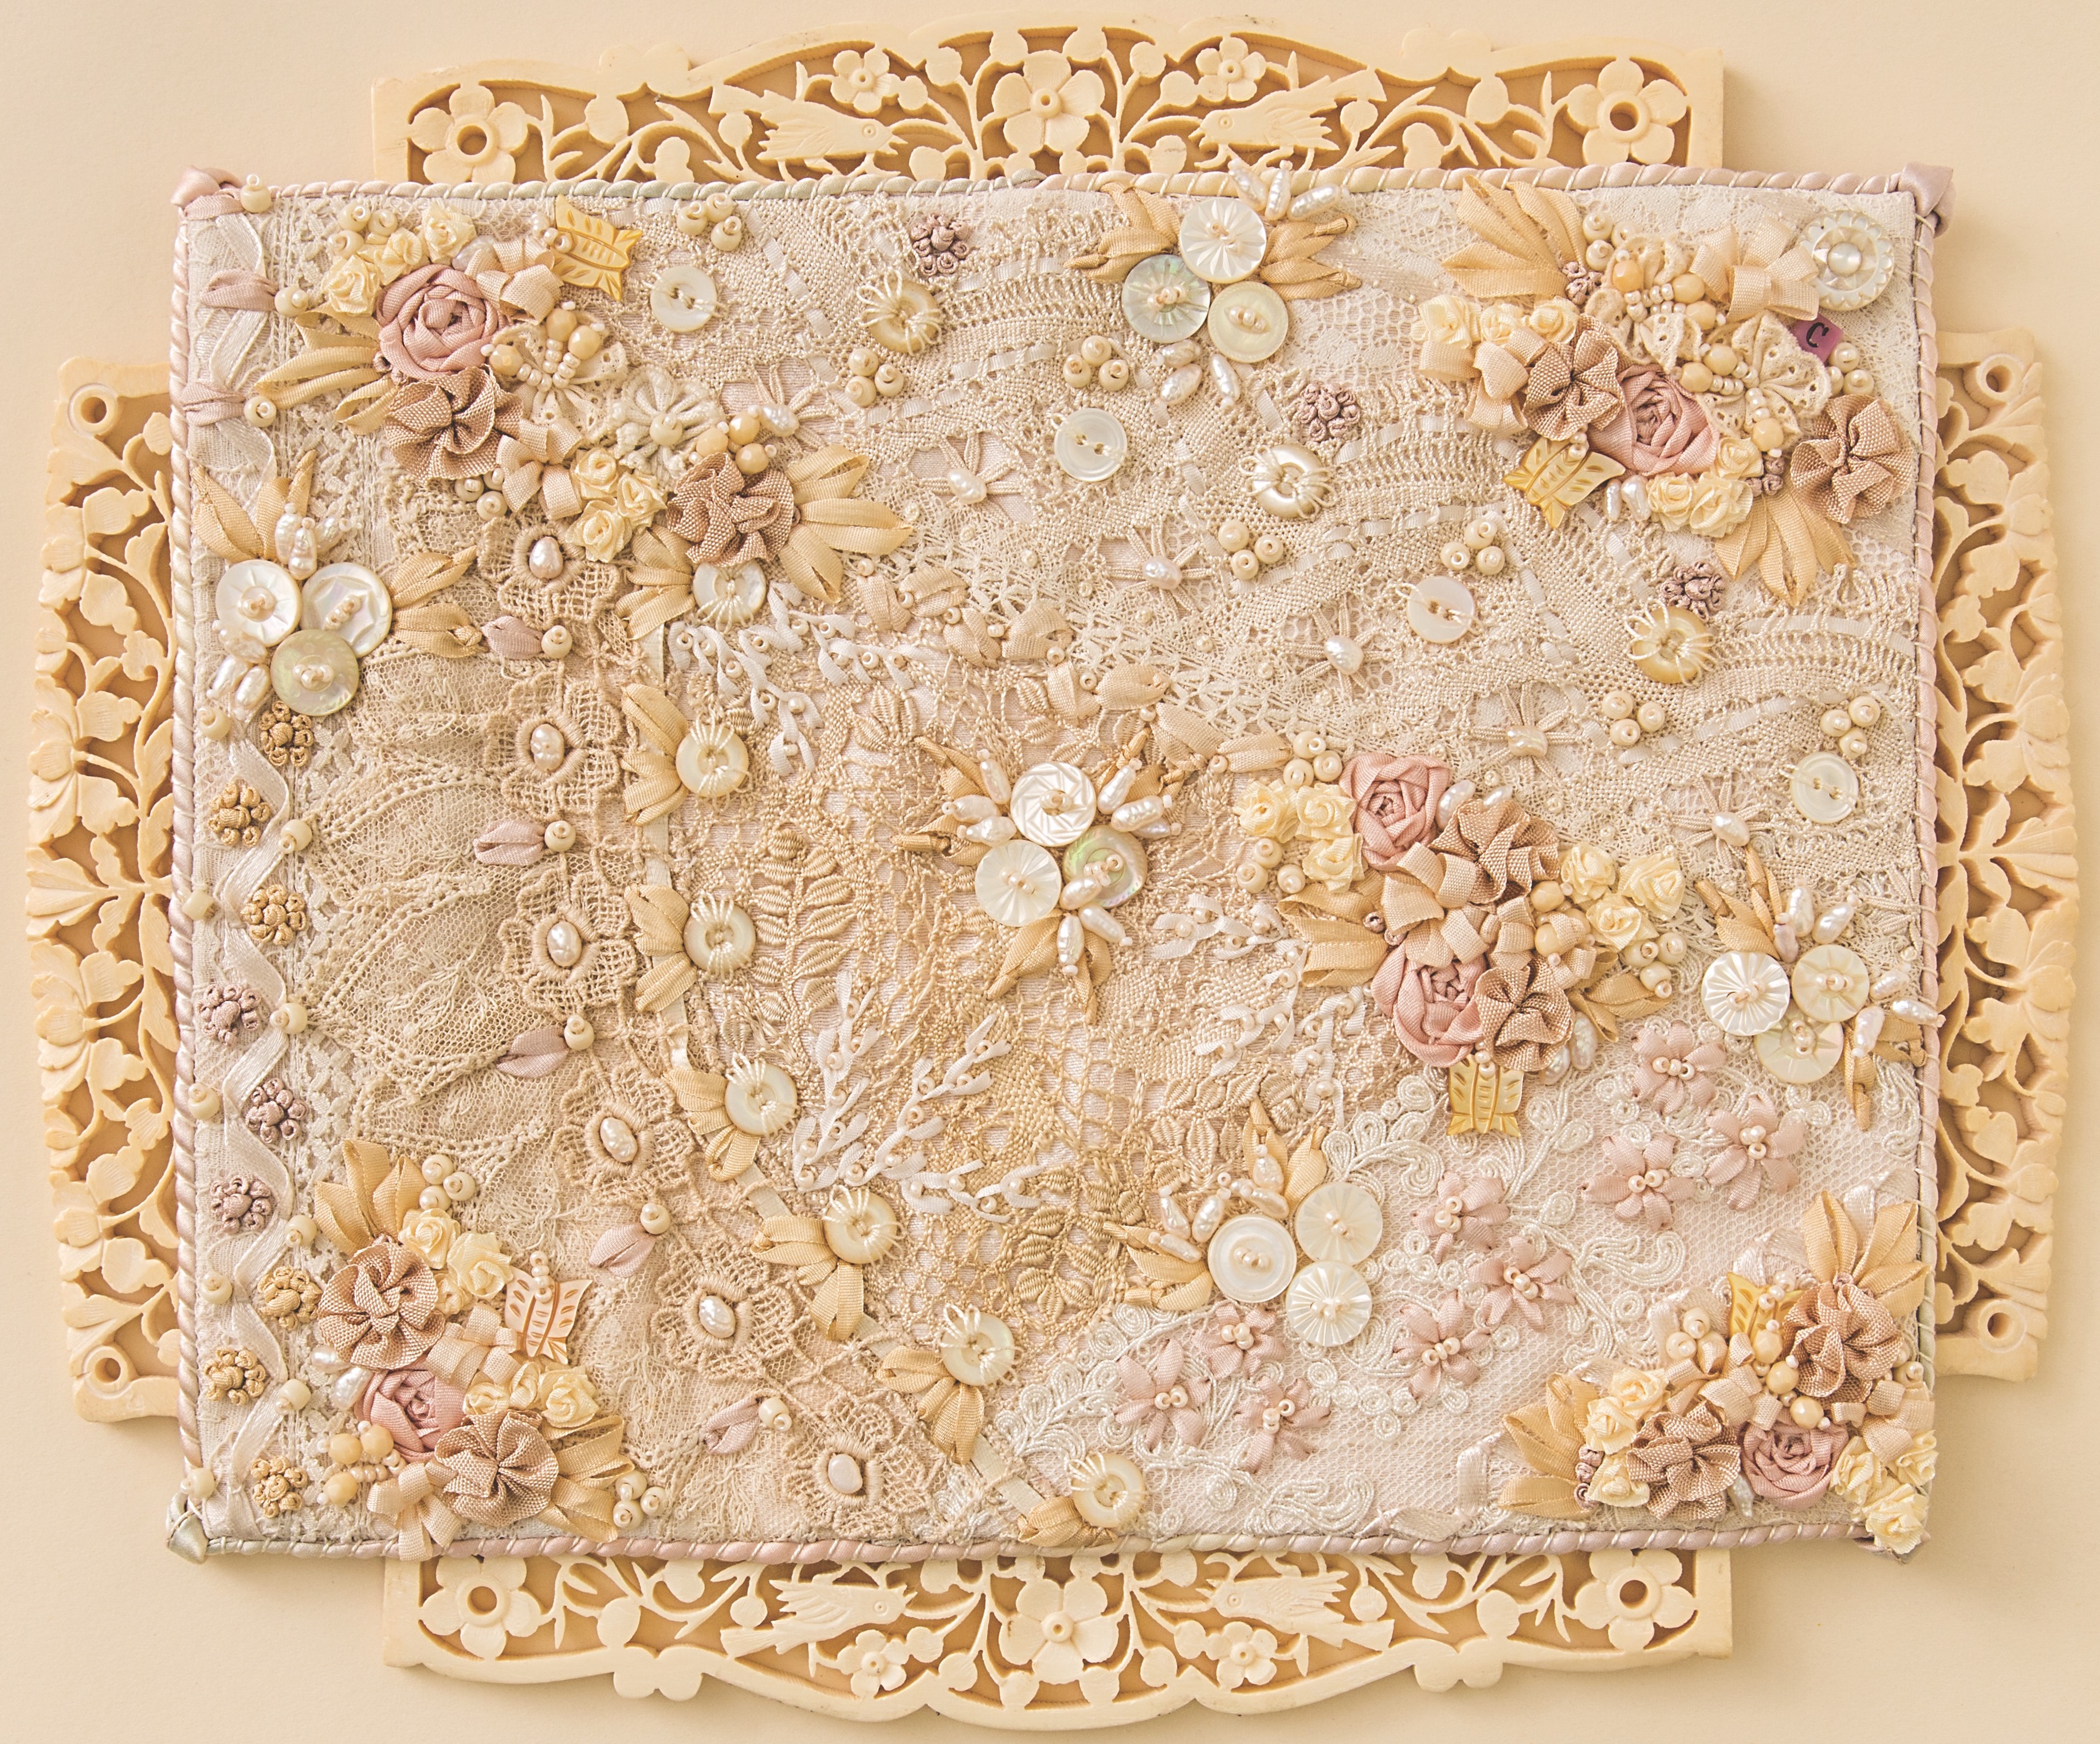
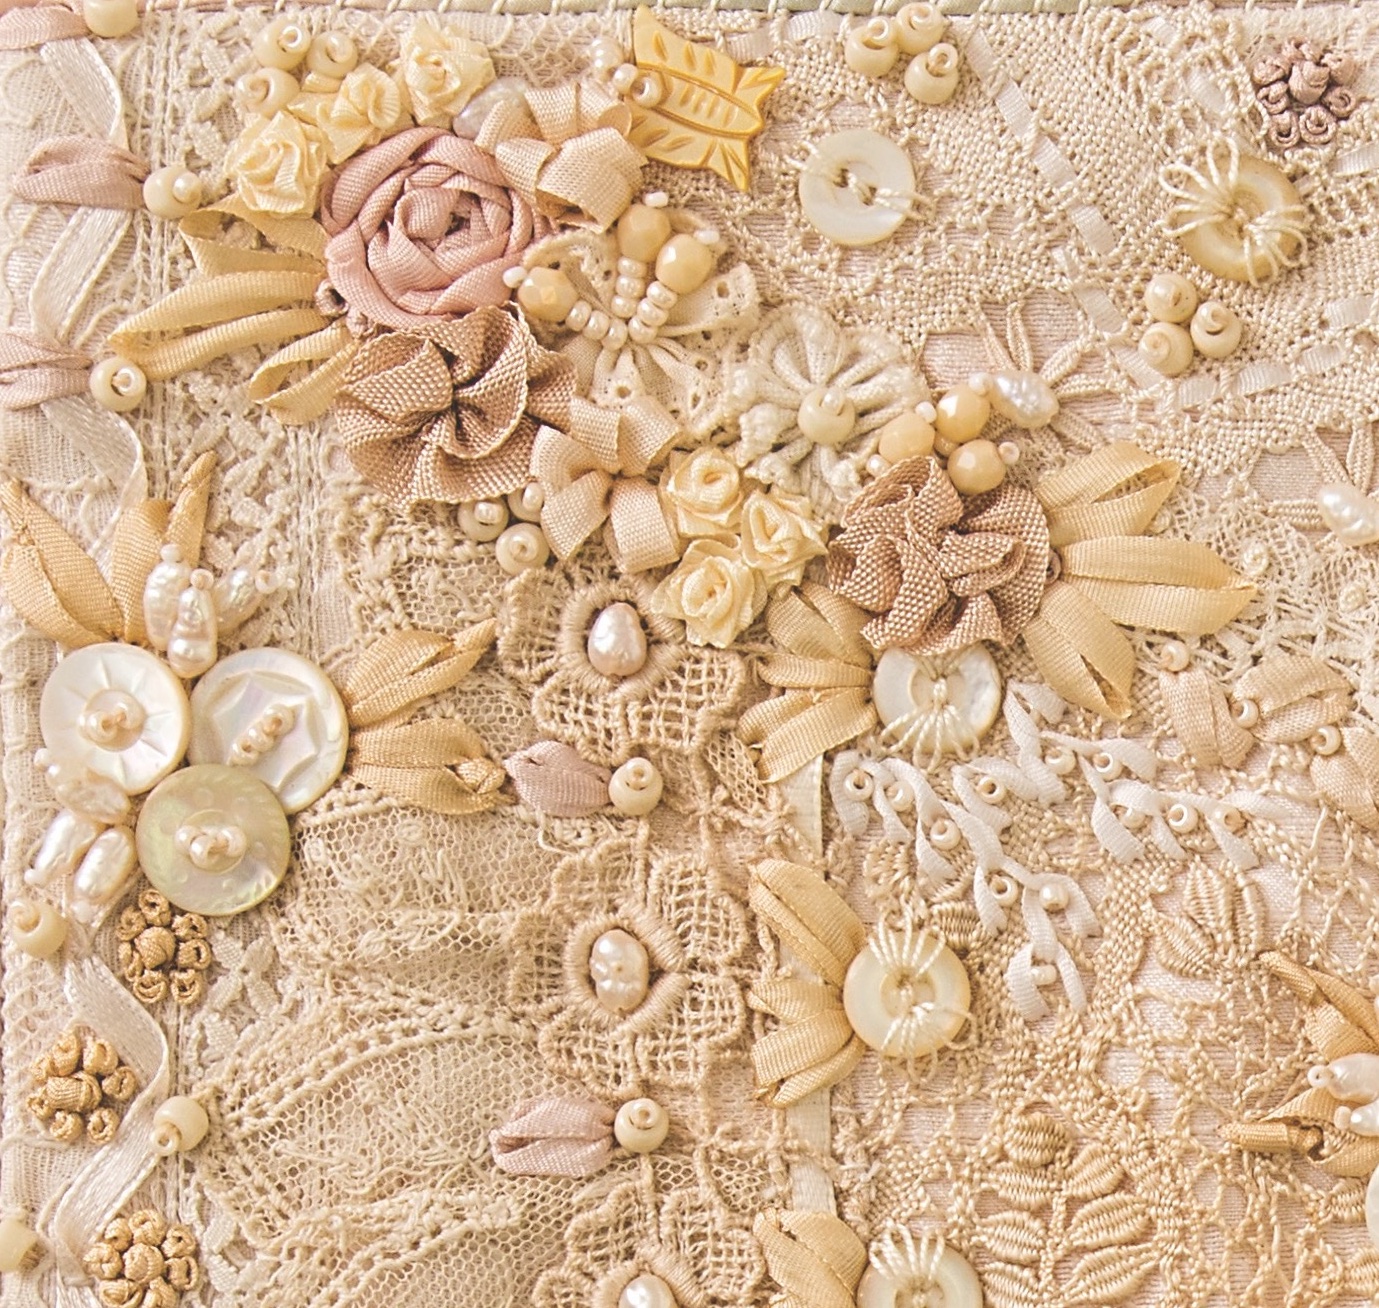
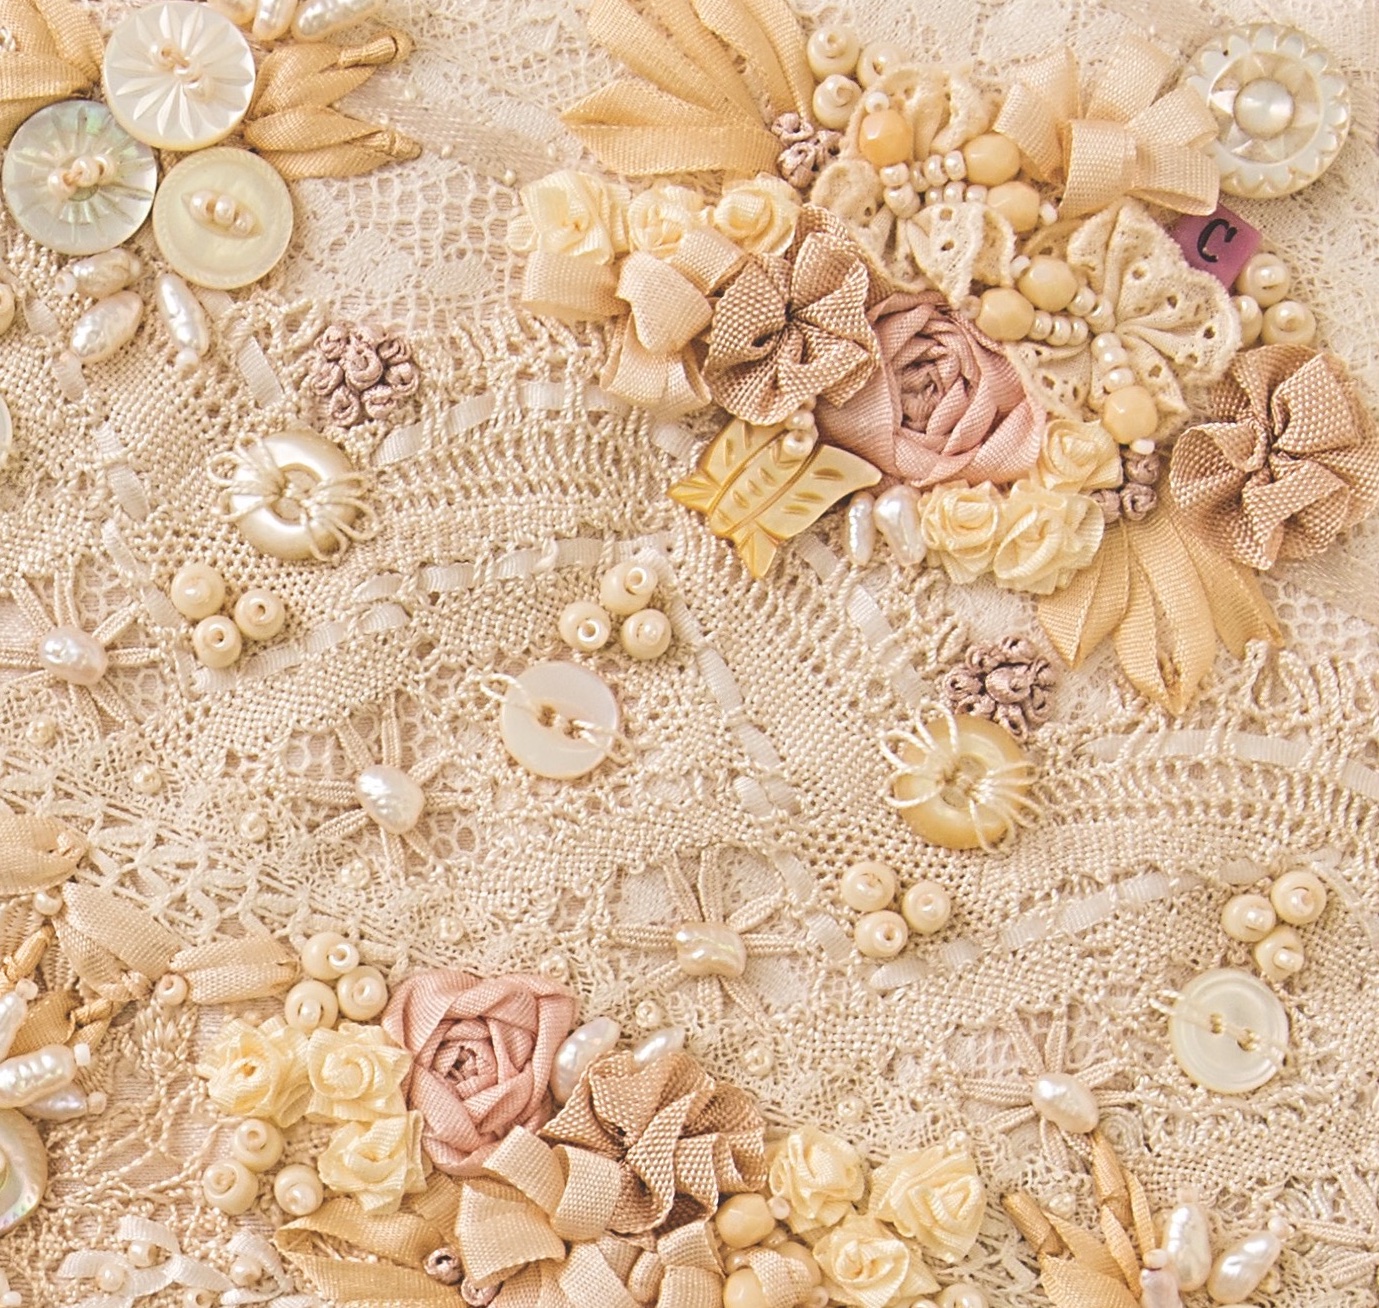
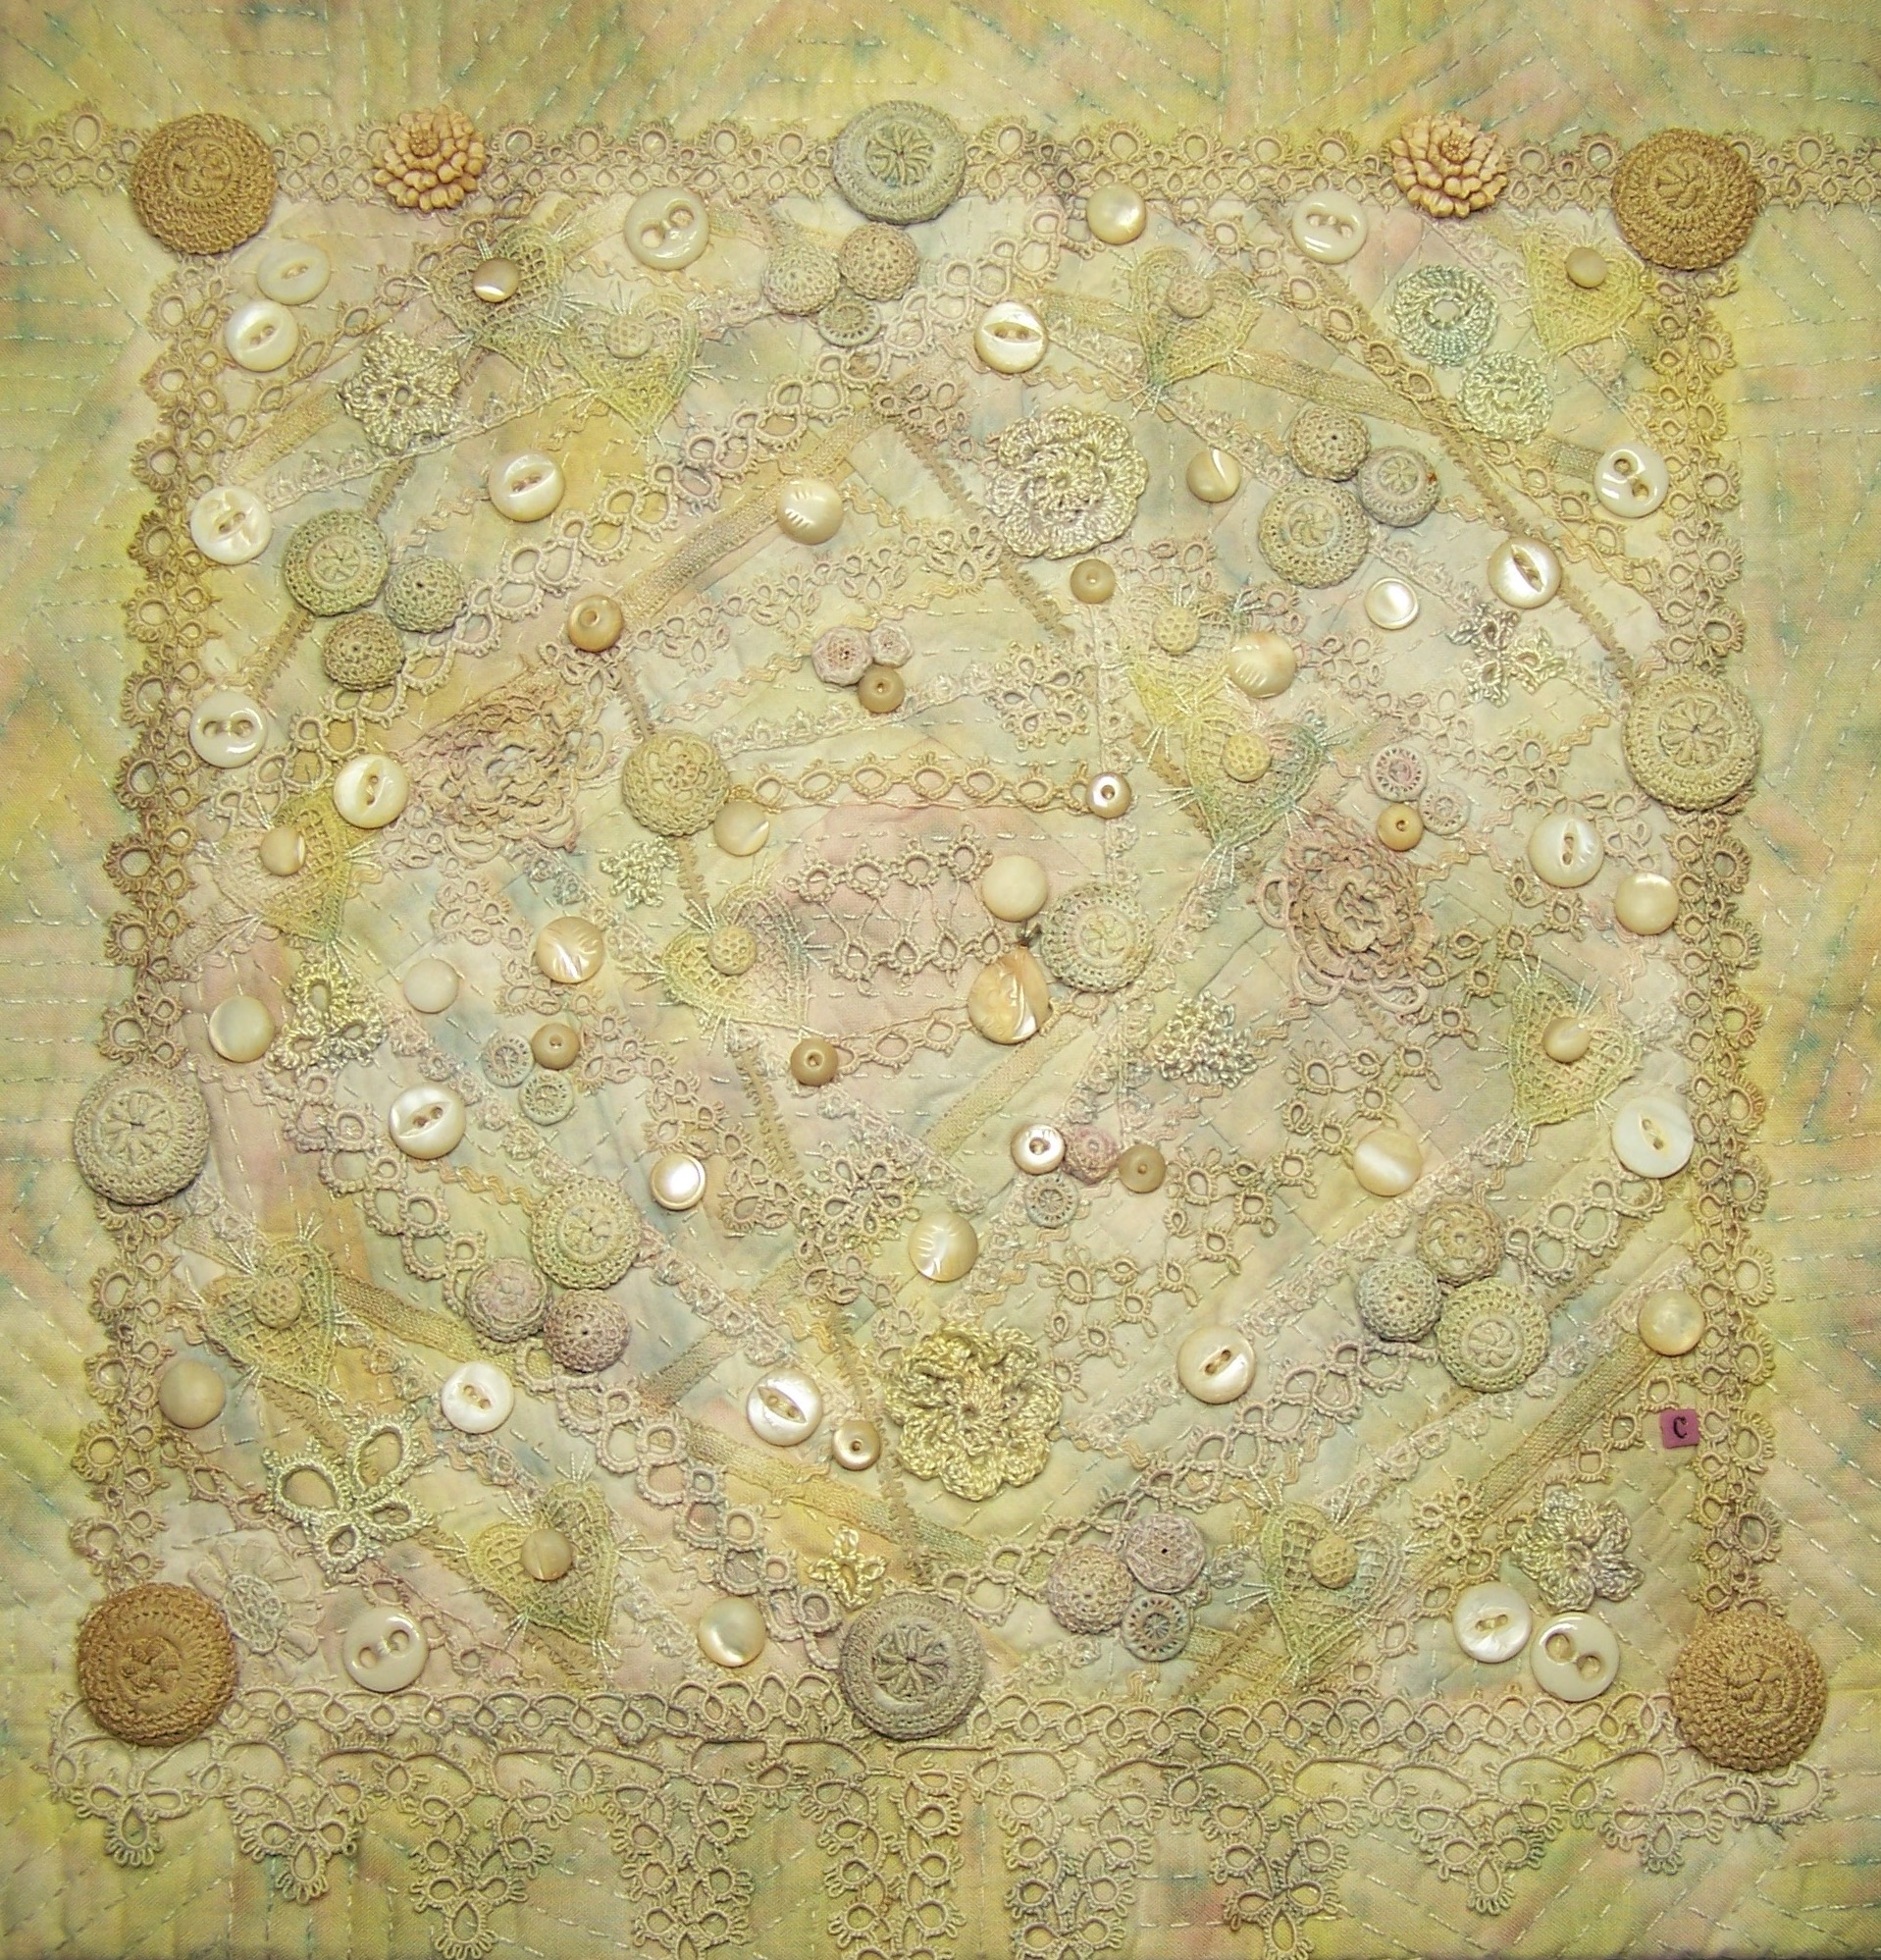
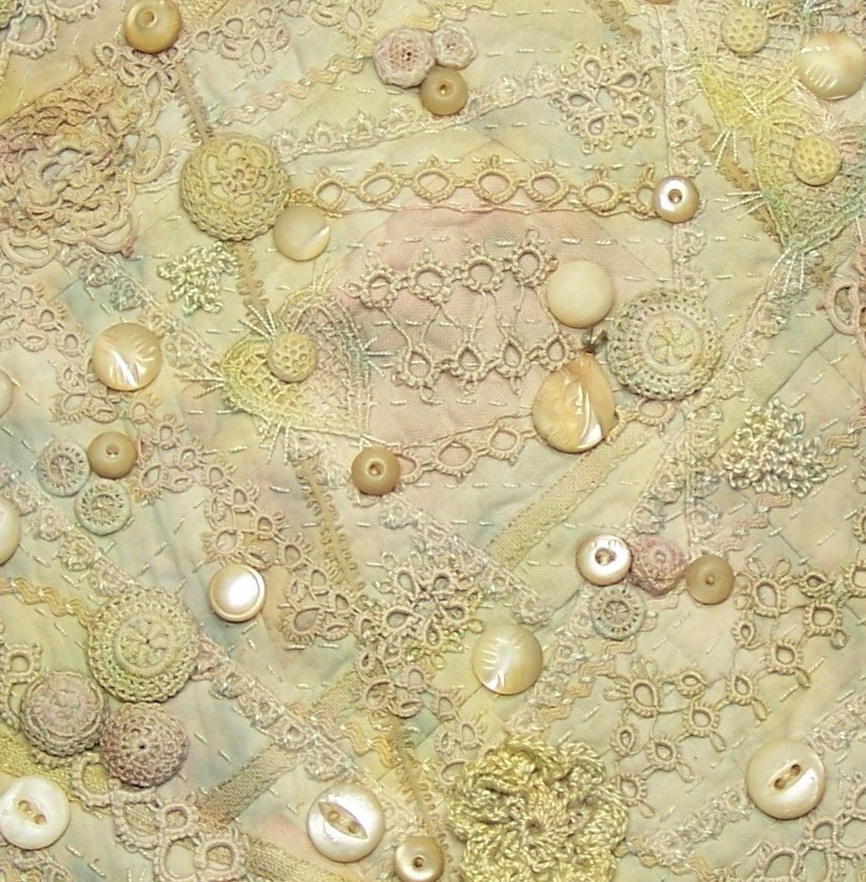
While I was sipping my chamomile tea today, I got to thinking about crochet lace gloves and accessories, imagining a ladies’ tea from an era when you actually wore gloves. What a nice thought to have! I was lucky enough to find the gloves and reticule on eBay, for a moderately reasonable price. I was also lucky that they were not discolored in anyway, which I can’t say for other pieces that I have rescued! That brings me to today’s tip, cleaning your vintage laces.

Tip: Cleaning Your Cotton Laces

Clean like colors together in the same wash bath. Use a medium/warm water for light colors, warm/cool water for bright colors, and cold water for dark colors. Use a delicate cleaner such as Restoration Linen Cleaner or Mama’s Miracle Linen Soak.

  1. Fill a tub full of water, add the cleaning product, swish the water.
  2. Place the lace in the water, making sure there is room for the bits and pieces to move around.
  3. Soak the items for 25-30 minutes, then RINSE well.
  4. If the water is still dirty, repeat the wash and soak process.
  5. Once the lace is clean, drape each length over a plastic hanger, or lay out on a cotton bath towel.
  6. If pressing is necessary, use distilled water in the spray bottle with your iron set on the lowest temp.
  7. Press with the wrong side down, and be mindful to not crush any raised pattern.

Happy tea drinking and stitching to you! ~Christen

PS: If you have any questions or thoughts, just leave a comment! See Tips, Tricks, the Basics, for more helpful ideas.

Slow Stitchin’ on Sunday Morning

In these posts I want to share some of my favorite pieces, which will include wall hangings, small works, pillows, purses, and just because pieces, enjoy!

11 1/4″ x 11 1/4″

California Dreamin’

This piece was created for my book, The Embroidery Book, by C&T Publishing. The inspiration for the base were the two hand-dyed marbleized fabrics, and I used every last bit here! I cut them into strips, and pieced the remaining sections with bleached muslin fabric. I used left-over strips of a batik fabric for the binding and back. The center square, and the third row of muslin fabric is where the bulk of the embroidery stitches are worked, I love how only a bit of that fabric shows through the stitches. The stitches are worked in four skeins of perle cotton #5 and nine skeins of cotton floss, using solid and variegated colors. Vintage green glass beads were used for the accents.

Embroidery Stitches Used

  • Decorative stitches: Gwen’s rose stitch, Jill’s flower stitch, lazy daisy stitch flower, French knot flower, fly stitch side-by-side, buttonhole circle stitch, barnacle stitch, whip-stitch star
  • Detail stitches: French knot stitch, lazy daisy stitch, fly stitch
  • Border rows: chain stitch, French knot stitch

Happy Stitching to You! Christen

PS: If you wish to see more of my work, check out the Gallery section.

Tips and Tea on Tuesdays

On Tips and Tea on Tuesdays, I will cover a topic and hopefully provide you with some tips that will be helpful! And just as an afterthought, tea may occasionally be a cup of Joe!

tea cup

Tea today is going to be Ambrosia Plum, just because the name matches the colors in my mug! Hah! The calendar is an old one, but the colors here too seemed appropriate. And as luck would have it, I am wearing a purple sweatshirt. Styling it here at my desk!

So, let’s talk about color and design. I think that everyone who creates asks this question: what colors should I work with, what design should I use? When my students ask this question, I suggest to start with colors that please them, or match their home decor, because if you start with something you don’t like, it is just that much harder to finish!

Wild Persimmons

This is a gallery piece featured in my book Beaded Embroidery Stitching, by C&T Publishing. I used it as an example to explain my design process. For me, each project has a story to tell, and all of the parts and pieces you chose to create with, help to tell that story. I chose a crazy-piece base design, because my fabrics were all very small or scraps left over from other projects. Notice how the colors of the base, differ slightly than the embroidery and embellishment materials. In some cases I used both lighter and darker components, allowing these pieces to be seen as well as the pieced fabric base.

Tip: Have a Plan

Once you have gathered all of the components for a project, make a swatch card of fabric, threads, and beads. Then decide how to tell the story, through color, design, and the components you chose.

  • Theme/title: this may start with the colors that you choose, or the embroidery or embellishments.
  • Color: the colors of the palette can be traditional, subtle, or complex.
  • Fabric: this is the most important component, but should not overpower the embroidery and embellishments.
  • Construction: is determined by the quantity of fabric you have, and the piecing techniques you want to work with.
  • Embroidery design: the embroidery and embellishments can follow the design of the base, or flow around the design.
  • Embroidery materials and embellishments: select a variety of threads, beads, and other components to work with.

Happy tea drinking and stitching to you! ~Christen

PS: If you have any questions or thoughts, just leave a comment! See Tips, Tricks, the Basics, for more helpful ideas.

Slow Stitchin’ on Sunday Morning

In these posts I want to share some of my favorite pieces, which will include wall hangings, small works, pillows, purses, and just because pieces, enjoy!

8 1/4″ x 8 1/4″

Sweet Roses and Posies

I created this piece for my book, The Embroidery Book, by C&T Publishing. I used two different colors of Hoffman Batiks for the the strip-pieced base. I added in hand-dyed vintage cotton lace and dyed mother-of-pearl buttons for the details. The embroidery was first worked around the center square, with a row of stitches mirroring the square. Vignettes were worked into the center, and corners of the middle section. The embroidery was worked in Wildflower thread by the Caron Collection, and 6 colors of silk embroidery ribbon and silk floss.

Embroidery Stitches Used

  • Border row and vines: blanket stitch, feather stitch
  • Decorative stitches: lazy daisy stitch, ribbon stitch, padded straight stitch
  • Detail stitches: French knot stitch, lazy daisy stitch, fly stitch
  • Vignette stitches: woven rose stitch, woven rose stitch variation (two colors of ribbon), pointed petal stitch, rosette, French knot stitch

Happy Stitching to You! Christen

PS: If you wish to see more of my work, check out the Gallery section.

Friday’s Favorites: Color Episode 1

Color, color, color and more colors. I love them all. When I work, I let the fabrics and other components tell me what they want to be when they grow up. Today, I am going to share two pieces from my cream and beige collection.

9″ x 10 1/2″

Creme de la Creme

This piece was featured in my book The Embroidery Book, by C&T Publishing. It was an example of a monochromatic color palette. There are shades of cream, off-white, candlelight, beige, and pearl. The base of this piece is a doupioni silk, layered with many treasured bits of lace, that I had collected over the years. The embroidery was worked in silk ribbons and perle cotton threads. The embellishments include, beads, mother of pearl buttons and charms, and fresh water pearls. The frame is comprised of carved bone purse handles.

13″ x 13″

Splattered Scattered Tatters

This piece is from my new book, Creative Embroidery, Mixing the Old with the New. I crazy pieced the base using odd scraps of muslin, added batting to the back and quilted a random pattern with perle cotton #12. I gathered small bits of machine made lace, tatted and crochet lace, and appliques. Some of the tatted and crochet pieces were made by my mom and myself. I also found a home for a collection of crochet and thread woven buttons, mother of pearl buttons, and bone underwear buttons. The embroidery is very minimal, so that the lovely components could speak for themselves. To bring all of the shades of cream together, I spatter dyed the base with Colorhue dyes.

I hope that your day is colorful! Happy Stitching to you all! ~Christen

Slow Stitchin’ on Sunday Morning

In these posts I want to share some of my favorite pieces, which will include wall hangings, small works, pillows, purses, and just because pieces, enjoy!

6 3/4″ x 7 3/4″

Merrily We Go Around

This piece was featured in my book, The Embroidery Book, by C&T Publishing. I started with a square of linen fabric, and machine stitched a spiral in a variegated green thread. Then the slow stitching started. The embroidery is worked in cotton floss: four colors of green, and 13 flower colors. There are five flower designs, each with a a stalk and leaf, two vine designs, and one small flower. The eight stitched components were repeated over the spiral.

Embroidery Stitches Used

  • Stalks: outline stitch, lazy daisy stitch
  • Flowers: lazy daisy stitch flowers (3, 4, 5, and 6 petals) using the lazy daisy stitch and lazy daisy bullion tip stitch
  • Detail stitches: 3-wrap French knot stitch, straight stitch, fly stitch
  • Small flowers: French knot stitch flower, lazy daisy stitch
  • Vines: feather stitch, chain stitch, lazy daisy stitch
  • Details: 3-wrap French knot stitch

Happy Stitching to You! Christen

PS: If you wish to see more of my work, check out the Gallery section.

Tips and Tea on Tuesdays

On Tips and Tea on Tuesdays, I will cover a topic and hopefully provide you with some tips that will be helpful! And just as an afterthought, tea may occasionally be a cup of Joe!

tea on tuesday

Tea today is chai, with a lovely aroma, accompanied by a homemade oatmeal cookie. I am looking around at our decorations, and enjoying the colors, and the imagery. The piece below, Big Leaves was featured in my book, Hand Embroidery Dictionary, by C&T Publishing. This piece hangs over my computer, and just makes me smile.

Big Leaves

I created this project, with this small section of fabric that I had saved for just the right project. I love the colors in the linen print, but didn’t find any fabrics that I thought coordinated with it. So I decided just to work the embroidery stitches over the sections of the leaves. But what colors would I choose for the embroidery threads?

In this case, this large print fabric already came with the colors swatches printed on the selvedge edge. Wow, if only the rest of life could be so easy! This made it a breeze to pick out the thread colors. I chose solid colors in perle cotton, and variegated colors from Valdani.

Tip: Documentation

I put together a swatch card of the threads that I will work with for every project. On the back I list the color numbers, brand name, and the size of the threads used. The swatch card contains all of the information that I need and stays with the project until it has been completed. This way if I need to buy more thread, I have the color numbers right there. I also use my Embellished Art Embroidery Project Planner to keep all of my projects on track.

Happy tea drinking and stitching to you! ~Christen

PS: If you have any questions or thoughts, just leave a comment! See Tips, Tricks, the Basics, for more helpful ideas.

Friday’s Favorites: Fall Colors

14 3/4″ x 13 3/4″

Batik Galaxy by Christen Brown

This piece started with the a group of batik fabrics in dark mustard, teal, and cranberry/rust. The cranberry/rust fabric reminded me of the red ring around Mars, so I created a galaxy in the center of the piece, using a wholecloth reverse applique technique. The copper and antiqued brass finishes of the celestial-themed charms added an extra color element. This piece can be found in my book, The Embroidery Book by C&T Publishing.

11 1/4″ x 12 7/8″

Umbria by Christen Brown

This piece started with four printed fabrics in rich browns, rust, and cranberry colors. I found a variegated perle cotton that picked up all of those colors. I then chose the remainder of the embroidery and embellishments to match the thread. Embellishments include vintage shell buttons, copper charms, and glass buttons that are sprinkled around the fiber and metal leaf trims. This piece can be found in my book, The Embroidery Book by C&T Publishing.

17″ x 16 3/4″ (close-up)

Autumn Ribbons by Christen Brown

The base of this piece started with a linen napkin, and added bits of vintage lace that I hand-dyed with Colorhue dyes. I then added in loads of rust, orange, and brown flowers and leaves that I hand-stitched from Hanah silk bias ribbons. I used techniques that can be found in my book Ribbonwork Flowers by C&T Publishing. The embroidery was worked with perle cotton, Wildflower threads, and silk embroidery ribbon, using many of the stitches that can be found in my book Embroidered and Embellished by C&T Publishing.

24″ x 23″ (close-up)

Harvest Quilt by Christen Brown

The base of this quilt was strip-pieced using Hoffman cotton batiks, in rich autumn colors of rust, umber, cranberry, maple, and olive. The embroidery stitches are worked in perle cotton #5 and #8, Wildflower threads, and cotton floss. This piece was featured in the gallery section of my book Embroidered and Embellished by C&T Publishing.

Enjoy! Happy Stitching! ~Christen

Bead Embroidery vs Thread Embroidery

I love to embroider, which I am sure you can tell. I have two books that are specifically focused on embroidery. In the Hand Embroidery Dictionary there are over 500+ stitches, both traditional stitches and unique stitches that I developed for the book. In my book Beaded Embroidery Stitching, I offer you both traditional bead embroidery stitches as well as unique techniques that accommodate the special characteristics of the different bead shapes and sizes.

Below, I show you how various forms of thread embroidery can be adapted to bead embroidery and bead woven stitches. The use of beads in the bead embroidery and bead woven stitches certainly do bring a surprisingly visual and dimensional aspect to the work.

Here is an example of two crazy pieced sections of fabric. The first is worked in traditional thread and silk ribbon embroidery stitches, along with embellishments such as tatting, rosettes, charms and buttons. In the second piece, you see traditional stitches translated into beaded embroidery, with the stitches worked in seed beads in sizes 6°, 8°, 11°, and 15°. Embellishments include lace, larger beads, charms, and buttons.

This is an example of a sashiko pattern, the first is embroidered with perle cotton; the second is embroidered with 11° seed beads.

Here is an example of the cross stitch worked in perle cotton, and size 11° seed beads.

Here is an example of two brooches, worked in similar design. In the first I embroidered the Brazilian rose, and traditional leaves and French knot stitches in perle cotton; with a couched cord frame. In the second, I embroidered the a rose with size 11° seed beads, and added in bead woven leaves, and charms; with a beaded couched cord frame.

Happy Stitching to you! ~Christen

PS: If you are looking for inspiration or ideas, check out my PDF Classes and books.

Embroidery Samplers

If I could pass on one important thought, it would be that practice just makes sense. Perfection is not something that I strive for, but I myself feel more confident when I understand the stitches that I am working on.

My book Embroidered and Embellished, by C&T Publishing is divided into four chapters, each chapter includes 20 stitches and 2 projects. I grouped the stitches according to the type of stitches and the materials that were used in each of these chapters.

At the beginning of each chapter I have included a sampler which utilizes all of the stitches included in the chapter. I used the above embroidery template (page 89) as a guide, and embroidered the design around the guide.

The Embroidery Journal Project above, is from my book, The Embroidery Book, by C&T embellishing. There are instructions in the book for making this little journal on page 43. Each page is 10″ x 6″, with the embroidered sections worked on each 5″ x 6″ half. You can refer to the samplers in the Visual Guide for the stitches to use, or use the samplers at the beginning of each chapter.

In my class The Embroidery Corner, I taught a 17 week course on embroidery. Each week, working with one stitch family, the student practiced their stitching on a 6″ piece of fabric. Here are some of my examples:

For a book that includes over 500+ stitches, see my book Hand Embroidery Dictionary, by C&T Publishing. If you would like to make a sampler of your own, you can download the free PDF lesson, Sampler Roll of Stitches.

I am confident that you will agree that by allowing yourself the time to learn and experiment with a new technique will never be a waste of time. You are worth the time that it takes to prepare for your journey into embroidery. May that be a long enjoyable journey, and may your needles fly!

Happy Stitching, enjoy~Christen