Archive | December 2022

Friday’s Favorites: Numbers and Measures

Measuring Up
Measuring Up Montage

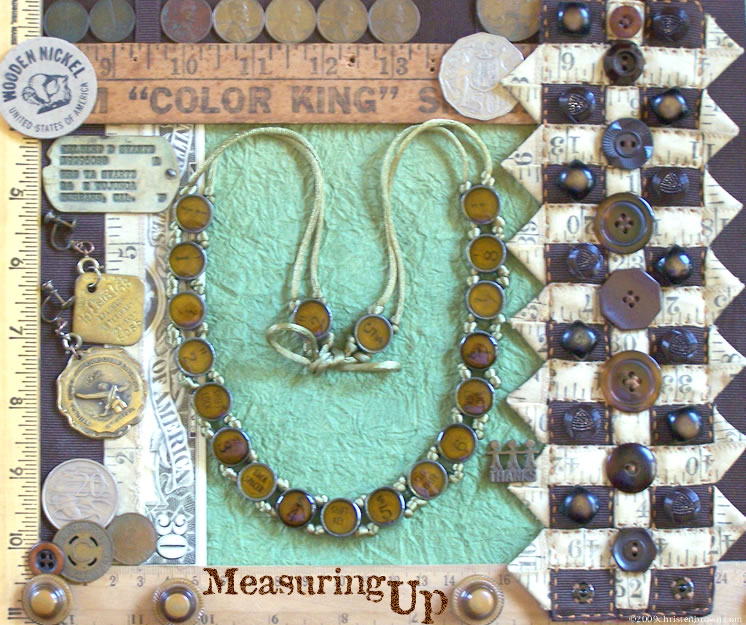
The montage has a collection of a few of my favorite things. The jewelry pieces are just fun, with both new and old typewriter keys, and charms. The dog tags belonged to my mom’s dog when she was growing up, my dad won the medal in a model airplane contest for one of his own designs. Other images are my dad’s actual dog tags from WWII, coins (from my grandpa), a wooden nickel I got a Knot’s Berry Farm as a kid and more buttons.

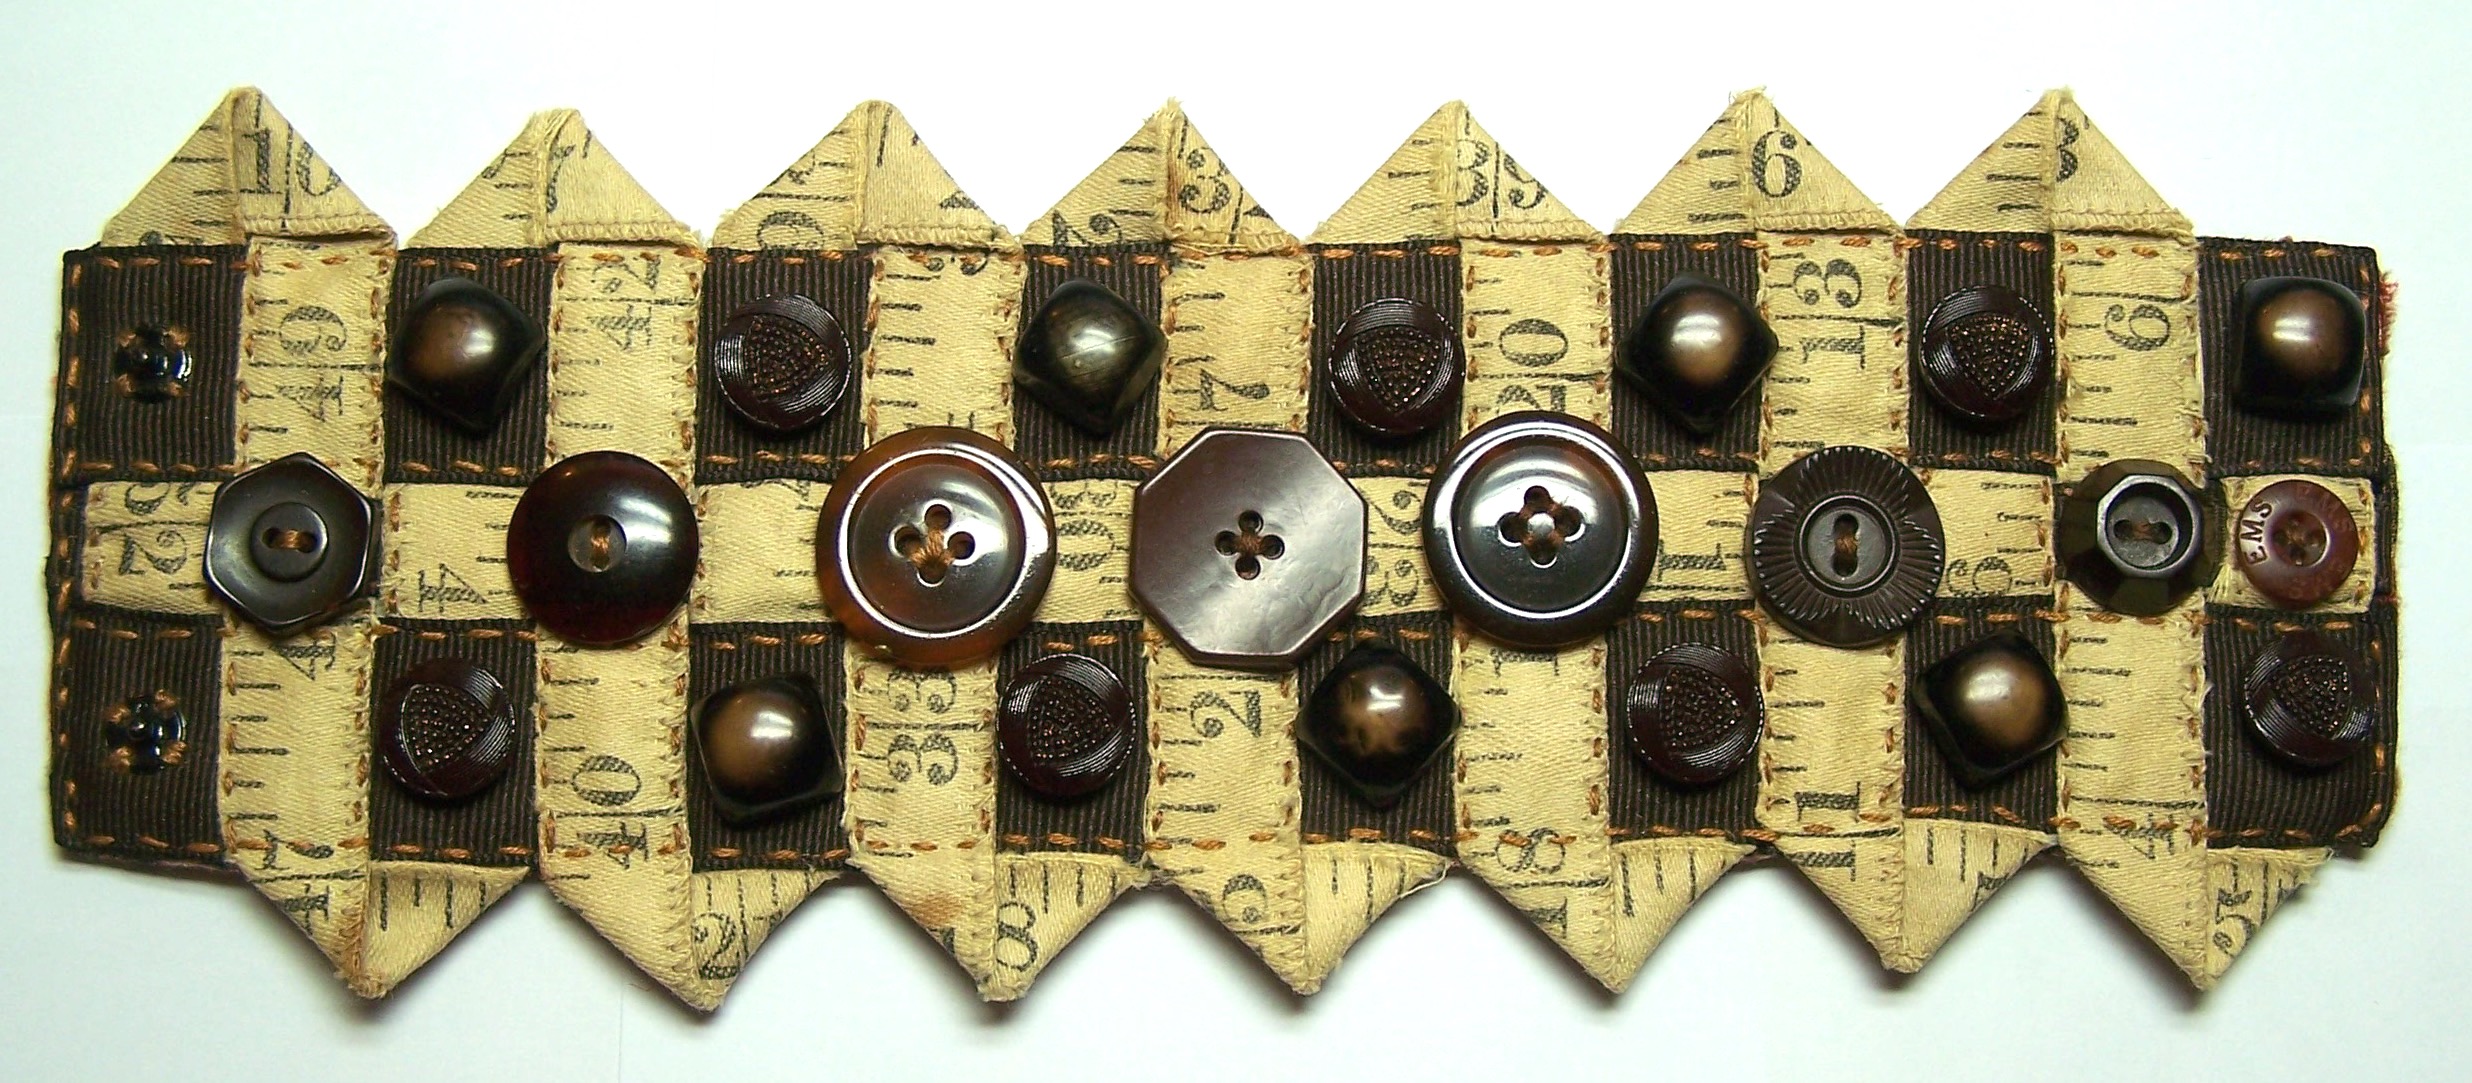
Shown here is the bracelet close-up. I started with a very well loved, tape measure that belonged to my Grandmother. I paired it with grosgrain ribbon and a few buttons that I found at the thrift store. The small button at the right has my mom’s initials on it. When I found it I thought must save this for just the right project, I think that I did!

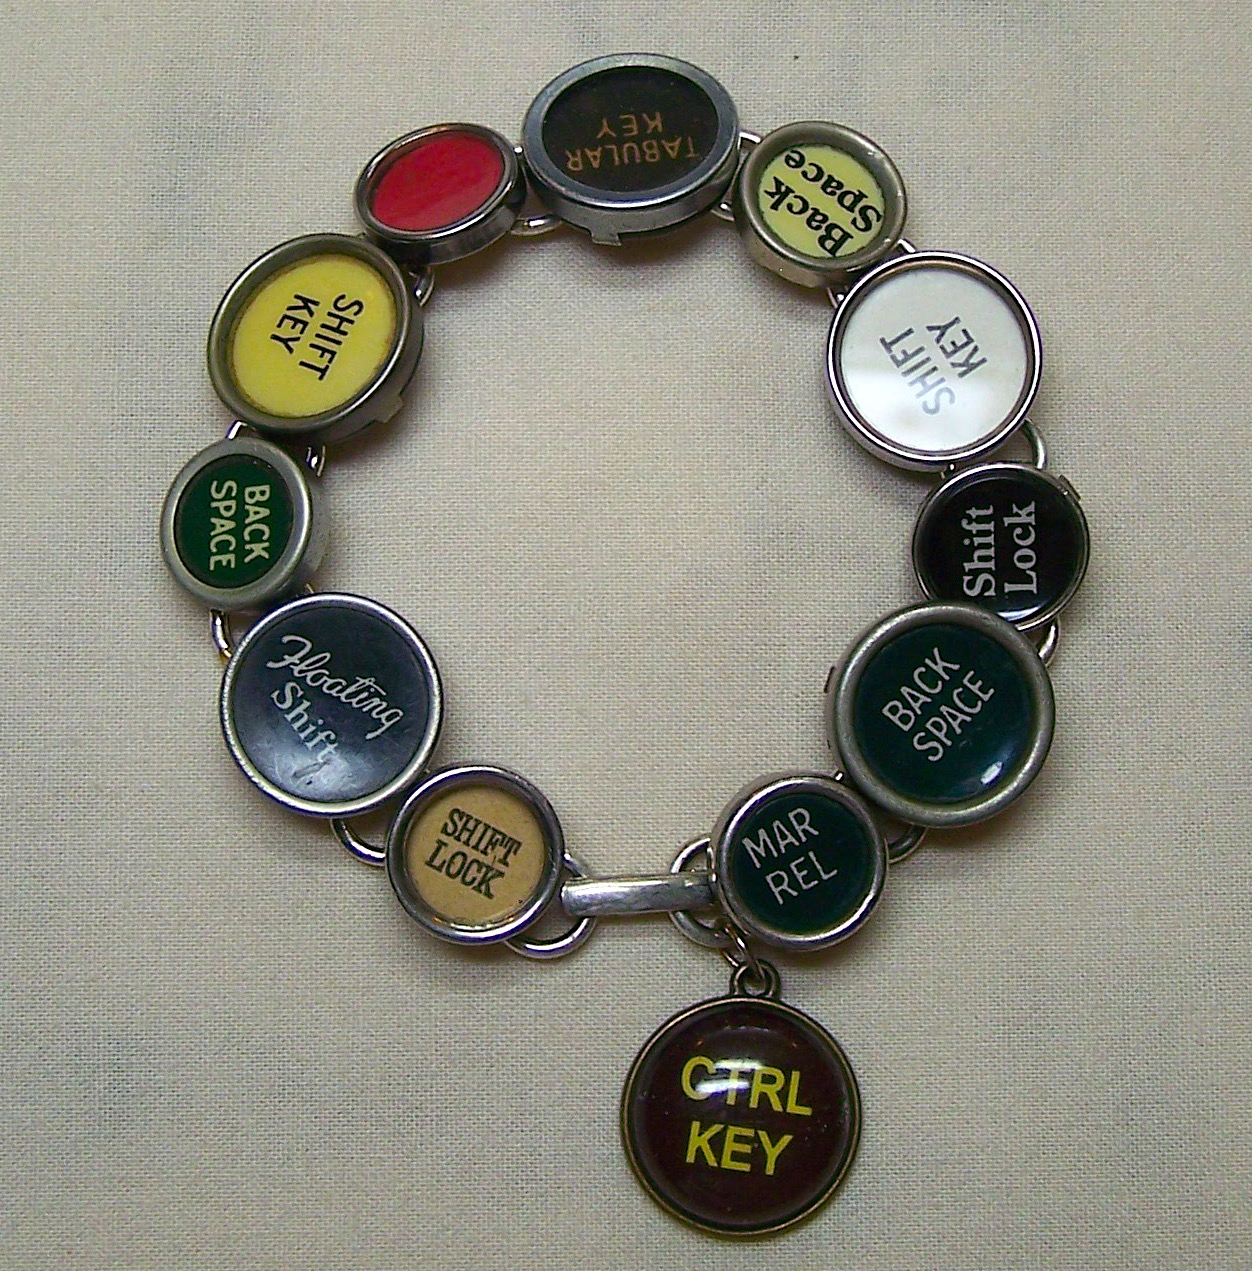
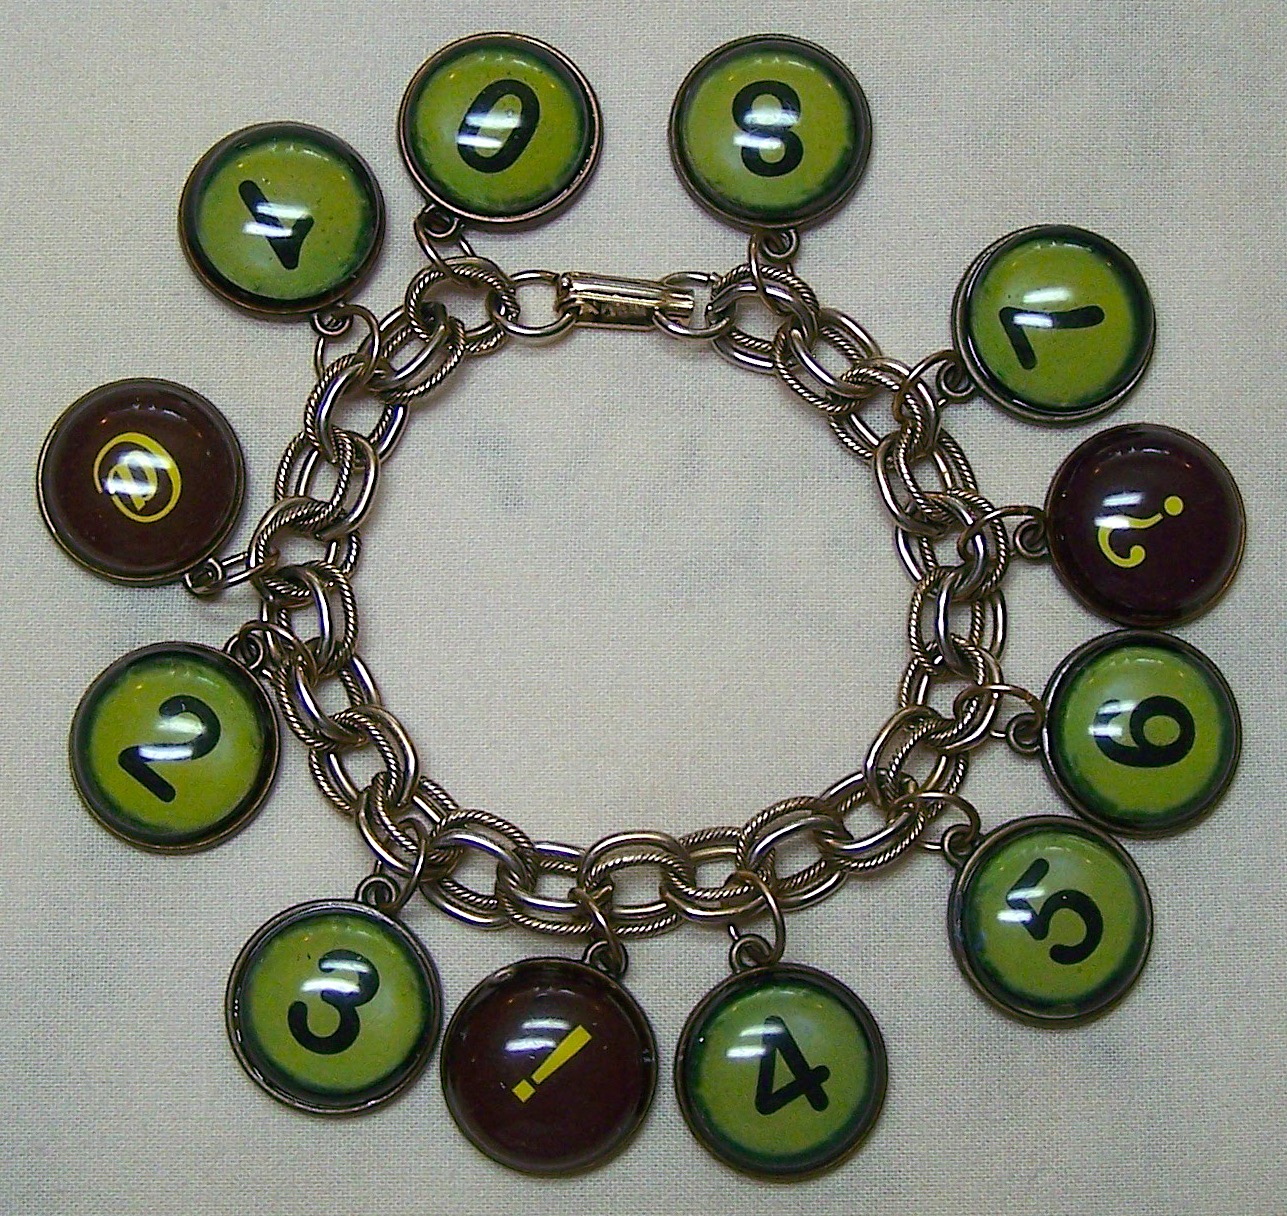
The first bracelet was found on eBay, it was made with vintage typewriter keys. The necklace is made from new two-hole beads, with typewriter symbols, that have been strung on a rayon cord. The last bracelet, is made from new charms, that are attached to a vintage chain bracelet.

Favorite collection of measuring devices

Numbers can be viewed differently by the way you present them, such as “I HAVE 5 weeds!”, or “I only have five weeds…”; vice versa: “I only have five roses…” or “I HAVE 5 roses!”… you get the point. Numbers can also relate to how much money you have, or how wide you are by the inches on the tape measure, or the accumulation of years that equal your life.

Measuring up can mean quite a few things as well. With New Year’s Eve looming, and resolution lists waiting to be written, for me it means gauging my accomplishments, successes and triumphs. Did I spend my time wisely, did I make a difference, did I contribute?

Whatever your answers are to these questions, I hope that you enjoy the days, hours, and minutes to come! Be happy creating or be happy creatively! Enjoy- Christen

Tips and Tea on Tuesdays

On Tips and Tea on Tuesdays, I will cover a topic and hopefully provide you with some tips that will be helpful! And just as an afterthought, tea may occasionally be a cup of Joe!

breakfast

Tea today is lemon zinger, and two slices of my favorite carrot and zucchini bread. Last week I talked about collecting vintage cookie cutter molds. Well not to be forgotten are the other aluminum molds that you can find, like the ones pictured below. These were used for Jell-O molds or aspic molds, and probably a few other reasons I am not aware of.

Tip: Find and Re-purpose Vintage Aluminum Molds

  • Check out your local thrift store, garage sale, or eBay favorite.
  • Often you will find these grouped as a set, or you could bargain for a lower price when you buy more than one.
  • Once you have your molds at home, wash and dry them as you would any dish or baking item.
  • Then gather together your favorite treasures, fill the molds, and put them on display.
  • Smile!

Happy tea drinking and stitching to you! ~Christen

PS: If you have any questions or thoughts, just leave a comment! See Tips, Tricks, the Basics, for more helpful ideas.

Friday’s Favorites: Decorating the Tables

OK, it is no secret that I love to decorate for the holidays. Here is what the dining room area looks like when I am done.

This table sits against the bay window, with a collection of some of my most favorite funky trees and stuff.

Thank you for allowing me to share my decorations!

Happy decorating to you! ~Christen

Tips and Tea on Tuesdays

On Tips and Tea on Tuesdays, I will cover a topic and hopefully provide you with some tips that will be helpful! And just as an afterthought, tea may occasionally be a cup of Joe!

kitchen christmas tree

Tea today is “Yogi Green Tea”, sipping and smiling as I nibble on the shortbread that I just made. I use the recipe in the Joy of Cooking, which was a gift from my friend Jeri (many, many, years ago). The book is falling apart, and the binding is no longer attached to the cover, but I wouldn’t trade it for all the world. It is special to me.

Another thing that I find special, are the memories of making sugar cookies, using aluminum cookie cutter molds as a kid. I have been collecting molds from thrift stores, garage sales, or on eBay, where ever I can find them. I decorated this wire tree with cookie cutter molds and old Christmas light-bulb ornaments. The bulbs had belonged to my mom and dad, and were used on our tree when we had growing up.

My tip today, is to use an item/s that you find special to you, and incorporate them into your daily life.

vintage cookie cutter ornaments
vintage cookie cutter and Christmas light ornaments

Tip: Ornaments from Recycled Treasures

Note: Always practice safety when using a glue gun. Keep a glass of water on hand to dip your finger into just in case you burn yourself.

Cookie Cutter Ornaments

Gather together a collection of vintage aluminum cookie cutter molds. Follow the directions below for each ornament.

  1. Cut an 8″ length of 1/4″ ribbon. Fold and tie this into a knot, for the loop.
  2. Glue the center of the loop on top of the cookie cutter mold with a low temp glue gun.
  3. Cut a 12″ length of 5/8″ ribbon. Tie this into a bow.
  4. Open up the loop of ribbon, and glue the bow on top of the center of the loop.
  5. Glue a purchased ribbon flower on top of the bow.
  6. Use the loop to hang the ornament.

Light-bulb Ornament

Gather together a collection of vintage tree bulbs. Follow the directions below for each ornament.

  1. Curve one end of a metal ornament hook to fit over the top metal portion of the bulb.
  2. Glue the curved portion of the hook to the bulb with a low temp glue gun.
  3. Glue one or more purchased ribbon flowers on top of the curved portion, with a low temp glue gun.
  4. Use the hooked end of the ornament hook to hang the ornament.

Happy tea drinking and stitching to you! ~Christen

PS: If you have any questions or thoughts, just leave a comment! See Tips, Tricks, the Basics, for more helpful ideas.

Friday’s Favorite: Decorating the Living Room

OK, it is no secret that I love to decorate for the holidays. Here is what the living room looks like when I am done.

I start decorating, right after I take down the Fall decorations, usually the day after Thanksgiving. It takes me about a week to get all of the trees set up, and then decorate them. After the trees are set up, I add in the special little bits of collected holiday ephemera, here and there and EVERY WHERE.

I use this vintage wooden Coca~Cola box as a non-traditional advent calendar. It is full of treasures that I have collected throughout our marriage.

Wishing a happy and joyous season for you all. ~Christen

Tips and Tea on Tuesdays

On Tips and Tea on Tuesdays, I will cover a topic and hopefully provide you with some tips that will be helpful! And just as an afterthought, tea may occasionally be a cup of Joe! 

angels and hearts
Angels and Hearts

Tea today is a cup of Tazo Joy, which is a blend of black and oolong green teas. There is a pleasant little hint of peach, so I decided to accompany my morning repose with a few of the thumbprint cookies I made (with apricot jelly centers). The aroma is just wonderful, and the cookie(s), well are divine! Pictured here is my Angel and Hearts tree. My mom called me her Christmas Angel, probably because I was born on the 21st of this month. Each year she gave me an angel for my collection, and here are just a few.

Speaking of trees, I wanted to share a few unconventional trees, that I have made from recycled objects. These are pretty simple to make, and the supplies are easy to find.

Tips: Recycled Trees

Note: Always practice safety when using a glue gun. Keep a glass of water on hand to dip your finger into just in case you burn yourself.

Wooden Ruler Tree

  1. Gather a collection of 12″ rulers.
  2. Choose one for the stem.
  3. Cut the remaining rulers into varying lengths from long to short.
  4. Glue these to the stem with wood glue.
  5. Glue a pop top hook to the wrong side of the stem with a low temp glue gun.

Cork Tree

  1. Gather a collection of wine corks.
  2. Arrange the corks in rows.
  3. Use a low temp glue gun to glue the rows in place, then the rows together.

Vintage Kitchen Tree

  1. Gather old sieves, and other kitchen equipment that will stack nicely.
  2. Use a wooden chopstick, or knitting needle for the center pole.
  3. Hold the center pole in the center of a pie tin.
  4. Thread the utensils onto the center pole, from the large to small.
  5. Arrange aluminum cookie cutter molds around the bottom of the tree.

Happy tea drinking and stitching to you! ~Christen

PS: If you have any questions or thoughts, just leave a comment! See Tips, Tricks, the Basics, for more helpful ideas.

Friday’s Favorites: Decorating The Trees

OK, it is no secret that I love to decorate for the holidays. I started to collect ornaments by theme when we were first married, and well I forgot to stop. Consequently, I now have around 50 trees that I decorate and display around the house. Before you become concerned for my sanity, I should say that the largest is 4ft. and the smallest is 3″. So not so crazy, at least that is what I tell my husband when he has to pull out those many, many, many, boxes from the garage.

Each tree has a theme, and even some of the trees are not traditional trees. Mug-trees and greeting card holders make for excellent display opportunities. I repurpose them and used them to display a collection of ornaments.

Small Trees, Spring Candle Holders, Cork Trees

Here are some of the smaller trees on top of vintage wooden spools. I put aluminum molds on top of old mattress springs, and filled them with plastic tea-lights. And yes, I was a partner in drinking all of those bottles of wine, just so I could make these cork Christmas trees.

I also decorate with non traditional finds, such as the colander and wooden sewing spools that the Star Tree is resting in. The sewing tree has vintage measuring tape garlands, and is surrounded by pincushions and wooden spools. The heart tree has many hand-made ornaments, made by mom and myself. The bell tree’s focus is well, bells. The tinkling sound they make while I am decorating the tree, makes it fun!

Happy decorating to you! ~Christen

Tips and Tea on Tuesdays

On Tips and Tea on Tuesdays, I will cover a topic and hopefully provide you with some tips that will be helpful! And just as an afterthought, tea may occasionally be a cup of Joe!

cup of coffee

Tea today is as you can see, a mug of coffee. It is cold out, and I just wanted to have a sip of JOE. As I was sipping in my workroom, I came across some cardboard cones left over from a weaving project. I got to thinking about the shape, and thought, hmmm, this looks like it wants to be a tree. So I pulled out my ribbons, trims, lace, buttons, and started to play.

Tip: Wire Ribbon Cone Trees

  1. Buy a cardboard cone at your local craft store.
  2. Select the ribbon or ribbons that you want to use.
  3. Start at the bottom of the cone. Wrap the ribbon around the cone, cut off the length needed plus 1″.
  4. Place this onto the cone, with the bottom edge of the ribbon even with the bottom of the cone.
  5. Glue this end to the cone. Fold the remaining end over 1/2″, and pin.
  6. Wrap the length around the cone, remove the pin, and glue this end over the beginning end.
  7. Repeat this step, with the same ribbon or a variety of ribbons, slightly overlapping the previous row, until the cone is covered.
  8. Add a bow to the top, and small ornaments, or whatever strikes your fancy.

Tip: Lace and Rhinestone Cone Trees

  1. Buy a cardboard cone or a Styrofoam cone at your your local craft store.
  2. Select a 2 – 3 yard length of lace with one edge that has a ruffle.
  3. Start at the bottom of the cone. Pin one end of the lace to the cone with an appliqué pin, so that the ruffle is even with the bottom of the cone.
  4. Wrap the lace around the cone at a slight angle, slightly overlapping the previous row, and spiraling up the length of the cone.
  5. Cut off the excess lace at the top of the cone, plus 1/2″. Fold the edge over, and pin this to the cone.
  6. Using straight pins, decorate the tree with a length of rhinestone or pearl trim for a garland, or substitute an old rhinestone necklace.
  7. Pin a ribbonworked flower, or and old dress pin to the top of the cone as the tree topper.
  8. Pin buttons or old earrings in place with straight pins for the ornaments.

Happy tea drinking and stitching to you! ~Christen

PS: If you have any questions or thoughts, just leave a comment! See Tips, Tricks, the Basics, for more helpful ideas.

Friday’s Favorites: Decorating with Lace and Jewels

I love to decorate for the holidays. I have quite a collection of lace, buttons, and old jewelry bits, and try to find ways to incorporate them into my holiday decorations.

The first tree here, is actually a metal jewelry holder, with a bowl to catch your loose bits of stuff. I have used it to display my collection of vintage mercury glass ornaments and garlands. I placed vintage tinsel garlands in the bottom of the bowl, then nestled a collection of vintage swan shaped clip-on tree ornaments around the base of the tree. I gathered together a collection of vintage dress pins and single earrings, and added these throughout the branches.

The Lace Cone Trees, are resting in a silver leaf tray, with a garland of bells wrapped around the base. There are two vases flanking this group, filled with vintage mercury glass ornaments and vintage glass beads. See my Tips and Tea on Tuesdays post December 6, 2022, for directions on how to make a cone tree.

The Lace Christmas Tree hanging at the top of the picture is comprised of bits and pieces of lace that had been a salesman’s sampler. I added additional pieces of lace, and some vintage buttons. This project is a free handout that I am offering to my readers as a gift, from me to you.

Happy Stitching to you! ~Christen