Search Results for: The Embroidery Corner

Stitch Along Sampler

Stitch Along Sampler

This is an 18-week series that explores the different aspects of embroidery and the stitches learned in the Embroidery Corner series. The design and stitching time for each square will be covered in two consecutive week intervals. This is a perfect project, as you can step into the session at the beginning of a square, and work your way through the project as your time allows. The finished project can become a wall hanging or pillow.

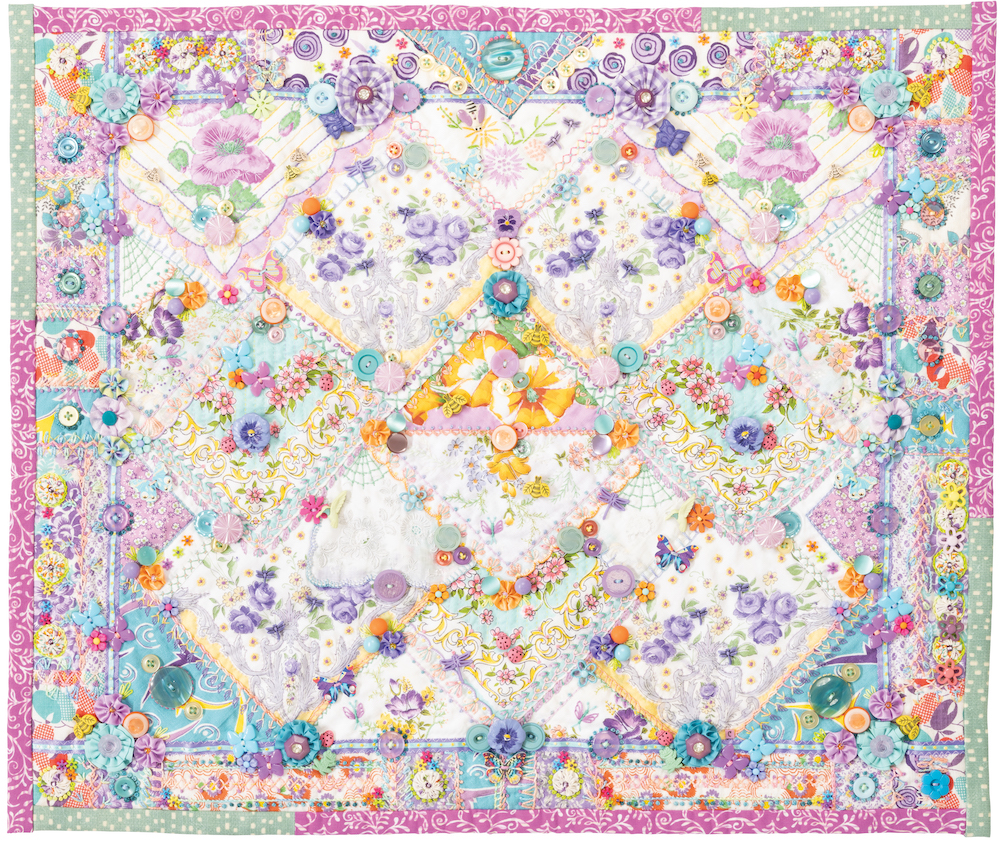
There will be 9 separate squares of fabric that will have an embroidered design on them. The embroidered designs will also include whole cloth, applique, ribbonwork and other aspects of embellished embroidery. The squares can be stitched onto a base fabric, or stitched together. The finished piece can be made into a pillow or a wall hanging. My book Embroidered and Embellished is a required supply.

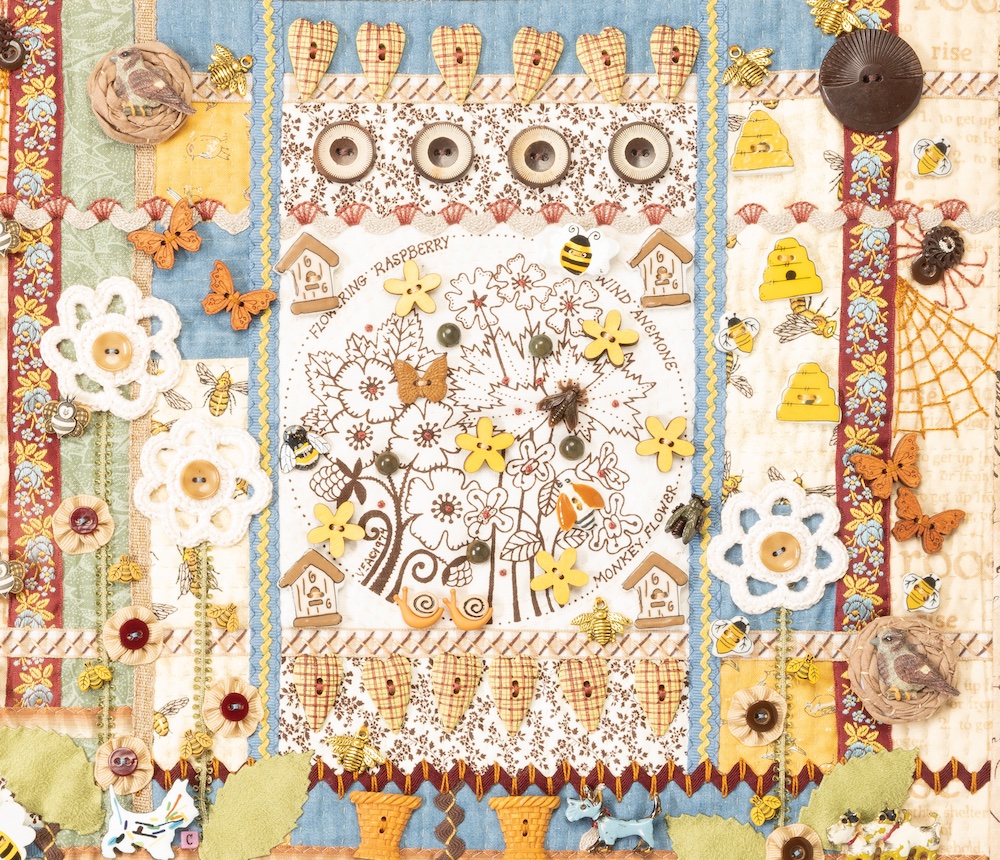
Square #1: Merrily We Go Around $30.00 (traditional embroidery stitches)

stitch along sampler block 1

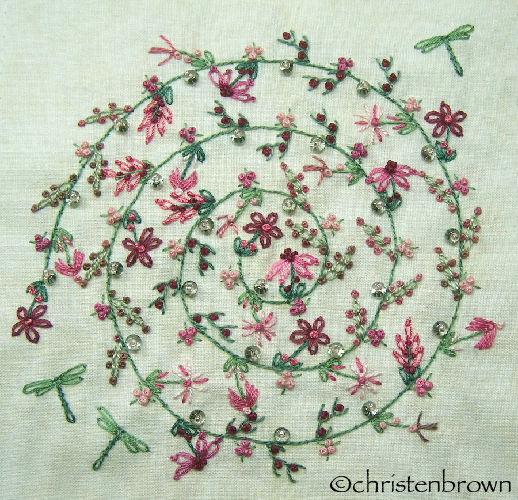
  • #1A: transfer base design; embroider base, vines and stalks
  • #1B: embroider large flowers, fill in flowers, dragonfly

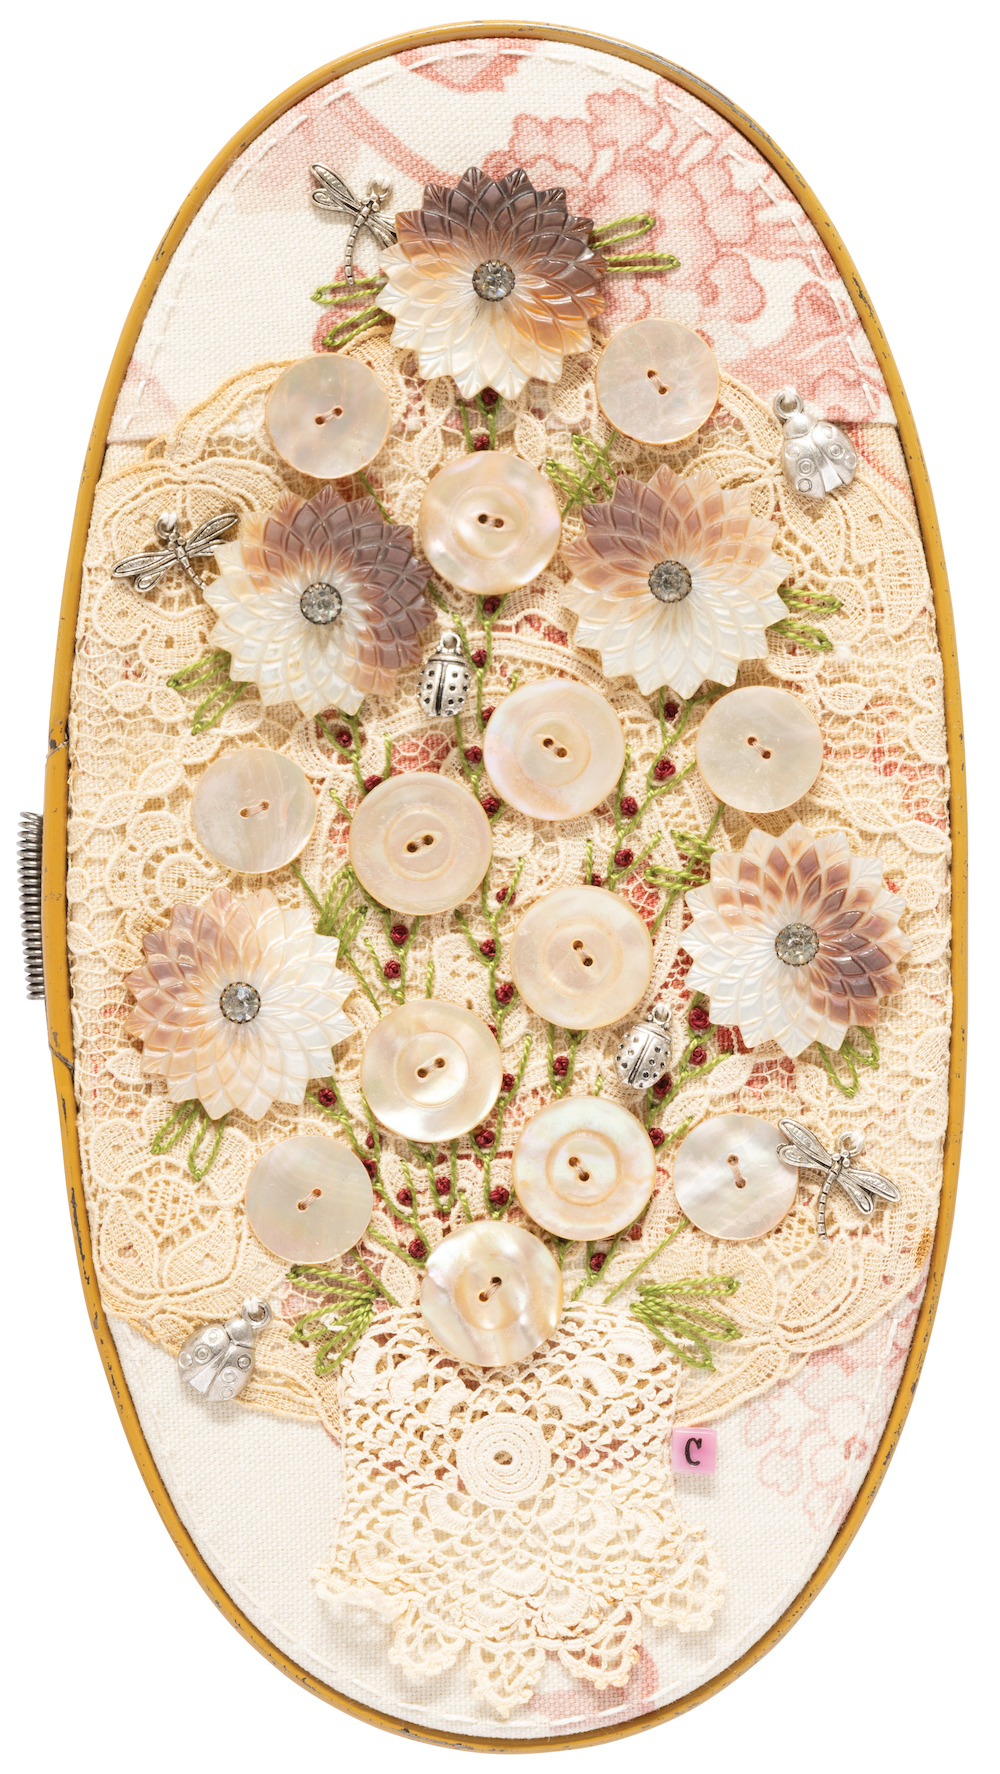
Square #2: Rose and Grape Vine $30.00 (lace applique, traditional, raised and textured and silk ribbon embroidery stitches)

stitch along sampler block 2

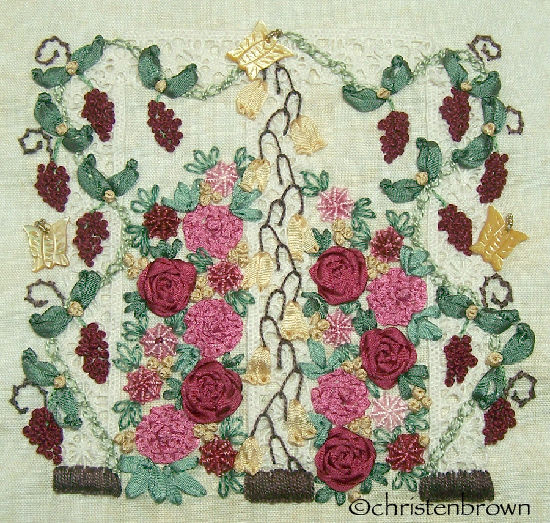
  • #2A: stitch applique, transfer base design; embroider vine,  branches, and grapes
  • #2B: embroider roses, fill in flowers, leaves and charms

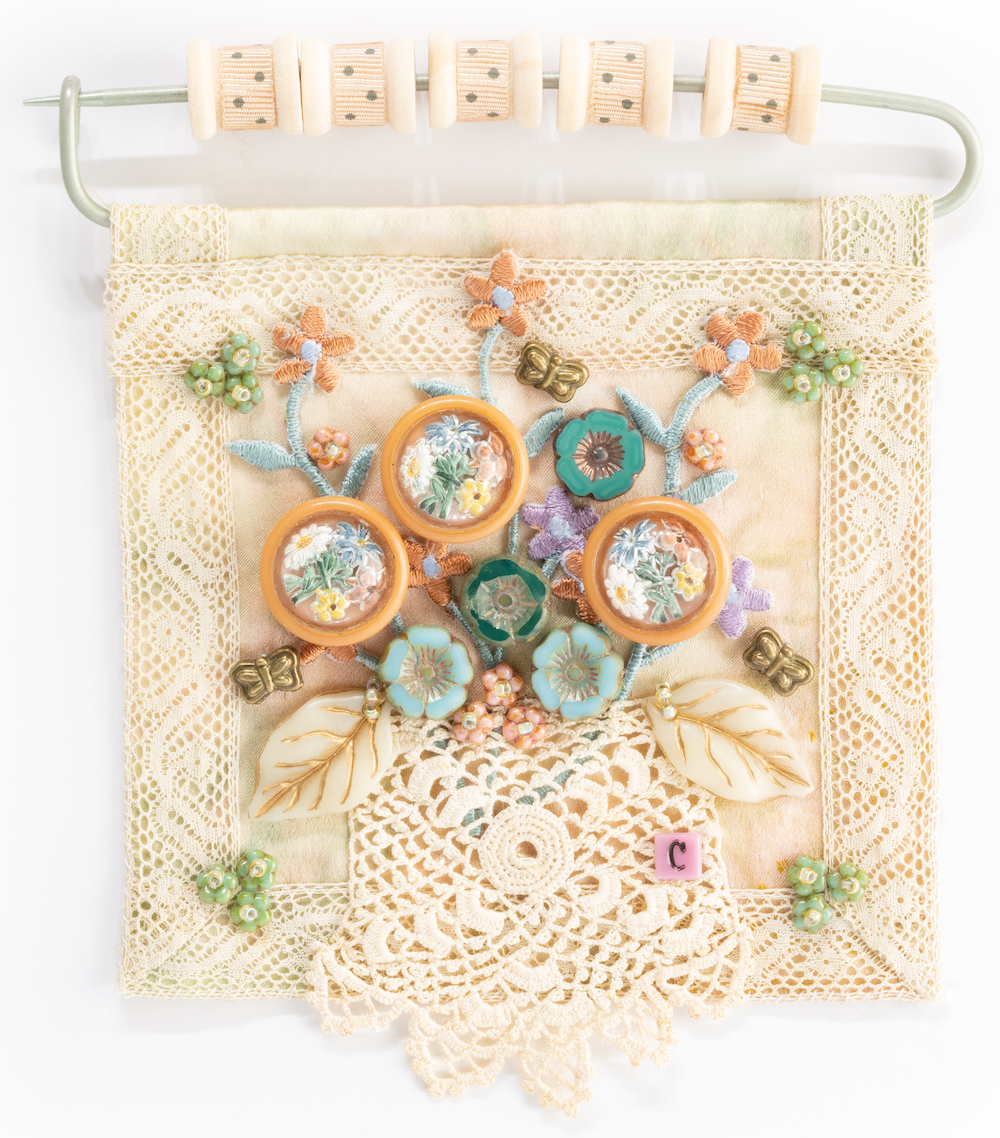
Square #3: Vase with Flowers $30.00 (applique, ribbonwork flowers, traditional and silk ribbon embroidery stitches)

stitch along sampler block 3

  • #3A: cut out applique shape and fuse to base; embroider edge; stitch ribbonwork flowers
  • #3B: embroider feather stitch vine, embroider leaves, small details

Square #4: Embroidered Heart $30.00 (traditional, raised and textured embroidery stitches)

stitch along sampler block 4

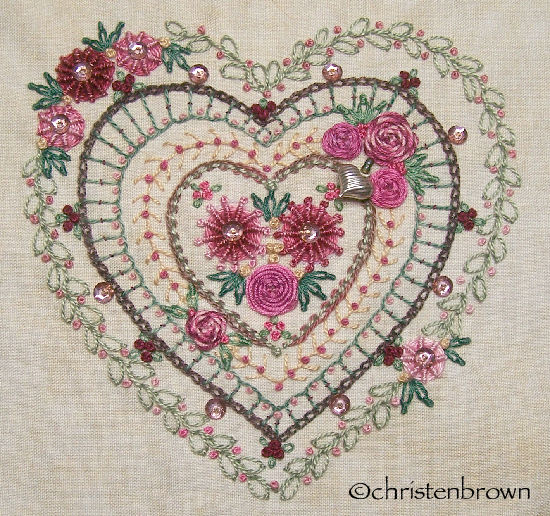
  • #4A: transfer base design; embroider first and second layers of heart design
  • #4B: embroider third, fourth and fifth layers of heart design

Square #5: Four Square $30.00 (traditional and silk ribbon embroidery stitches)

stitch along sampler block 5

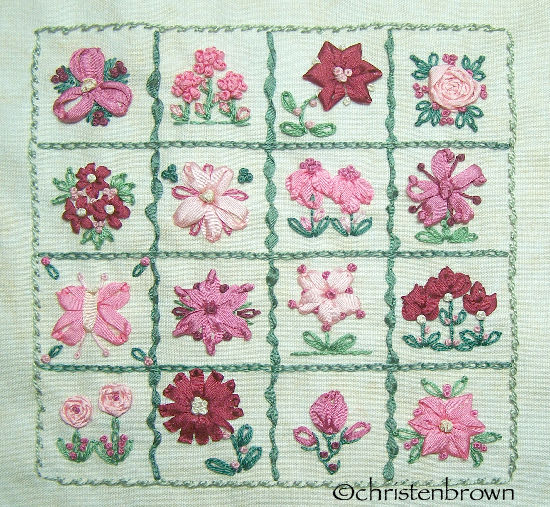
  • #5A: transfer design, embroider squares
  • #5B: embroider squares

Square #6: Embroidered Fan $30.00 (traditional embroidery stitches)

stitch along sampler block 6

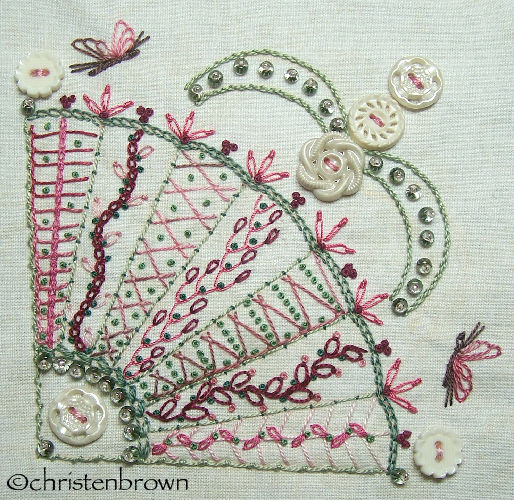
  • #6A: transfer base design; embroider edges and sections
  • #6B: embroider large flowers and fill in flowers

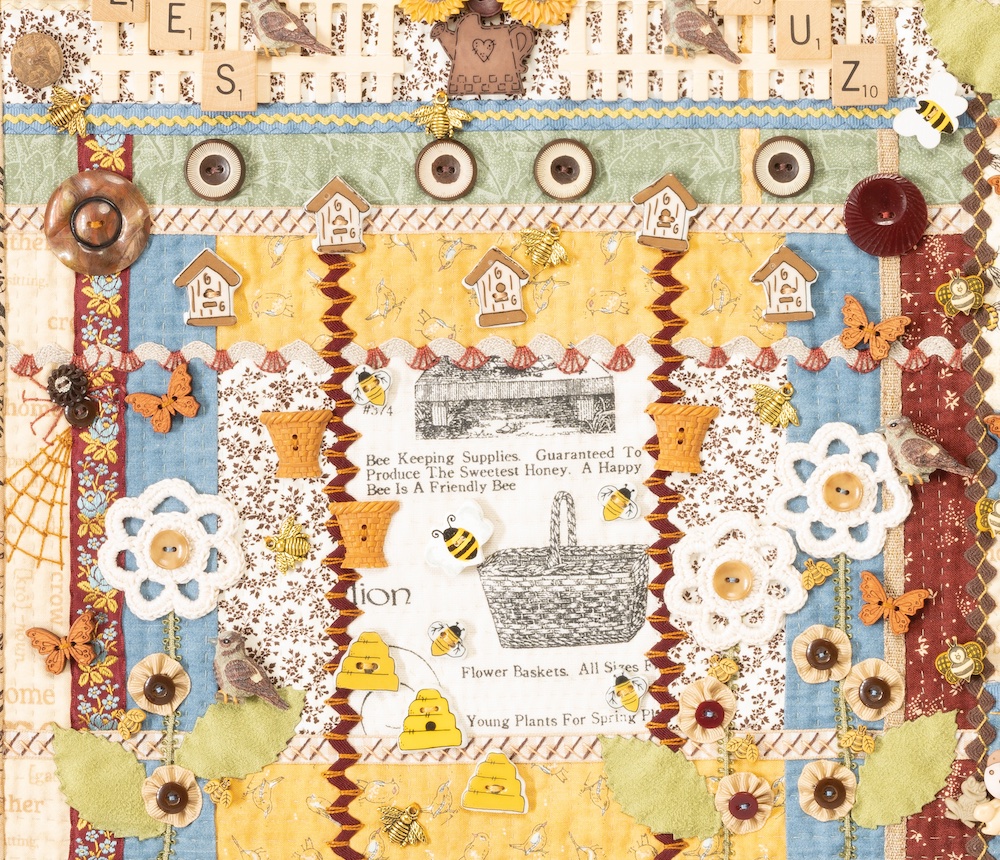
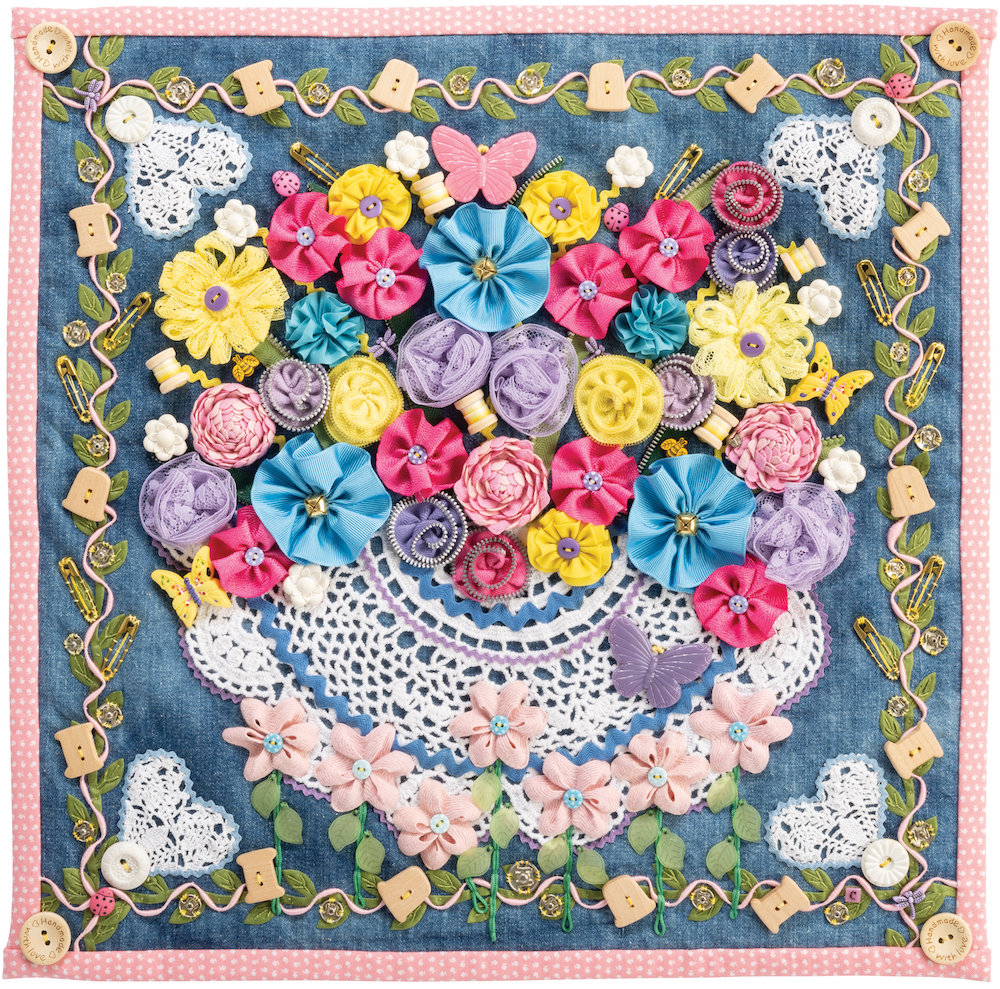
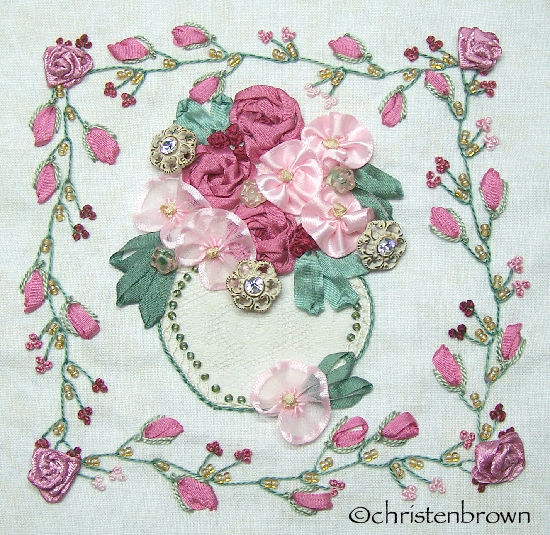
Square #7: Basket of Flowers $30.00 (applique, ribbonwork flowers, traditional and silk ribbon embroidery stitches)

stitch along sampler block 7

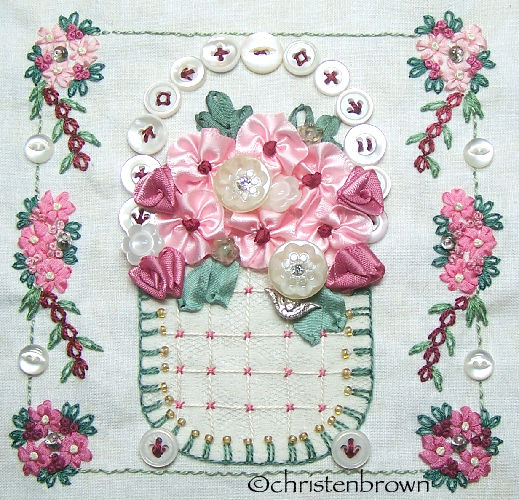
  • #7A: cut out applique shape and fuse to base; embroider edge; stitch couched ribbon handle and bow
  • #7B: embroider flowers and leaves

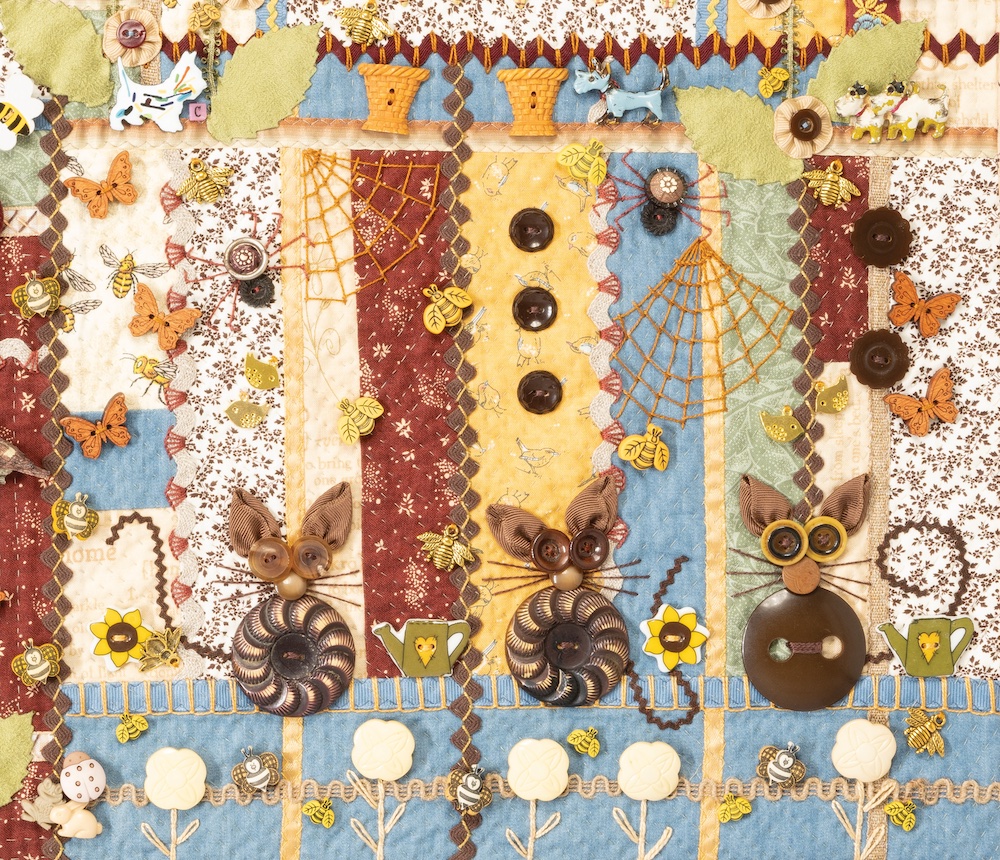
Square #8: Embroidered Chorus $30.00 (traditional, raised and textured embroidery stitches)

stitch along sampler block 8

  • #8A: transfer base design; embroider edges and sections, and large flowers
  • #8B: embroider medium and small flowers and fill ins

Square #9: Wreath of Roses $30.00 (traditional and silk ribbon embroidery stitches)

stitch along sampler block 9

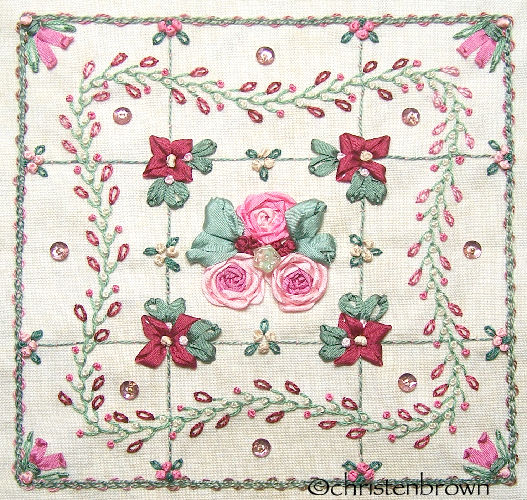
  • #9A: transfer base design; embroider borders and roses
  • #9B: embroider fill in flowers and leaves

The Finishing Hour $10.00
Whether you have made all nine square or just a few you have many options for finishing the project. The squares can be grouped with all nine blocks to make a wall hanging; or grouped together in fours for a smaller wall hanging or even a pillow. One square can be backed with a wide ribbon as hung an individual wall piece, or group several together for a longer section. The question is what will you do with your blocks?

Class Details:

These classes are listed with the price per visit.

Date and time: This class is not currently on the schedule.

For information on the series, please contact me: thestoreonthecorner@gmail.com

The above class fees reflect the content, the handout and any supplies noted in the description of each specific class. Once the fee of a class is paid for, you will receive a handout in an email, which will need to be printed and brought to class.

Happy Stitching! ~Christen

Tips and Tea on Tuesdays

On Tips and Tea on Tuesdays, I will cover a topic and hopefully provide you with some tips that will be helpful! And just as an afterthought, tea may occasionally be a cup of Joe!

Tea today, is my old stand by, Earl Grey, black tea, good for bringing a smile on a gloomy, cloudy, day. Another old stand by that provides some needed cheering up, is pulling out my collection of vintage handkerchiefs. These are so dear, and I enjoy pulling them out and just imaging a past life-time when I would place one of these in my pocket book, along with my lipstick, and other dainty-lady’s needs.

Here are some pieces where I used some of my hanky collection, for my book Creative Embroidery Mixing the Old with the New. Often, people ask how can you use hankies? Well the book also covers that too, with projects and gallery pieces! Hanky and Lace Collage, is one of the Projects by Design, the Tea Cozy, is a Stash Project, and Bella Fleur Mouchoir, is a gallery piece.

Tips: Working with Hankies

  • Stabilize the hanky with an iron-on sheer-weight or light-weight interfacing.
  • Cut a hanky that has an embroidered pattern on 1 or all 4 corners into 4 sections.
  • For a hanky that has an allover pattern, cut off each corner, leaving a square in the middle that can also be used in a collaged base.

Happy tea drinking and stitching to you! ~Christen

PS: If you have any questions or thoughts, just leave a comment! See Tips, Tricks, the Basics, for more helpful ideas.

Slow Stitchin’ on Sunday Mornings

In these posts I want to share some of my favorite pieces, which will include wall hangings, small works, pillows, purses, and just because pieces. The piece below is form my book Creative Embroidery, Mixing the Old with the New.

Bella Fleur Mouchoir, 25 1/2″ x 21 1/2″

Bella Fleur Mouchoir (Beautiful Flower Handkerchief): The base of this wallhanging is made from a group of vintage floral printed hankies that I found in a green satin bag in my mom’s “delicates” drawer. I combined the hankies with scraps of vintage feed sack and cotton fabrics from the 40’s, with new cotton fabrics. I created a border of crazy- and strip- pieced fabrics, and I used satin ribbons to hide the raw edges. I embroidered stitches around the edges of the hankies and ribbons and the seams of the pieced fabric.

I embroidered this piece over several months, making sure to add embroidered and embellished details to each seam and open space. I was able to use almost all of the embroidery stitches that I included in the book, that utilized the threads that I chose to work with.

I made ribbonwork flowers using vintage cotton bias tape and woven ribbons, and fabric yo-yos from the left-over bits of vintage feed sack and cotton floral fabrics. This piece is adorned with vintage and new plastic buttons, and new novelty buttons.

Materials Used:

  • Perle Cotton: #8 and #12
  • Cotton Floss: 2 or three strands
  • Additional threads: tatting and crochet cotton in various weights; cotton floss
  • Embellishments: Glass seed beads, plastic charms, vintage and new buttons
  • Flowers and Fabric: Rosette, crinkly flower, fuller flower, yo-yo

Embroidery Details:

  • Border Row Stitches: Backstitch, blanket stitch, blanket stitch up and down, blanket and chain stitch, blanket stitch closed, blanket stitch up and down, chain stitch, chain stitch double, chain stitch spiny, chain stitch zigzag, chevron stitch, coral stitch, cretan stitch, cretan stitch looped, cretan stitch up and down, cretan stitch with chain stitch, cretan with feather stitch, crossed wing stitch, cross stitch row, feather stitch, feather stitch cobwebbed, feather stitch double, feather stitch looped, feather stitch single, fern stitch modern, fishhook stitch, fly stitch fancy link, herringbone stitch, herringbone stitch twisted, shell stitch row, snail trail stitch, stem stitch
  • Detail Stitches: Cross stitch, cross stitch twisted, fleet stitch, fleet stitch with loose knot, fly stitch, fly stitch with French knot stitch, fly stitch with lazy daisy stitch, French knot stitch, lazy daisy stitch, lazy daisy with bullion tip stitch, lazy daisy with French knot stitch, looped tendril stitch, pistil stitch, shell stitch, stamen stitch, and straight stitch
  • Flower and Shape Stitches: Bell flower stitch, buttonhole circle stitch, fly stitch flowers, French knot stitch flowers, lazy daisy stitch flowers, spiderweb: corner stitch, straight stitch flowers, whip-stitch star
  • Embellishment Stitches: Clustered buttons, curved wing butterfly, embroidered buttons, single bead stitch, stacked bead stitch, stitched 2-hole buttons, stitched 4-hole buttons

Happy Stitching to you all! ~Christen

Friday’s Favorites: Repurposing Vintage Ties

If you follow my blog, you know that I love to repurpose, rescue, and re-use discarded and forgotten items. Today’s post is no different. I have a collection of pieces to show you how I have done just that.

Victoriana, The Crazy Lady

Victoriana, the Crazy Lady: This piece was created as I taught my in-person class, the Crazy Corner. I used several vintage ties, and the tie linings, satin, rayon, and silk fabrics to create the crazy-pieced base. The center section was pieced first, then I added crazy-pieced borders. I used a vintage satin ribbon to hide the seam connections for the base and borders. The embroidery stitches are worked in silk embroidery ribbon, perle cotton, cotton floss, and seed beads. Embellishments include ribbonwork flowers, fabric appliques, vintage buttons, and charms.

Kimono Ties

Kimono Ties: The crazy-pieced and machine quilted base is comprised of silk fabrics, men’s ties, and pieces of kimonos, haoris, and obis. The embellishments include vintage glass, celluloid, and inlaid buttons, fabric yo-yos, fabric circles, and embroidery. This is a gallery example from my book, Creative Embroidery, Mixing the old with the New.

Mary Margaret’s Pretty Purse

Mary Margaret’s Pretty Purse: The pieced base of silk ties and a scrap of silk fabric features a small purse with steel cut beads and a metal frame. Embellishments include silk ribbon and ribbonwork embroidery, vintage gimp and rickrack trims, fabric, metal, crochet, and glass buttons, and glass beads. This is a gallery example from my book, Creative Embroidery, Mixing the old with the New.

Here are a collection of adornments made from vintage ties. The Hollywood Rose Bracelet and Brooch are made from a tie that my dad had worn, and the label was Hollywood! Loved the kitsch of it all! Instructions for the Old Rose Corsage can be found in my lecture/class Upcycle it with Embellishments.

Happy Stitching to you! ~ Christen

Slow Stitchin’ on Sunday Mornings

In these posts I want to share some of my favorite pieces, which will include wall hangings, small works, pillows, purses, and just because pieces. This month they are going to be from my new book, Creative Embroidery, Mixing the Old with the New, by C&T Publishing.

Don’t forget, there is one more day to leave a comment on Saturday’s post 3-25-2023, Creative Embroidery, Mixing the Old with the New, Book Promotion, Day 6. Your name will be entered into a drawing to win the free ebook.

Denim and Dresden: The Dresden Plate block made from vintage feed sack and cotton prints was purchased at a thrift store for $1.00. It was originally sewn to a piece of muslin and embroidered with black floss, which really didn’t look that great! I removed the embroidery and background, and stitched the pieced block to a square of denim fabric, adding a fun vintage floral cotton fabric to the center of the block. I crazy-pieced each of the border strip sections with vintage feed sack and cotton print fabrics that I found on ebay, adding in a newer piece of fabric here and there. I hand-stitched yo-yo’s from the left-over vintage fabric scraps.

I embroidered each section of the plate block, then hand-quilted the denim fabric square. Because I had created the border strips separately, it made it much easier to embroider these sections. When the center denim square and each of the strips were embroidered I stitched in the yo-yo’s around the center of the block and added vintage buttons for embellishment on both the block, denim square, and the crazy-pieced strips.

Once all of the embroidery and embellishments were completed, I bound the inner edge of each crazy-pieced strip to finish off the raw edges. I stitched the center denim square onto a piece of batting, and then stitched the crazy-pieced border strips in place covering the raw edges of the denim square. Once this was done, I stitched in the yo-yo’s and buttons into the corners of the denim square. I added a backing made from left-over bits of cotton fabric, and bound the outer raw edges with the same vintage floral cotton fabric used in the center of the block.

Embroidery Details

  • Embroidery Stitches: All of the stitches that I used can be found in Creative Embroidery, Mixing the Old with the New
  • Hand Quilting: perle cotton #12
  • Border Rows: perle cotton #8, #12, and vintage tatting cotton
  • Decorative and Detail Stitches: perle cotton #8, #12, tatting cotton, and cotton floss
  • Embellishments: Fabric yo-yos (directions can also be found in my book), and vintage buttons

Here is a video that I shot at the C&T Publishing Studios, that focuses on the new book, and some of my favorite pieces.

Happy Stitching to you all! ~Christen

Slow Stitchin’ on Sunday Mornings and National Button Week, Day 7!!!

In these posts I want to share some of my favorite pieces, which will include wall hangings, small works, pillows, purses, and just because pieces. This month they are going to be from my new book, Creative Embroidery, Mixing the Old with the New, by C&T Publishing. This is the last day of National Button week March 13-19, 2023, here are few of my favorite buttons, and buttons, and lots and lots of buttons.

Bees Buzz on a Saturday Afternoon

I created this four block wall hanging, combining a grouping of solid and printed fabrics with vintage printed panels, using a different piecing technique for each block. The blocks are layered with a variety of both new and old ribbons and trims which include vintage rickrack trims and a jacquard ribbon; grosgrain, satin, and picot edge satin ribbons; burlap ribbon and burlap loop trim. Once the base was stitched, I hand-quilted it with perle cotton #12.

I incorporated an assortment of buttons, charms, and other ephemera to tell the story. I found loads of buttons in all sizes and materials including vintage celluloid, plastics, ceramic, and wood. I also used a collection of bird and bee charms, and Scottie dog scatter pins.

Block 1: This block started with the 9-patch square that I made with left-over pieces from another project. I added in strips of solid and printed cotton fabrics. I used grosgrain ribbon and burlap trim, along with vintage rickrack trim in several sizes for the seam treatments. I ironed a vintage cotton tape measure to muslin backed with HeatnBond, to use for the birds nest boxes. The wooden garden fence was purchased at JoAnne Fabrics. Notice Buzz is spelled with one Z and a bee button, because in Scrabble there is only one Z.

Block 2: This block started with the floral screen print, which I purchased from Woof and Warp Fabrics (my first job), back in the late 1970’s. I strip- and patch-pieced the sections around the block. I used the cinnamon colored jacquard ribbon and woven ribbons to hide the raw edges while piecing the block. I also used grosgrain, and burlap ribbons along with vintage rickrack trim for the seam treatments. Other embellishments include vintage fly buttons in the center panel, and Scottie dog “scatter pins” along the bottom edge. The little cutie next to my signature “C” was made for me by my cousin Richard, when he was in high school in the 1960’s.

Block 3: In the center of this block I used a printed fabric advertising “Flower Baskets” and “Bee Keeping Supplies” that I found at a rummage sale back in the 1980’s. I patch-pieced the center panel with strips of fabric, and used the ribbons and trims as seam treatments. To balance with Block 2, I repeated the grouping of large crochet flowers and rosettes made from grosgrain ribbon. I placed the flowers on stems of looped trim, with leaves made from ultra suede.

    Block 4: This block is strip-pieced, with a few of the strips pieced to create a larger strip, using up the remaining bits and pieces of fabric that I had. The blue strip on the bottom became a fence for the three “Cat Amigos” to sit on, to ponder those Bees Buzzing on a Saturday Afternoon.

    Embroidery Stitches Used Throughout the Blocks

    • Blanket Stitch Up and Down
    • Couched Stitch
    • Straight Stitch
    • Lazy Daisy Stitch
    • Fly Stitch
    • Cross Stitch
    • Bell Flower Stitch
    • Spiderweb Corner Stitch
    • Button Spider

    Little Stitched Extras

    • Rosette
    • Loop Leaf
    • Birds Nest

    Happy Stitching to you all! ~Christen

    Tips and Tea on Tuesdays

    On Tips and Tea on Tuesdays, I will cover a topic and hopefully provide you with some tips that will be helpful! And just as an afterthought, tea may occasionally be a cup of Joe!

    Tea today, was a cup of coffee with my hubby! Long ago, I decided that Kevin needed a hobby, this way I could focus on something for gift giving occasions. I thought that he could collect frogs for this hobby, why? no idea. This became a team effort that our daughter and I could really have fun with. Then his mom and sister got into the act, and at one point we ended up with over 300 frogs. One of the more memorable gifts from his mom, was a frog that croaked out “Jingle Bells”. I must admit that I forgot to replace the batteries when they wore out.

    Eventually this unusual “frog moniker” to represent Kevin filtered into my creative endeavors. I chose a ladybug to represent our daughter, as she loved red and black, and I became the bunny or cat, depending on the availability of the buttons or charms.

    I also like to sign my pieces, using a “C” sew-through charm that I bought many years ago. I don’t worry if the orchid color bead doesn’t match the piece that I am working on, as it is meant to stand alone as my signature.

    Originally when I bought this group, I thought to myself, how on earth will I have the time to make enough pieces and use up all of those Cs? I continue to work, and hope that at some point I can answer that question.

    Tip: Create a Special Signature for Your Art Work

    I admit that it was serendipitous to find those “C” beads, in lieu of that, I suggest that you find something that is unique to you and your style.

    1. Do you have a favorite number? or a even letter?
      • Suggestion: Use a fabric glue, or low melt glue gun to affix wooden numbers or scrabble tiles to your fiber pieces
    2. Do you have a favorite group of images?
      • Suggestion: Collect charms and buttons in the groups that you like and store them somewhere you can locate them!
    3. Do you have a favorite bead color that you like and use a lot?
      • Suggestion: stitch a large bead or sequin in the corner or center of your art-piece. If the beads are smaller, stitch 3 stacked bead stitches in a group for your signature.
    4. Do you have a favorite or special shape button that you like, or one that tells your story?
      • Suggestion: stitch the button in place with perle cotton, on the same corner of every art-piece.
    5. Do you have a favorite charm that you like, perhaps a flower, heart, or ladybug?
      • Suggestion: use the same shape or variation of the shape, or use a different color of glass, metal or plastic that would match the art-piece.
    6. Do you have a whimsical side, perhaps use a funky notion as your signature!
      • Suggestion: stitch the notions in place with perle cotton, add embroidery stitches to create a butterfly or flower.
    7. Do you have a favorite color that you like or always use?
      • Suggestion: Use the color for your signature while piecing the project, or as the lining, or use it in your embroidery stitches. One of my dear friends loved acid green, she used it on every garment she ever made; whenever I come across that color in my travels I think, there is that “Betty Green”, and I smile!

    Happy tea drinking and stitching to you! ~Christen

    PS: If you have any questions or thoughts, just leave a comment! See Tips, Tricks, the Basics, for more helpful ideas.

    Slow Stitchin’ on Sunday Mornings

    In these posts I want to share some of my favorite pieces, which will include wall hangings, small works, pillows, purses, and just because pieces. This month they are going to be from my new book, Creative Embroidery, Mixing the Old with the New, by C&T Publishing.

    Into the Garden: The base of this project started with a group of disparate fabrics, which included a collection of small strips of a few floral upholstery fabrics, two cuffs from a linen jacket, and a few squares of a printed polished cotton. I just started to randomly patch- and strip-piecing the base, fitting the pieces together, starting form small to large. Once the piecing was completed, I hand-quilted the base with perle cotton #12.

    As I was contemplating my next move, I thought with all of the floral prints, this piece seemed to me to want to showcase a garden, with flowers, and birds, bugs, and more. I found some wonderful metal hangers, and some wooden clothespins, who doesn’t remember mom hanging the sheets out to dry in the warm summer sun?

    I then rummaged around the button box, and found an eclectic mixture of old and new sew-through and shank buttons. I used the buttons as the centers for both the ribbonwork and embroidered flowers. A few were sewn as the body of the spiders and button bugs.

    I found a great group of printed ribbons, burlap ribbon, printed rickrack trim, and vintage rickrack and loop trims. I used these as seam treatments, and for the ribbonwork flowers on the frame of the wooden hanger. I also found some rayon knitting ribbon and soutache braid for the stems of the flowers.

    In the top left corner I stitched a sun, with rays shining down into the garden. Little stitched extras (which you can find in the book) include a birds nest, yo-yos, and penny circles. The little birds resting in the nest are made from spun cotton with beaks and wings made from dried mushrooms.

    I filled the garden with buttons and charms of dragonflies, butterflies, and ladybugs. And of course spiders and their webs. I couched some old cotton twine for branches, on both the vertical edges, with a vine of couched silk ribbon to showcase the bright mixture of plastic, metal, and glass buttons.

    I kept the embroidery fairly simple, so that the imagery could shine through. Included are: running stitch, chain stitch, stem stitch, couched stitch, lazy daisy stitch, fly stitch, French knot stitch, and straight stitch. You can find all of the embroidery stitches and the little stitched extras that I used in my book.

    Here is a video that I shot at the C&T Publishing Studios, that focuses on the new book, and some of my favorite pieces.

    Happy Stitching to you all! ~Christen

    Friday’s Favorites: Flowers and Buttons in Baskets

    What more can I say? I have a selection of pieces to show you today, from my upcoming book, Creative Embroidery, Mixing the Old With the New, by C&T Publishing. Some of the pieces are gallery examples, some are examples of the projects included in the book.

    Doilies, appliqués, and wide flat lace can be used as a starting point to make a pretty basket that you can then fill with ribbonwork flowers, buttons, embroidery, charms, and beads.

    Notions of Spring: A Stash Idea Inspiration piece. I cut a large doily in half, and used one half for the base. I cut a smaller doily into four sections, which created the heart shaped pieces in each corner. I filled the vase with the flowers and leaves included in the chapter Altering the Past. I even used and old tool that belonged to my mom, called the “Daisy Maker” which was used to make a flower from yarn. I substituted a lace hem tape for the yarn, and it worked out perfectly! I embellished the piece with several sizes of rickrack, a vine trim, a coronation cord, sewing notions, buttons, charms, and bells.

    Lace, Doilies and Appliqués: Is one of the Projects by Design. I combined ribbonwork flowers, with fabric yo-yo’s, buttons, charms and beads to create a floral display. The project has two block designs, which are repeated, and then stitched into a 4-block wallhanging.

    Flowers in a Cuff: Is a Stash Idea Inspiration piece. I hand-dyed the cuff, and the grosgrain ribbons that I used to stitch the ribbonwork rosettes. I had been saving those fun character buttons for years, waiting for just the right project to come along. I also used vintage dyed mother-of-perle buttons for the centers of the flowers.

    Aunt Murt’s Garden: Is an example of the Stash Project called Scrap Pins. I used a section of vintage crochet lace for the basket, and stitched it onto a dyed silk base, finished with vintage flat lace. I stitched machine-made appliqués, vintage buttons, plastic leaves, glass roundels, and glass beads into and around the basket. I used a vintage knitting pin for the hanger.

    Hoop Frame: This is a Stash Project. The base is a piece of decorator fabric set into a vintage hoop frame, which is adorned with a beautiful lace doily, and another piece of vintage crochet lace. I embroidered stems with the feather and couched stitch, leaves with the lazy daisy stitch, and French knot stitch details. The flowers are vintage mother-of-pearl and muscle shell buttons, with ladybug and dragonfly charms sprinkled throughout the bouquet.

    Happy Stitching! ~Christen

    Slow Stitchin’ on Sunday Morning

    In these posts I want to share some of my favorite pieces, which will include wall hangings, small works, pillows, purses, and just because pieces, enjoy!

    Gentle Ladies Needle Keep

    The needle keep and pincushion roll were created for my book, Hand Embroidery Stitching, by C&T Publishing. The crazy-pieced needle keep is comprised of both solid and cotton prints with grosgrain ribbon and rickrack trim. The embroidery stitches were worked in cotton floss, perle cotton #8 and #12, and glass seed beads. Additional embellishments include fun novelty shaped buttons. The pincushion and roll are made from felt, with a wooden spool as the base. Both are embellished with rickrack trim, seed beads, and novelty shaped buttons. Here is a handout for Free Pincushion Instructions.

    Needle Keep: Embroidery Stitches Used

    • Border rows: feather stitch with chain-stitch edge, fern stitch modern, running stitch, chain stitch feathered, blanket stitch short-long, blanket stitch, chevron stitch, cross stitch row, blanket stitch locked zipper, stem stitch, herringbone stitch overlaid, blanket stitch crossed, petal stitch, backstitch, string of pearls stitch, fly stitch netted, fishnet stitch, blanket stitch angled, rickrack trim with straight stitch details
    • Decorative stitches: Fly stitch, lazy daisy tulip stitch, straight stitch, fly stitch with lazy daisy stitch, lazy daisy stitch
    • Detail stitches: French knot stitch, straight stitch
    • Vignette stitches: Spiderweb corner stitch, button spider, grouped French knot and straight stitches, stacked bead stitch, clustered buttons

    Pincushion Roll: Embroidery Stitches Used

    • Border row: rickrack trim with bell flower stitch, seed bead details
    • Stem and flowers: chain stitch, lazy daisy stitch, buttons

    Happy Stitching to You! Christen

    PS: If you wish to see more of my work, check out the Gallery section.