Archives

National Sewing Month

Day 8

Question: Do you like to make and sew your own jewelry and adornments? I have a few suggestions including cuffs, bracelets and brooches, all use bits of this and that including fabric, lace, ribbons, and buttons.

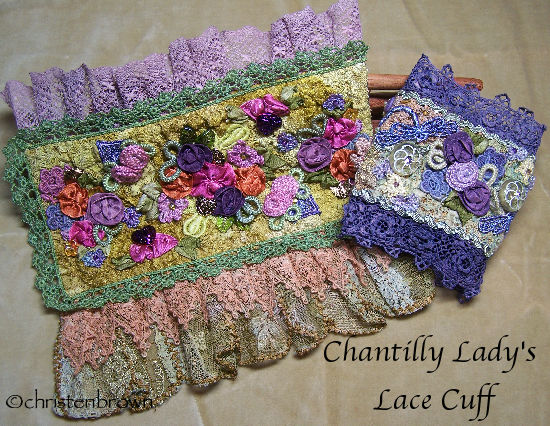
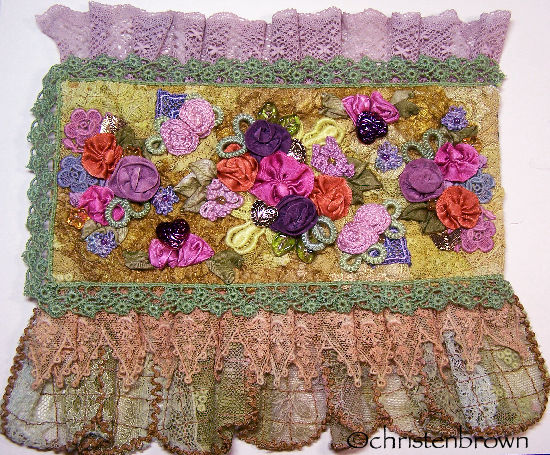
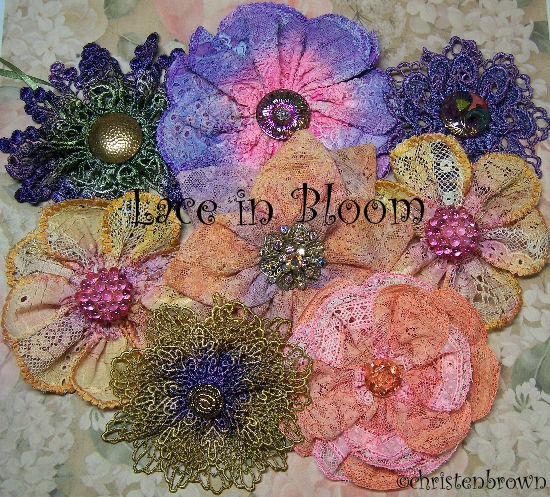
Chantilly Lady’s Lace Cuff by Christen Brown

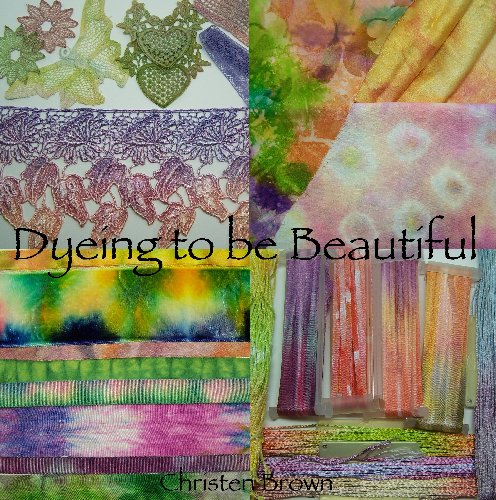
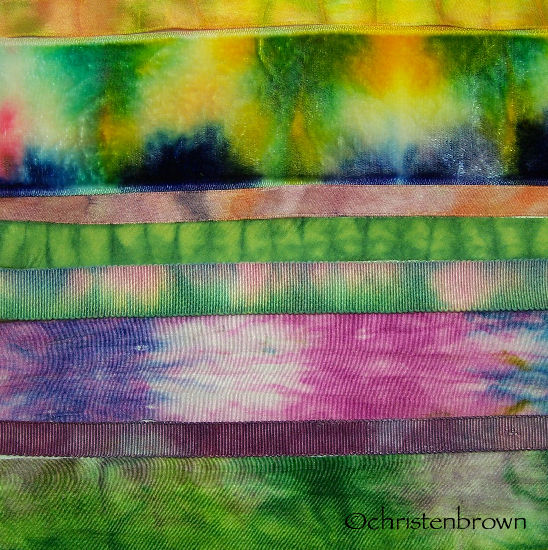
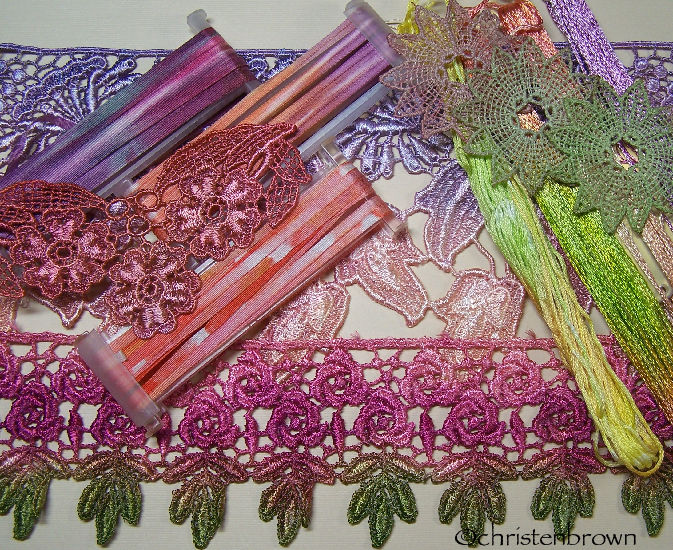
These are examples of what I call the wistful days gone by, reminiscent of tranquil days lounging on an overstuffed satin pouf, or demurely sashaying along a tree-lined avenue, parasol in hand. There are two styles to choose from that will be embellished with needle-tatted and crochet components, ribbonwork flowers, a few silk ribbon embroidery stitches, beads and buttons. The lace base and other components are dyed with Colorhue dyes.

silk ribbon, embroidery, bracelets

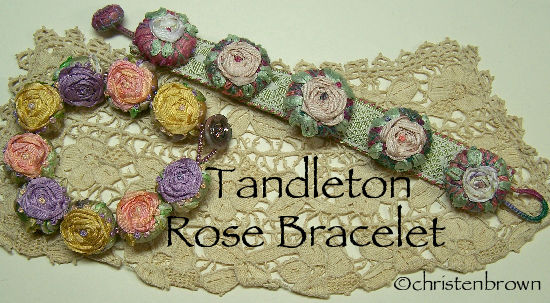
Tandleton Rose Bracelets by Christen Brown

You have two styles to choose from, both using a Tandleton base (pillow). The “Ring of Roses” is made up entirely of embroidered ribbon pillows, strung with beads and has a glass button for the closure. The “Band of Roses” is made from a ribbon base, layered with vintage lace and a few of the embroidered pillows; a dainty embroidered button and hand-stitched button loop are used for the closure.

ribbon work flowers and leaves

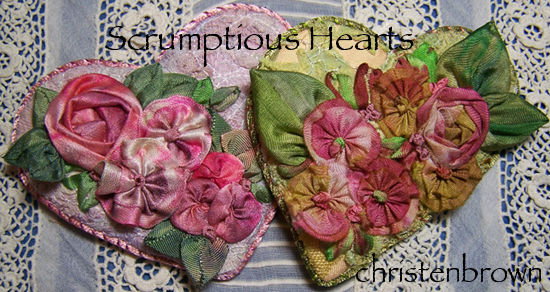
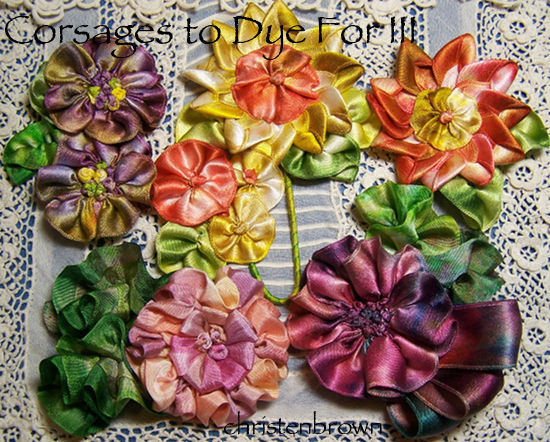
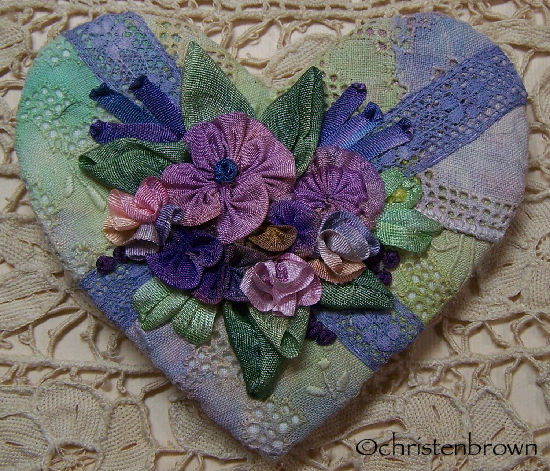
Scrumptious Hearts by Christen Brown

The base is created with bits of cherished lace and with silk fabric to form a beautiful heart shaped base for your floral design. Chose from a few different heart shapes and ribbon worked floral vignettes or create your own. This is an excellent way to use up small amounts of this and that to form an heirloom brooch to be treasured. The lace base and other components are dyed with Colorhue dyes.

Happy Stitching, ~Christen

National Sewing Month

Day 28

What form of piecing do you prefer? I really love crazy-piecing, simply because you can use the pieces and scraps that you have on hand, and the pieced lines provide a variety of opportunities to embroider and embellish.

Victoriana 1 and Victoriana 2 by Christen Brown

These two pieces were stitched using the same fabrics, and are almost identically pieced together. I was going to make a purse, but decided that two small wall hangings were more desirable. The embroidery stitches were worked in silk embroidery ribbon, perle cotton and cotton floss. Beads, charms and buttons were used for the embellishments.

You can find these two pieces in The Embroidery Book by C&T Publishing.

The Crazy Lady Victoriana by Christen Brown

This piece was made using the same fabrics as the above two pieces, with the addition of several vintage silk ties and their lining fabrics. I created this piece while I was teaching a class titled the Crazy Corner. I enjoyed adding in all of the embellishments such as a birds nest, fabric yo-yos, and ribbonwork flowers.

Happy Stitching, ~Christen

Day 27 of FLOWERS GALORE!

Day 27 of FLOWERS GALORE!

dyed ribbon corsages

dyed ribbon corsages

dyed ribbon corsages

Corsages to Dye For

This is a series of classes that I taught on-line for Joggles, Corsages to Dye For I, Corsages to Dye For II, and Corsages to Dye For III. The student learned how to mix colors and dye her own ribbons. The flowers and leaves were made with ribbonwork techniques, and a little bit of embroidery. Many of the techniques can be found in my two ribbonwork books by C&T Publishing.

Ribbonwork Gardens a book by Christen Brown

Happy Stitching, enjoy~ Christen!

Day 8 of FLOWERS GALORE!

Day 8 of FLOWERS GALORE!

Chantilly Lady’s Lace Cuff

This is one of the bracelets that I designed for my class Chantilly Lady’s Lace Cuff.  The lace, ribbons, and threads are dyed with ColorHue dyes. The techniques included are ribbonwork, tatting, crochet, and embroidery. This piece can be found in the gallery section of my book Ribbonwork Flowers by C&T Publishing.

Happy Stitching, enjoy~ Christen!

Day 4 of HEARTS: Hanky Heart

Day 4 of HEARTS!

Many of you know that I love hearts! I love the shapes and all of the possibilities. The base of the brooch is made from a vintage embroidered hanky, sewn over a Fast2Fuse base. The heart shape is adorned with vintage lace, silk ribbon embroidery and ribbonwork flowers, many of which were hand-dyed in my class Dyeing to Be Beautiful.

Happy February to you!

~Christen

Scrumptious Scraps: class/tutorial

Scrumptious Scraps: 5 lessons/$60.00

dyed lace scrapsScrumptious bits and pieces of vintage laces are melded and stitched together on a base of silk fabric to form a unique and beautiful base for your creative stitched designs. Once the lace scraps are turned into a base, I will show you how to dye the base and a variety of RTD silk ribbons that can be later used in the embroidery and ribbon worked floral vignettes.

Skill Level Advanced: sewing machine, hand sewing, embroidery and ribbonwork knowledge needed.

Lesson 1: This lesson will cover the design of the collage with bits of lace and silk ribbon that will be stitched onto to a piece of silk for the base. This includes machine and hand stitched details. Only cotton, rayon or silk lace will work for the meld, you will need to know what you have before you start the project.

Lesson 2: In this class we will focus on dyeing the melded lace base as well as different techniques that can be used to prepare the ribbons for dyeing. The melded lace base and the RTD silk ribbons for the ribbon work flowers and the silk ribbon embroidery are dyed with the Colorhue dyes, (no other dye will be used or discussed).

Lesson 3: This class will focus on the ribbon worked (ribbon cut to a specific length and stitched with a needle and thread), flowers that will become the centerpieces for the floral vignettes. We will cover setting up the vignettes with added bits of dyed appliqués, ribbon scrunched sections, ribbon worked flowers such as the rosette, double edged rosette, berries, fuchsias, hearts, concertina rose, and the prairie lily.

Lesson 4: This class will focus on the silk ribbon embroidery (ribbon threaded through a needle and stitched through the fabric to form a flower or pattern) and traditional embroidered stitches (ribbon or thread stitched into patterns) that will be worked within and around the vignettes. The stitches that will be covered are the outline stitch, feather stitch, woven rose, Japanese ribbon stitch, lazy daisy stitch, bullion-tipped lazy daisy, couched thread tendrils, and the French knot.

Lesson 5: This class will focus on the extra embellishments that you can add onto your piece such as simple beaded centers, buttons, charms and trinkets. We will also discuss the finishing touches and details that can be added to your project.

Class Information

These classes can be purchased at any time, there is no set schedule. The class can be ordered by contacting Christen: thestoreonthecorner@gmail.com. She will send you an invoice through PayPal.

Once the class is paid for, the supply list will be sent out. The lessons will begin one week after the purchase of the class, unless otherwise stated. You will receive an email with the lesson attached. The following lesson/s will arrive one week after the previous lesson.

A high speed internet connection is recommended, and you must have basic computer and internet skills. You will need to be able know how to download and save a document to your computer’s hard drive, open it and print out a copy.

You can contact Christen with any questions pertaining to the class/class information throughout the length of the class.

Class fees will not be refunded.

Happy Stitching,

~Christen

Scarves to Dye For: class/tutorial

Scarves to Dye For: 2 lessons/$30.00

scarves to dye forDo you find yourself wishing “if only I had scarf that had all of my favorite colors in it”? If your answer is YES, then let me invite you to take a colorful journey into the realm of dyeing your own RTD (ready to dye) scarves, lace and silk ribbons. I will teach you how to prepare your scarf blank, the lace and ribbons then dye them to create one of a kind, creative and colorful wearable masterpiece! In this class you will be using Colorhue Dyes, no other dye will be discussed

Skill Level Beginning/Intermediate: hand sewing and ribbonwork knowledge helpful.

Lesson 1: I will give you a few simple resist dye techniques that include tied, stitched and wrapped that can be used on the scarf blanks, ribbons and lace. I will show you how to prepare the dye baths, and give you color formulas to work from.

Lesson 2: First you will hand stitch the lace to the edges of the scarf. Then you will transform your ribbons into the flowers and leaves of your choice. These will be turned into finished vignettes that can be pinned or attached to the scarf bases.

Class Information

These classes can be purchased at any time, there is no set schedule. The class can be ordered by contacting Christen: thestoreonthecorner@gmail.com. She will send you an invoice through PayPal.

Once the class is paid for, the supply list will be sent out. The lessons will begin one week after the purchase of the class, unless otherwise stated. You will receive an email with the lesson attached. The following lesson/s will arrive one week after the previous lesson.

A high speed internet connection is recommended, and you must have basic computer and internet skills. You will need to be able know how to download and save a document to your computer’s hard drive, open it and print out a copy.

You can contact Christen with any questions pertaining to the class/class information throughout the length of the class.

Class fees will not be refunded.

Happy Stitching,

~Christen

Lace in Bloom: class/tutorial

Lace in Bloom: 2 lessons/$25.00

lace in bloomAre you the frilly type of girl, who loves lace, blossoms and corsages? In this class I will show you a few different techniques that will take bits of lace and magically transform them into five different blooms. The techniques include individual pieces cut or folded into a petal, then sewn into a flower. Another technique is similar to my Scrumptious Scrap classes, creating a length of scrumptious bits that is turned into a flower. Then some easy peasy rosettes are created with lengths of Viennese lace and ribbon. Each of the blooms is finished off with buttons or a bit of bling. These will make wonderful gifts! Colorhue dyes will be used in this class; no other dyes will be discussed.

Skill Level Beginning/Intermediate: some machine and hand-sewing knowledge helpful

dyed lace flowers Lesson 1: This class will transform your bits of lace into a fabric mesh or strip of fabric to be cut into petals. Then you will dye these pieces and the other lengths of lace that will be used for flowers.

dyed lace flowersLesson 2: In this class you will transform your dyed laces into beautiful one-of-a-kind blossoms, using a few different petal shapes and techniques. The flowers include Claire de Lune, Pretty Petals, Scrumptious Petals, Lace Rosettes and Frilly Double Rosettes.

Class Information

These classes can be purchased at any time, there is no set schedule.The class can be ordered by contacting Christen: thestoreonthecorner@gmail.com. She will send you an invoice through PayPal.

Once the class is paid for, the supply list will be sent out. The lessons will begin one week after the purchase of the class, unless otherwise stated. You will receive an email with the lesson attached. The following lesson/s will arrive one week after the previous lesson.

A high speed internet connection is recommended, and you must have basic computer and internet skills. You will need to be able know how to download and save a document to your computer’s hard drive, open it and print out a copy.

You can contact Christen with any questions pertaining to the class/class information throughout the length of the class.

Class fees will not be refunded.

Happy Stitching,

~Christen

Dyeing to be Beautiful: class/tutorial

Dyeing to be Beautiful: 3 lessons/$40.00

dyeing to be beautifulThis technique class will teach you how to successfully dye your own fabrics, laces, ribbons, trims and threads to be used in your creative fiber art adventures. The dyes are easy to use, with simple sewing, pinning or tying resist techniques. These lessons will only cover the use Colorhue dyes, and natural fibers including cotton, silk, rayon, linen and wool. These dyes are easy to work with, non-toxic and self-setting, and best of all they yield beautiful colors every time.

Skill Level Beginning

dyed fabric Lesson 1: This class is all about learning how to set up your workspace, and mixing your dyes directly from the bottle. It will also cover mixing the primary colors into secondary and tertiary colors. The dyeing techniques include gradient dyeing small amounts of fabric; several sewing and pinning resist techniques with painted space dyed sections. These bits can be used as focal fabrics for any fiber art project.

dyed ribbonLesson 2. This class will cover several different preparation techniques including tying, pinning, and sewing. The dyeing techniques include space dyed immersion and total immersion. These techniques will yield interesting and beautiful ribbons that can be used for ribbonwork or trims.


dyed lace, silk embroidery ribbon, and threadsLesson 3: This lesson is all about flat dyeing laces, ribbons, trims and threads. Several different simple preparation techniques will be covered. The dyeing techniques include: paint and squirt; sectional dyeing, immersion dyeing and over-dyeing. These laces, trims and embroidery ribbon and threads will give your projects that extra special touch.

Class Information

These classes can be purchased at any time, there is no set schedule.The class can be ordered by contacting Christen: thestoreonthecorner@gmail.com. She will send you an invoice through PayPal.

Once the class is paid for, the supply list will be sent out. The lessons will begin one week after the purchase of the class, unless otherwise stated. You will receive an email with the lesson attached. The following lesson/s will arrive one week after the previous lesson.

A high speed internet connection is recommended, and you must have basic computer and internet skills. You will need to be able know how to download and save a document to your computer’s hard drive, open it and print out a copy.

You can contact Christen with any questions pertaining to the class/class information throughout the length of the class.

Class fees will not be refunded.

Happy Stitching,

~Christen

Corsages to Dye For II: class/tutorial

Corsages to Dye for II: 3 lessons/$38.00

dyed ribbon corsagesDo you find yourself wishing “if only I had a ribbon that was this color or that”, or “why didn’t it come in my favorite colors”? If your answer is YES, then let me invite you to take a colorful journey into the realm of dyeing your own RTD (ready to dye) silk ribbons. I will teach you how to prepare your ribbons then dye them to create one of a kind, creative and colorful ribbons. These ribbons will then be turned into magical works of floral art for your own “corsages to dye for”!

Skill Level Intermediate: hand sewing and ribbonwork knowledge helpful

Lesson 1: This class you will learn how to mix the Colorhue dyes (no other dye will be used or discussed); you can use the basic color wheel or create your own colors. You will learn a series of techniques to prepare the ribbon for dyeing, then dyeing the ribbons that you will use in the next lessons. I will also cover over-dyeing and “antique coloring” of the dyed ribbons.

Lesson 2: This class will focus on making the flowers: the Chou Rose, the Country Rose, and the Lady Ashley Rose. I will show you design options for each flower, from a single flower to a group of flowers. Which corsage you decide to make is up to you.

Lesson 3: This class will focus on making the leaves from the ribbons that you have dyed, then stitching all of the components together into the corsages.

*Note: The Corsages to Dye For series need not be taken in order. In each class you will learn how to prepare the dyes; and each lesson will cover a different set of preparation techniques to create the colorful patterns in the ribbons.

Class Information

These classes can be purchased at any time, there is no set schedule.The class can be ordered by contacting Christen: thestoreonthecorner@gmail.com. She will send you an invoice through PayPal.

Once the class is paid for, the supply list will be sent out. The lessons will begin one week after the purchase of the class, unless otherwise stated. You will receive an email with the lesson attached. The following lesson/s will arrive one week after the previous lesson.

A high speed internet connection is recommended, and you must have basic computer and internet skills. You will need to be able know how to download and save a document to your computer’s hard drive, open it and print out a copy.

You can contact Christen with any questions pertaining to the class/class information throughout the length of the class.

Class fees will not be refunded.

Happy Stitching,

~Christen