Archives

Tips and Tea on Tuesdays

On Tips and Tea on Tuesdays, I will cover a topic and hopefully provide you with some tips that will be helpful! And just as an afterthought, tea may occasionally be a cup of Joe!

kitchen christmas tree

Tea today is “Yogi Green Tea”, sipping and smiling as I nibble on the shortbread that I just made. I use the recipe in the Joy of Cooking, which was a gift from my friend Jeri (many, many, years ago). The book is falling apart, and the binding is no longer attached to the cover, but I wouldn’t trade it for all the world. It is special to me.

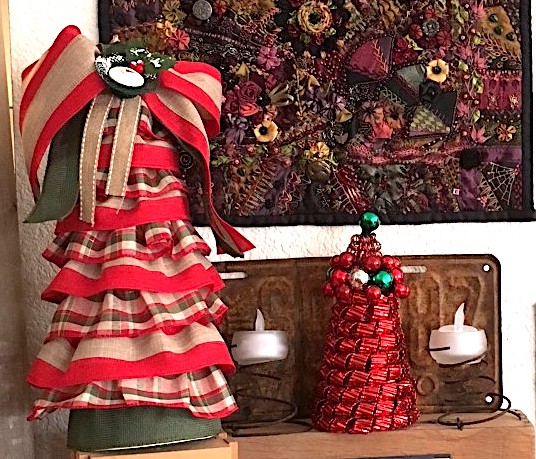
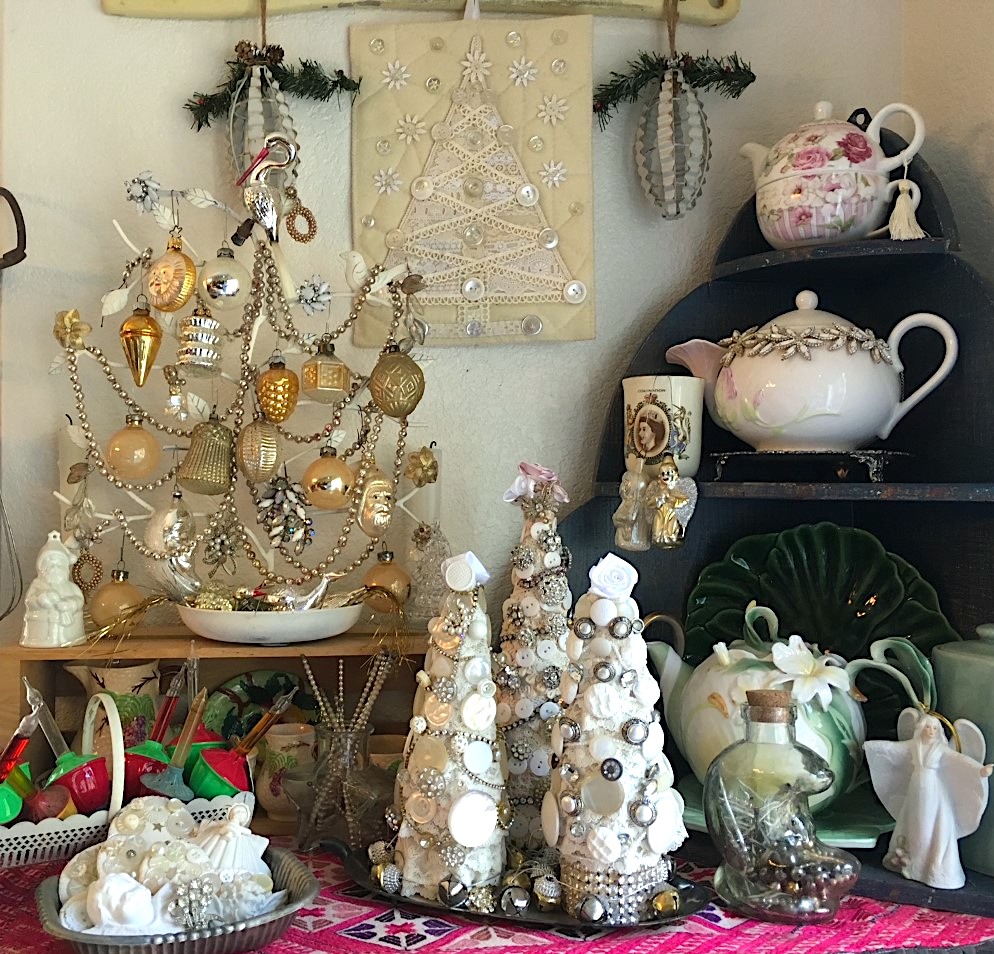
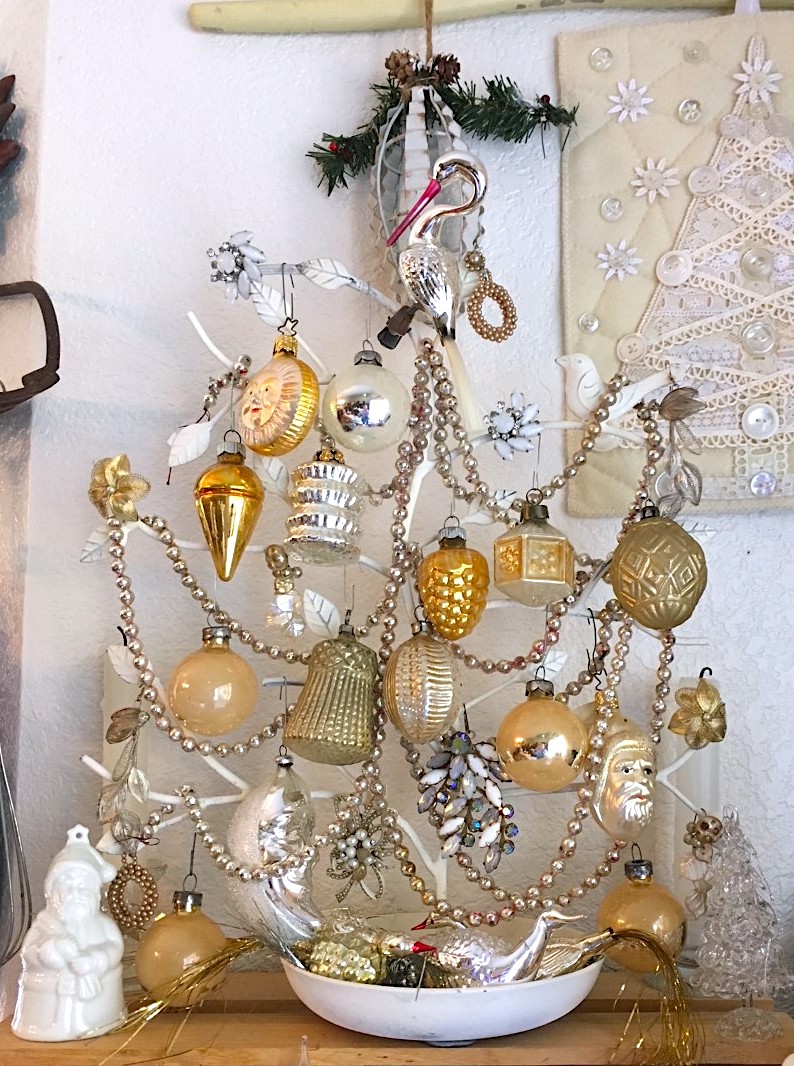
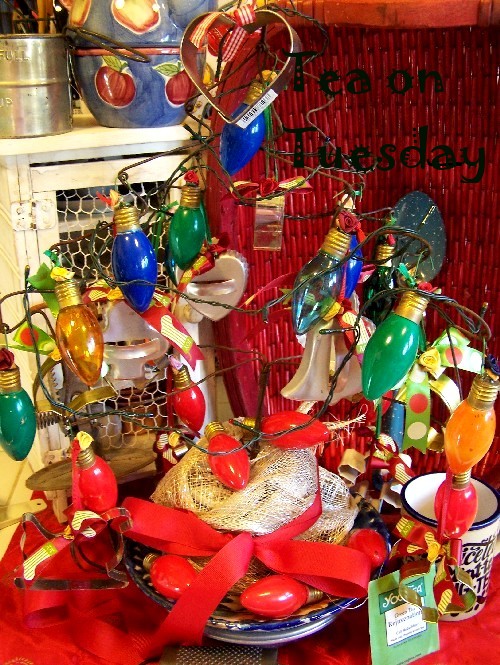
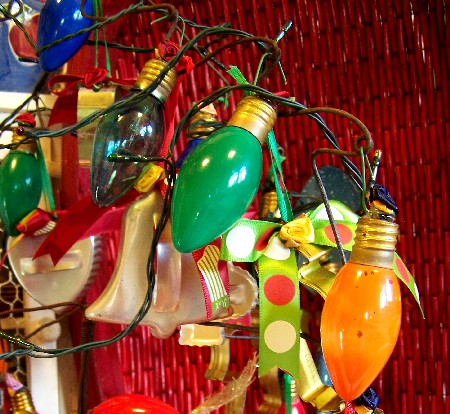
Another thing that I find special, are the memories of making sugar cookies, using aluminum cookie cutter molds as a kid. I have been collecting molds from thrift stores, garage sales, or on eBay, where ever I can find them. I decorated this wire tree with cookie cutter molds and old Christmas light-bulb ornaments. The bulbs had belonged to my mom and dad, and were used on our tree when we had growing up.

My tip today, is to use an item/s that you find special to you, and incorporate them into your daily life.

vintage cookie cutter ornaments
vintage cookie cutter and Christmas light ornaments

Tip: Ornaments from Recycled Treasures

Note: Always practice safety when using a glue gun. Keep a glass of water on hand to dip your finger into just in case you burn yourself.

Cookie Cutter Ornaments

Gather together a collection of vintage aluminum cookie cutter molds. Follow the directions below for each ornament.

  1. Cut an 8″ length of 1/4″ ribbon. Fold and tie this into a knot, for the loop.
  2. Glue the center of the loop on top of the cookie cutter mold with a low temp glue gun.
  3. Cut a 12″ length of 5/8″ ribbon. Tie this into a bow.
  4. Open up the loop of ribbon, and glue the bow on top of the center of the loop.
  5. Glue a purchased ribbon flower on top of the bow.
  6. Use the loop to hang the ornament.

Light-bulb Ornament

Gather together a collection of vintage tree bulbs. Follow the directions below for each ornament.

  1. Curve one end of a metal ornament hook to fit over the top metal portion of the bulb.
  2. Glue the curved portion of the hook to the bulb with a low temp glue gun.
  3. Glue one or more purchased ribbon flowers on top of the curved portion, with a low temp glue gun.
  4. Use the hooked end of the ornament hook to hang the ornament.

Happy tea drinking and stitching to you! ~Christen

PS: If you have any questions or thoughts, just leave a comment! See Tips, Tricks, the Basics, for more helpful ideas.

Tips and Tea on Tuesdays

On Tips and Tea on Tuesdays, I will cover a topic and hopefully provide you with some tips that will be helpful! And just as an afterthought, tea may occasionally be a cup of Joe!

cup of coffee

Tea today is as you can see, a mug of coffee. It is cold out, and I just wanted to have a sip of JOE. As I was sipping in my workroom, I came across some cardboard cones left over from a weaving project. I got to thinking about the shape, and thought, hmmm, this looks like it wants to be a tree. So I pulled out my ribbons, trims, lace, buttons, and started to play.

Tip: Wire Ribbon Cone Trees

  1. Buy a cardboard cone at your local craft store.
  2. Select the ribbon or ribbons that you want to use.
  3. Start at the bottom of the cone. Wrap the ribbon around the cone, cut off the length needed plus 1″.
  4. Place this onto the cone, with the bottom edge of the ribbon even with the bottom of the cone.
  5. Glue this end to the cone. Fold the remaining end over 1/2″, and pin.
  6. Wrap the length around the cone, remove the pin, and glue this end over the beginning end.
  7. Repeat this step, with the same ribbon or a variety of ribbons, slightly overlapping the previous row, until the cone is covered.
  8. Add a bow to the top, and small ornaments, or whatever strikes your fancy.

Tip: Lace and Rhinestone Cone Trees

  1. Buy a cardboard cone or a Styrofoam cone at your your local craft store.
  2. Select a 2 – 3 yard length of lace with one edge that has a ruffle.
  3. Start at the bottom of the cone. Pin one end of the lace to the cone with an appliqué pin, so that the ruffle is even with the bottom of the cone.
  4. Wrap the lace around the cone at a slight angle, slightly overlapping the previous row, and spiraling up the length of the cone.
  5. Cut off the excess lace at the top of the cone, plus 1/2″. Fold the edge over, and pin this to the cone.
  6. Using straight pins, decorate the tree with a length of rhinestone or pearl trim for a garland, or substitute an old rhinestone necklace.
  7. Pin a ribbonworked flower, or and old dress pin to the top of the cone as the tree topper.
  8. Pin buttons or old earrings in place with straight pins for the ornaments.

Happy tea drinking and stitching to you! ~Christen

PS: If you have any questions or thoughts, just leave a comment! See Tips, Tricks, the Basics, for more helpful ideas.

Friday’s Favorites: Decorating with Lace and Jewels

I love to decorate for the holidays. I have quite a collection of lace, buttons, and old jewelry bits, and try to find ways to incorporate them into my holiday decorations.

The first tree here, is actually a metal jewelry holder, with a bowl to catch your loose bits of stuff. I have used it to display my collection of vintage mercury glass ornaments and garlands. I placed vintage tinsel garlands in the bottom of the bowl, then nestled a collection of vintage swan shaped clip-on tree ornaments around the base of the tree. I gathered together a collection of vintage dress pins and single earrings, and added these throughout the branches.

The Lace Cone Trees, are resting in a silver leaf tray, with a garland of bells wrapped around the base. There are two vases flanking this group, filled with vintage mercury glass ornaments and vintage glass beads. See my Tips and Tea on Tuesdays post December 6, 2022, for directions on how to make a cone tree.

The Lace Christmas Tree hanging at the top of the picture is comprised of bits and pieces of lace that had been a salesman’s sampler. I added additional pieces of lace, and some vintage buttons. This project is a free handout that I am offering to my readers as a gift, from me to you.

Happy Stitching to you! ~Christen

Vintage at Heart: class/tutorial

Vintage at Heart: 1 lesson/ $25.00

vintageatheartThese hearts are a great way to mix the old with the new, and they are a great project that can be completed in a few hours. Bring your stash of vintage and new buttons, a bit of fabric and voila you have made an heirloom that can be treasured for years to come

heart broochLace and bits of ribbon can also be added in for extra touches. Finishing options for a pin will be covered and suggestions for an ornament and wall hanging will be discussed.

Bonus Handout: What is in Your Button Box? and Dating Buttons by Materials and Styles. All of us have a stash, and it is fun to find out just what is in that stash!

Skill Level Beginning: hand-sewing and embroidery knowledge needed

Class Information

This class can be purchased at any time, there is no set schedule. The class can be ordered by contacting Christen: thestoreonthecorner@gmail.com. She will send you an invoice through PayPal.

Once the class is paid for, the supply list and handout/s will be sent out.

A high-speed internet connection is recommended, and you must have basic computer and internet skills. You will need to be able know how to download and save a document to your computer’s hard drive, open it, and print out a copy.

You can contact Christen with any questions pertaining to the class/class information throughout the length of the class.

Class fees will not be refunded.

Happy Stitching! ~Christen

Friday’s Favorites: Autumn Jewels

These are a few of the small wall hangings and wreaths that I have made. The first was featured in my book Ribbonwork Flowers, with the ribbonworked flowers attached to a wire base, embellished with vintage buttons and charms. The second was a class that I taught at my store, with the flowers and leaves made from French wire and woven ribbons, embellished with vintage buttons and charms. The third features a dragonfly that I taught at my store, embellished with silk and woven ribbonwork flowers and leaves.

Here are two neck-pieces that I have created. The first is entirely made from ribbonwork flowers and leaves from the Petals and Posies series that I taught at my store. The embellishments include vintage velvet ribbon leaves, and a sprinkling of vintage and new buttons. The second is a version of a class that I taught at my store, Entwined Treasures. The base begins with a silk cord base, and is embroidered and embellished with beads, ribbons, charms and buttons.

Enjoy this harvest of treasures! Happy Stitching! ~Christen

National Sewing Month

Day 15

Question: Do like to work with felt? I find that this is a great way to teach a simple project, that can be embroidered and embellished.

In the above pieces, I used the synthetic felt squares that you can find at your local craft store. I used a variety of perle cotton threads, to work the embroidery stitches, which can all be found in my book Hand Embroidery Dictionary, by C&T Publishing.

Embroidered From the Heart by Christen Brown

This group of hearts are the examples from my Embroidered From the Heart PDF class lesson. There are a variety of heart shapes to work with, which you can mix and match; embroidery and embellishment stitches are also included in the 2 lessons. These make great gifts!

Happy Stitching~Christen

National Sewing Month

Day 26

What sewing enthusiast does not have a lot of precious scraps, that just can’t be thrown away?

3 1/2″ x 24″

Ivory and Lace by Christen Brown

This is my Scrap Roll, which is a project featured in my book, Beaded Embroidery Stitching. This piece does capture and keep all things feminine. The base is comprised of a collaged scraps and bits of lace, hankies, appliques, ribbons, buttons, beads and more. This project is embellished with both bead embroidery and bead woven stitches. The base is a painted wooden spool, adorned with lace, beads and a button.

3 1/2″ x 34″

Pansies and Sunflowers by Christen Brown

This is a slightly simpler version of the Scrap Roll (above). I used larger buttons, appliques, and rosettes, as well as wider trims for the base. The roll is embellished with bead embroidery. The button flowers have a floral wire stem, and are clustered together to create the center and base for the roll.

Happy Stitching, ~Christen

Day 16 of FLOWERS GALORE!

Day 16 of FLOWERS GALORE!

Fabulous Felt Florals

This group of colorful blooms is from my class Fabulous Felt Florals. These fast and easy flowers are just fun, fun, fun! Create a brooch, hair ornament, or decorate an object with these colorful, creative floral beauties. Several different flowers, leaves and embellishments will be made using a variety of shapes with the addition of machine and hand embroidery. The techniques involved are both machine and hand stitching. Fun for any time of year!

Happy Stitching, enjoy~ Christen!

Beaded Embroidery Stitching Blog Tour

I am proud to announce that my book on bead embroidery and bead weaving is HERE! Within the 160 pages of Beaded Embroidery Stitching you will find information on the types of beads and embellishments that you can use in the 125 bead-embroidery and bead-woven stitches. There are over eight projects, ranging from beginning to advanced, including wallhangings, a sewing caddy, jewelry, and more. I have included additional inspiration for each project, showing a different color way, or a different take on the design, and a gallery section for more ideas.

There are some amazingly talented people that are participating in this tour. I want to thank each and every one of them for agreeing to participate in the launch of my new book.

Please visit their blogs to read what they have to say, and for a chance to win an ebook of Beaded Embroidery Stitching.

Happy Stitching to you all!

Enjoy~ Christen

Day 28 of HEARTS! Three Generations of Love

Evelyn’s Heart

embroidered felt hearts

Christen’s Heart

Gwen’s Heart

Here we are gathered together for mother’s day, 12 years ago.

Day 28 of HEARTS!

Many of you know that I love hearts! I love the shapes and all of the possibilities. Here is an example of three generations who love hearts. The first image is of an embroidered greeting card that my mom made. The second is an image of the beginnings of my class Embroidered from the Heart. The third is my most favorite valentine, from our daughter Gwen.

Happy February to you, and thank you for letting me share my love of hearts!

~Christen