Tag Archive | brooch

Friday’s Favorites: Hearts of Course, A Heart a Day: 3

Heart Felt Wishes to you all! I love hearts, I love the shape, I love to decorate the house at Valentine’s Day, and I have a lot of hearts… so I decided to post A Heart a Day for the entire month of February.

What is love to you? Love to me is lending your jean jacket to your love when she is cold, which my guy does! And the best part is that he doesn’t mind if I put a pin or two on it! Keep your love strong, be kind, take a moment to believe that everything is going as planned, and spread the love.

Happiest of heartfelt wishes for a wondrous day! ~Christen

Vintage at Heart: class/tutorial

Vintage at Heart: 1 lesson/ $25.00

vintageatheartThese hearts are a great way to mix the old with the new, and they are a great project that can be completed in a few hours. Bring your stash of vintage and new buttons, a bit of fabric and voila you have made an heirloom that can be treasured for years to come

heart broochLace and bits of ribbon can also be added in for extra touches. Finishing options for a pin will be covered and suggestions for an ornament and wall hanging will be discussed.

Bonus Handout: What is in Your Button Box? and Dating Buttons by Materials and Styles. All of us have a stash, and it is fun to find out just what is in that stash!

Skill Level Beginning: hand-sewing and embroidery knowledge needed

Class Information

This class can be purchased at any time, there is no set schedule. The class can be ordered by contacting Christen: thestoreonthecorner@gmail.com. She will send you an invoice through PayPal.

Once the class is paid for, the supply list and handout/s will be sent out.

A high-speed internet connection is recommended, and you must have basic computer and internet skills. You will need to be able know how to download and save a document to your computer’s hard drive, open it, and print out a copy.

You can contact Christen with any questions pertaining to the class/class information throughout the length of the class.

Class fees will not be refunded.

Happy Stitching! ~Christen

Day 3 of HEARTS: Vintage at Heart

Day 3 of HEARTS!

Many of you know that I love hearts! I love the shapes and all of the possibilities. These brooches are from my class Vintage at Heart. This is a great beginner class that explores the use of buttons, trims and lace on this wonderful shape. Every button deserves love!

Happy February to you!

~Christen

Vintage at Heart

Vintage at Heart with Christen Brown

vintageatheartThese hearts are a great way to mix the old with the new, and they are a great project that can be completed in a few hours. Bring your stash of vintage and new buttons, a bit of fabric and voila you have made an heirloom that can be treasured for years to come

heart broochBasic straight stitches as well as embroidery stitches will be covered. Lace and bits of ribbon can also be added in for extra touches. Finishing options for a pin will be covered and suggestions for an ornament and wall hanging will be discussed.

Bonus Handout: What is in Your Button Box? and Dating Buttons by Materials and Styles. All of us have a stash, and it is fun to find out just what is in that stash!

Details:

Class Fee: $25.00/2 hour class

*Please note that this class does not include any of the materials, supplies or tools; these must be provided by the student.

Class Requirements: hand sewing a must, some embroidery knowledge will be helpful.

Date and time: This class is not currently scheduled.

Specifics:

This class fee is paid directly to Christen. This can be paid by a PayPal invoice, or by cash or check the day of class. Please email Christen:thestoreonthecorner@gmail.com to inquire about the availability of space for the date listed above.

Happy Stitching ~Christen

Rose ‘N Bud Brooch

Rose ‘N Bud Brooch

rosenbudbroochDo you ever dream of days gone by when women’s clothing was adorned with flowers? This lovely rose is reminiscent of those days gone by, where beauty and femininity were present in everything aspect of our lives. This is a simple flower to make, so easy that you can in fact complete it in an hour, and where out the door! Come join us!

Details:

Class Fee: $15.00/1 hour class

*Please note that this class does not include any of the materials, supplies or tools; these must be provided by the student.

Class Requirements: hand sewing skills are a must

Date and time: Not currently scheduled.

Specifics:

This class fee is paid directly to Christen. This can be paid by a PayPal invoice, or by cash or check the day of class. Please email Christen:thestoreonthecorner@gmail.com to inquire about the availability of space for the date listed above.

Happy Stitching ~Christen

Scrumptious Hearts: class/tutorial

Scrumptious Hearts: 3 lessons/$38.00

scrumptious hearts
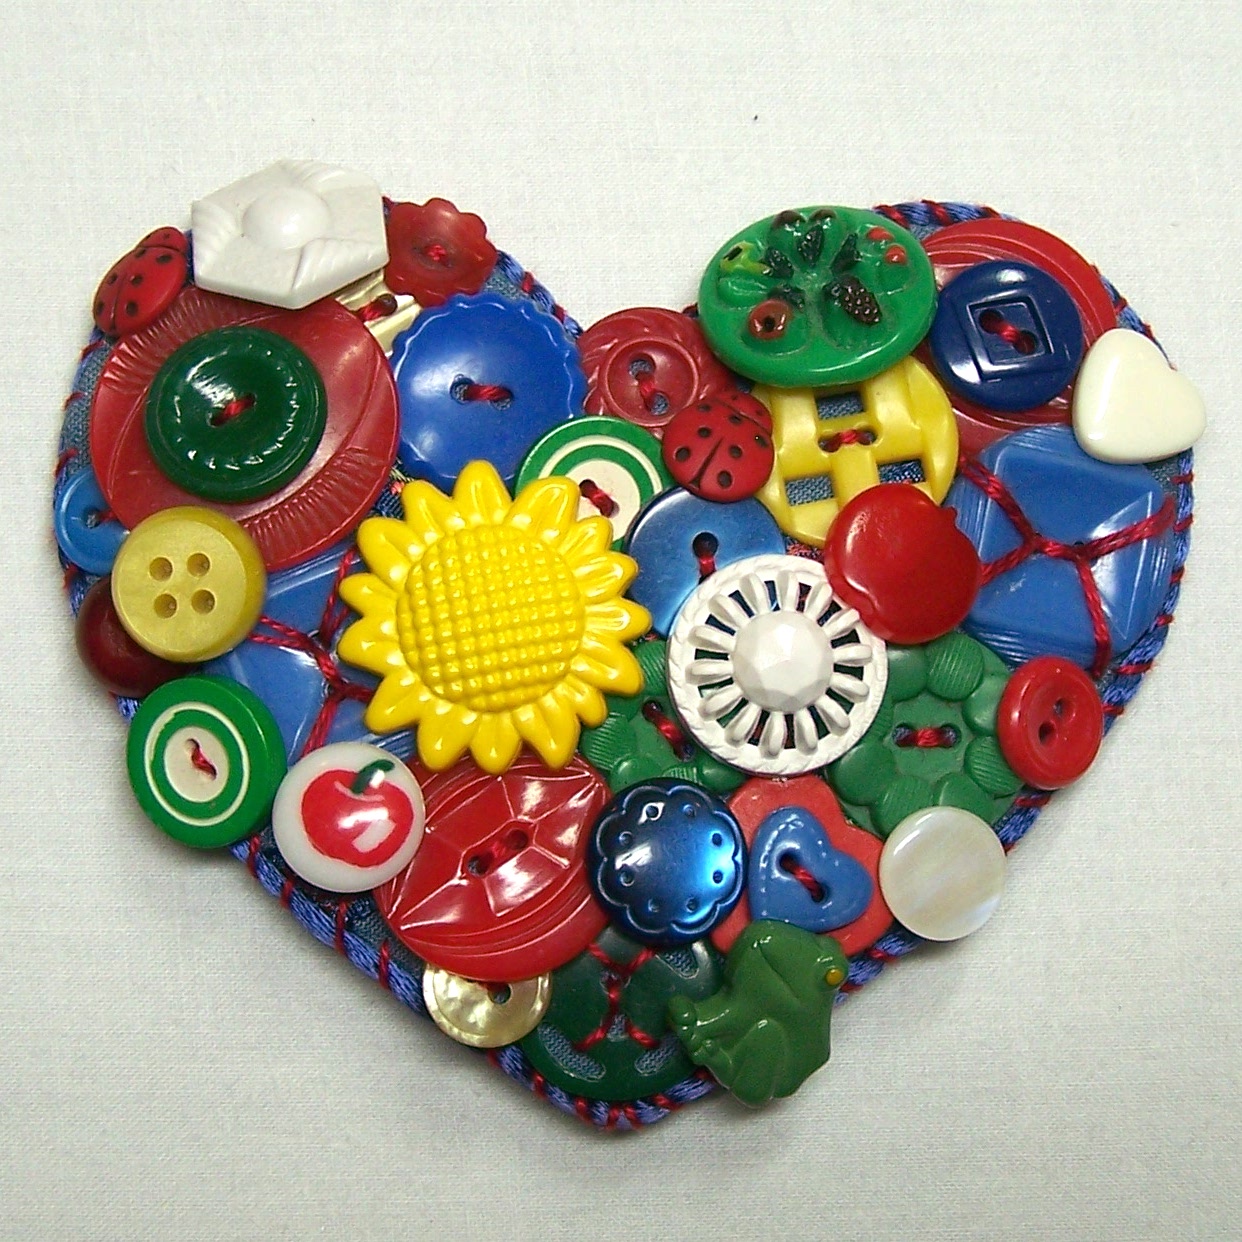
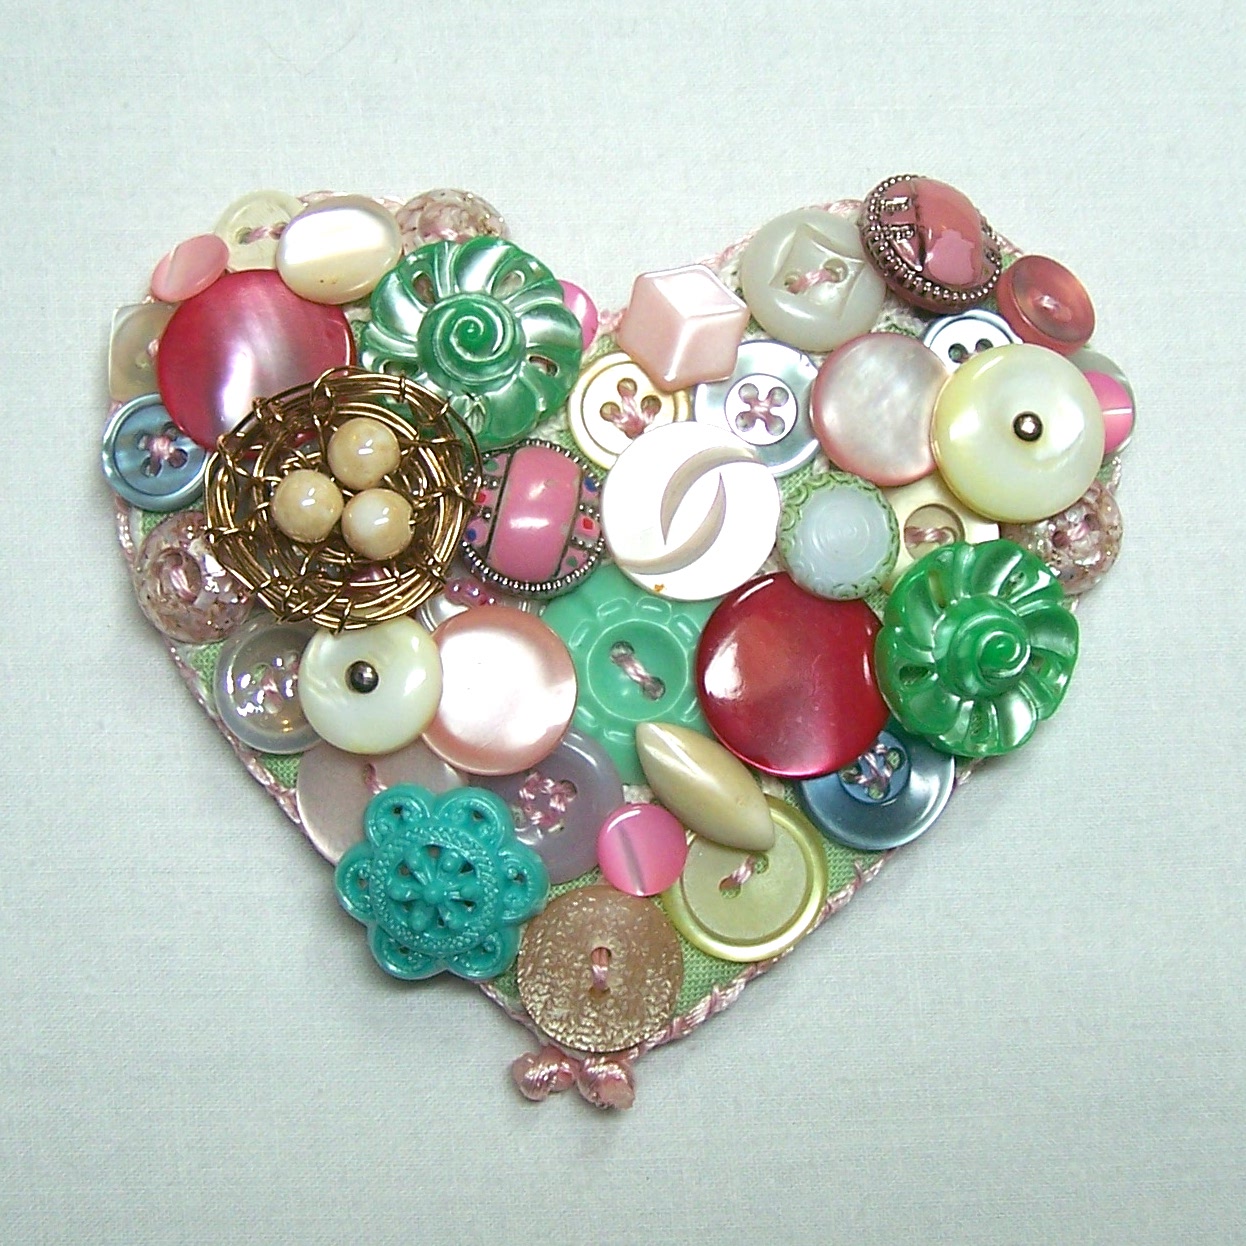
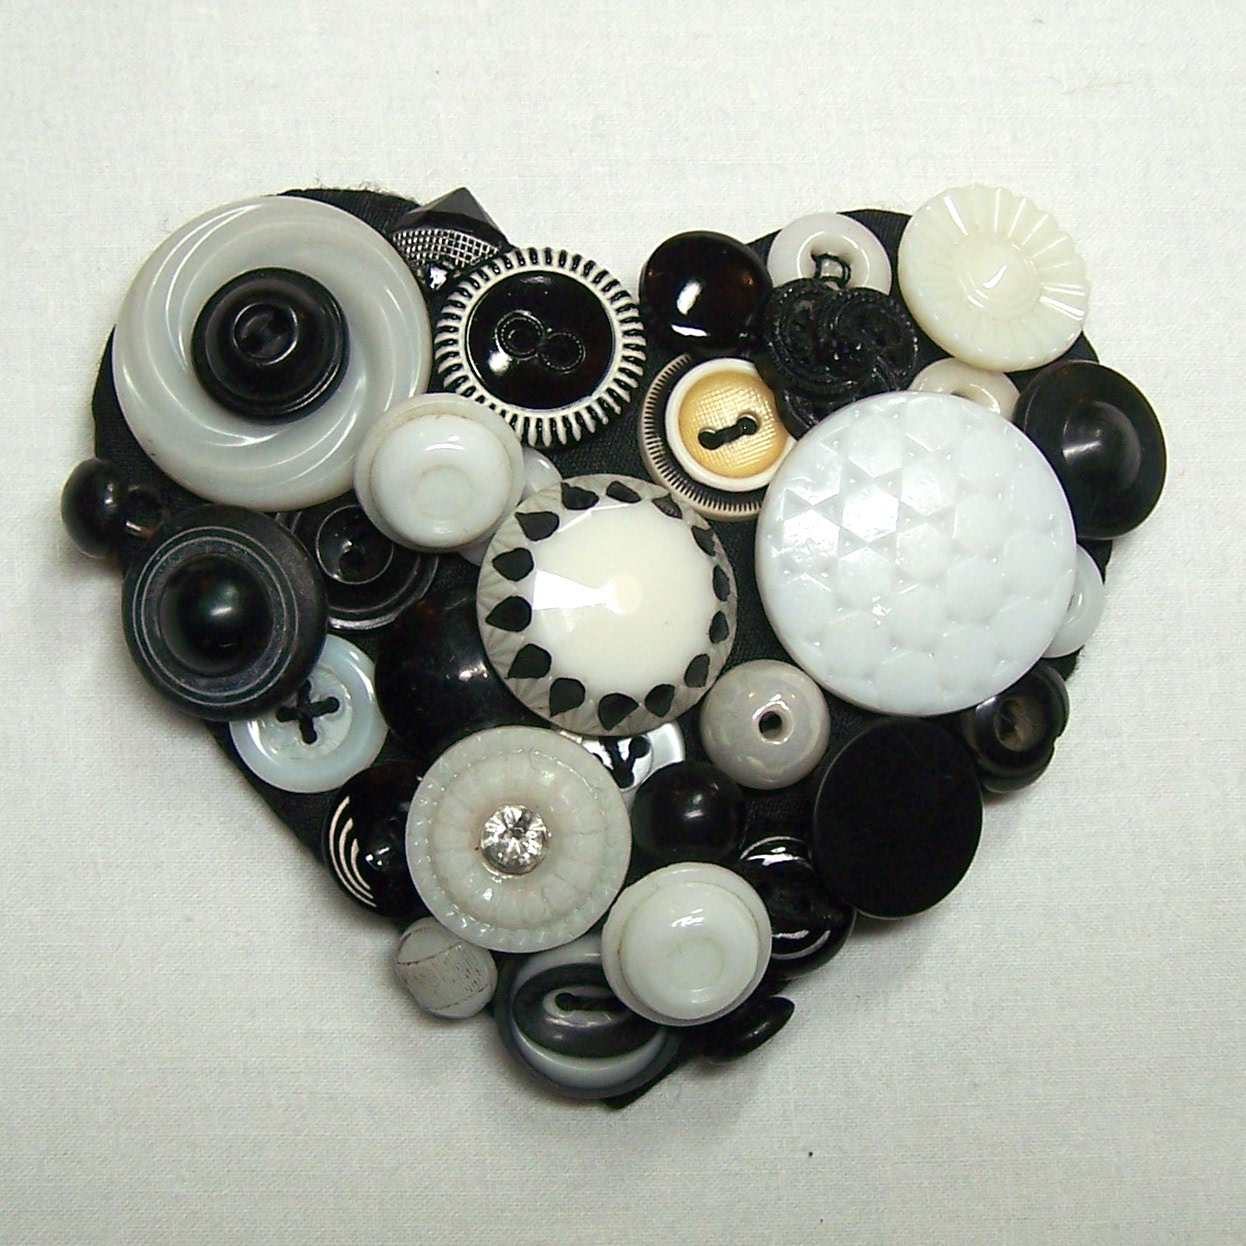
Bits and pieces of cherished lace are melded with silk fabric to form a beautiful heart shaped base for your floral design. Chose from a few different heart shapes and ribbon worked floral vignettes, or create your own. The melded silk and lace base and the RTD silk ribbons for the ribbon work flowers and the silk ribbon embroidery are dyed with the Colorhue dyes. This is an excellent way to use up small amounts of this and that to form an heirloom brooch to be treasured.

Skill Level Intermediate: machine and hand sewing, embroidery and ribbonwork knowledge needed.

Lesson 1: This lesson will cover the machine stitched and collaged bits of lace and silk fabric for the base of the heart, (only cotton, rayon or silk lace will work for the base, you will need to know what you have before you start the project). The finished base and the silk ribbons will be dyed in the second part of this lesson with Colorhue dyes (no other dye will be used or discussed).

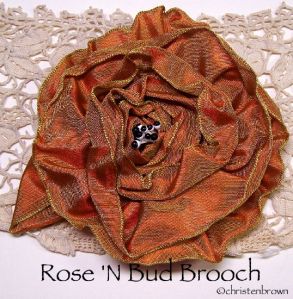
Lesson 2: This class will focus on the ribbon worked (ribbon cut to a specific length and stitched with a needle and thread) flowers and leaves, that will become the floral vignettes for the heart. The flowers include: the Chou Rose, Double Edge Rosette, and the Silk Bias Berry; the leaves include: the Simple Leaf and the Prairie Point Leaf. The flowers and leaves are stitched onto the heart shaped base in small vignettes.

Lesson 3: This class will focus on the silk ribbon embroidery stitches (ribbon threaded through a needle and stitched through the fabric to form a flower or pattern) that include the Lazy Daisy and French knot; these are stitched around the floral vignettes. Once the base is adorned with the ribbon worked flowers and leaves and embroidery, then the brooch is assembled with the backing and outer trim.

Class Information

These classes can be purchased at any time, there is no set schedule. The class can be ordered by contacting Christen: thestoreonthecorner@gmail.com. She will send you an invoice through PayPal.

Once the class is paid for, the supply list will be sent out. The lessons will begin one week after the purchase of the class, unless otherwise stated. You will receive an email with the lesson attached. The following lesson/s will arrive one week after the previous lesson.

A high speed internet connection is recommended, and you must have basic computer and internet skills. You will need to be able know how to download and save a document to your computer’s hard drive, open it and print out a copy.

You can contact Christen with any questions pertaining to the class/class information throughout the length of the class.

Class fees will not be refunded.

Happy Stitching,

~Christen

Friday’s Favorites: Mother of Pearl part 2

necklace made from vintage and new mother of pearl buttons

Enchanted Butterflies

Friday’s Favorites is continuing this month with Mother of pearl. This week I want to show you jewelry that I have made with MOP buttons, charms and beads.

Enchanted Butterflies is an adaptation of my “Entwined Treasures” pattern. The base is created by entwining and stitching silk cords, into a base. This base is then embellished with buttons and charms, and the beads are attached with the peyote stitch.

ribbon bracelets stitched with vintage mother of pearl buttons

Mother of Pearl Button Bracelets

Button bracelets have been around for many decades. You may have one of those cuff bracelets that your mom made with an elastic crochet or stretchy gimp base that is encrusted with vintage buttons and beads.
These two bracelets here are a take-off on those original bracelets.
I chose to use a ribbon for the base (because I don’t like the elastic), using a button for the closure. The top bracelet, which is a sample of my “Klimpt Kollage Kuff” pattern, is encrusted with buttons, while the buttons are stitched in a design on the bottom bracelet.

vintage tie neckpiece

Hopscotch

The neck-piece here is made from the tie that my dad wore at his wedding. The buttons are vintage carved Mother of pearl with celluloid discs.
The pin base is a wide ribbon, encrusted with Mother of pearl buttons and buckles, celluloid buttons, and roses that I made from gimp and vintage zippers.

necklace strand made from amethyst and mother of pearl buttons

Pearl's Delight

This necklace incorporates small mother of pearl buttons with beads, strung on #10 Soft Flex.. The beads are amethyst, fresh water pearls, mother of pearl and seed beads. This necklace and the bracelets below were created to wear with “Pearl’s Delight” jacket ensemble, that is covered in vintage lace and vintage Mother of pearl buttons.

bracelets made from mother of pearl buttons

Mother of Pearl Bracelets

These bracelets are all made from vintage Mother of pearl buttons. The top and bottom bracelets are samples from my “Bohemian Button Bracelet” pattern, these are strung on Soft Flex as the necklace above. The middle bracelet is a sample of my “Button Bracelet” pattern using the peyote stitch.

mother of pearl buttons

Vintage at Heart

These are two pins that I made using vintage Mother of pearl buttons. The pin on the left is made from muslin fabric and is covered with buttons. The pin to the right is made from silk fabric with a piece of vintage lace, the buttons are all carved.

Vintage Mother of pearl buttons are still around in some abundance, what will you make with them?
Enjoy what you do, it’s good for you! Christen

Friday’s Favorites: Celluloid Buttons

Celluloid Buttons

Celluloid Buttons

Today we will talk about the celluloid button. This necklace is part of an ensemble “Deco Drama” that I just finished. The base of the necklace is a vintage French ombre ribbon, ruched, with a silk cord stitched for the tie. As you can see celluloid was definitely the theme here, using many of my favorite types of celluloid button.

Celluloid was invented in the 1870’s and was one of the most versatile and the first of the man-made plastics. This lightweight material is thinner than Bakelite, though some of the same techniques could be used such as molding, stamping and machine tooling; but unlike Bakelite buttons they could also be created by pulling, hollow blowing, and extruding. The coloring of the celluloid button was often more diverse than that of the autumn and vibrant coloring of the Bakelite buttons. The versatility of celluloid made it extremely popular with manufacturer’s, however the serious drawback to this material was that it is flammable! For further reading may I suggest a book I use frequently: Button Button Identification & Price Guide by Peggy Ann Osborne.

bracelets made from vintage celluloid buttons

bracelets made from vintage celluloid buttons

Here are a series of bracelets that feature vintage celluloid, Bakelite and glass buttons. I made these over the summer using simple sewing techniques and materials so that the buttons would shine as the stars that they are!

  • The first bracelet base is vintage picot edged grosgrain ribbon. The buttons that I used are celluloid “glow bubbles”, tight-tops and a few brown Bakelite.
  • The second bracelet base is vintage cotton grosgrain ribbon. The heart shaped buttons are Bakelite and the cream colored buttons are celluloid.
  • The third bracelet base is taffeta ribbon with a strip of grosgrain ribbon stitched down the center. The incredible green buttons are vintage celluloid “glow bubbles” and the black buttons are carved celluloid.

ribbon bracelet

ribbon bracelet

This last bracelet is made using grosgrain ribbon and an old measuring tape. These were woven together and backed with interfacing. I then stitched vintage glass, celluloid and Bakelite buttons for decoration. I stitched snaps down for the closure.

Deco Decadence

Deco Decadence

This brooch was made to be worn with “Melon Balls jewelry ensemble and Hat, which is made using a variety of vintage and new buttons and beads in colors of melon and black.

The pin boasts a lovely display of “buffed celluloid” buttons. I just adore the black and tan combination. It took many years to collect the right sizes and colors for this brooch. The ribbon worked flowers are made from a vintage ribbed cotton ribbon and the leaves are from a taffeta ribbon.

The ribbon buttons and flowers are attached to florist wire wrapped in sating ribbon, and sit in a vintage jacquard ribbon vase. A pin back is stitched to the back of the vase.

So what is in your button box and need help with identifying what’s in there? Christen

Violet Gardens- ribbon work brooch

Violet Gardens Brooch

Violet Gardens Brooch

This was one of two entries for the Piecework Magazine’s Excellence in Needlework 2009. This year’s challenge was to make a brooch no larger than 3″, in any needle art category. I chose ribbon work here and silk ribbon embroidery for my other submission Elizabeth’s Garden.

The base of the brooch is 18 gauge florist wire wrapped in cotton batting, then a silk bias ribbon. The brooch was fashioned into a spiral (see the bottom picture), with two loops. Tiny spirals of 22 gauge florist wire wrapped in cotton batting then 4mm silk ribbon peek out here and there, and add more dimension to the design.

The brooch was then covered in hand made ribbon worked flowers and leaves. I used 1/4″, 3/8″, 1/2″ and 5/8″ (folded in half); in a variety of materials including silk bias, rayon hem tape, ombre and taffeta ribbons. A few beads are sprinkled here and there for extra detailing.

back of brooch

back of brooch

The back of the brooch is almost covered with as many flowers as the front. I used a rococo trim to cover the bulk of the stitching, and then added in flowers and leaves here and there.

From this picture you can make out the spiral design of the base. You can see the tiny tendrils quite well here too, and if you look closely the pesky white batting wanted to peep out whenever it had a chance to from the 4mm ribbon, I fixed that before sending it off on it’s journey!

Both of my entries were selected by the judges to be included in a display of the brooches at The National Needle Arts Association’s trade show in Columbus, Ohio, June 13-15, 2009. They will also be on display at the Embroiderer’s Guild of America’s (EGA) museum in Louisville, Kentucky, from July 1 through September 23, 2009. For information contact EGA www.egausa.org (502) 589-6956.

Happy stitching, happy day, enjoy- Christen

Elizabeth’s Garden- silk ribbon embroidered brooch

Elizabeth's Garden Brooch

Elizabeth’s Garden Brooch

This was one of two entries for the Piecework Magazine’s Excellence in Needlework 2009. This year’s challenge was to make a brooch no larger than 3″, in any needle art category. I chose silk ribbon embroidery here and ribbon work for my other submission Violet Gardens.

The base of the brooch is a silk chambray fabric, which is covered in silk ribbon embroidery and a few ribbon worked flowers. The top center has two woven roses, with two rolled roses below these. A woven rose in the center and two carnations under the rolled rose.

The outer edge is covered in a rococo trim, with ribbon worked leaves that lead up to the top center with a another rolled rose and silk ribbon carnations.

back of brooch

back of brooch

The brooch was stitched to a padded cardboard base with the back covered in a piece of felt that I hand stitched to the silk front. I embroidered flowers through the holes in the pin back, and stitched in my initial for extra detailing.

This brooch is dedicated to our Elizabeth, who left her earthly body this year, but not our hearts. She was our 5 lb. Bengal kitty, who love all of these colors, fabrics and ribbons. Often I would find her nestled in the basket that held the components for this brooch, purring contentedly. Kitty kisses dear one.

Happy stitching, love what you do and those silent “mewses” who love you back! Christen

PS: Both of my entries were selected by the judges to be included in a display of the brooches at The National Needle Arts Association’s trade show in Columbus, Ohio, June 13-15, 2009. They were on display at the Embroiderer’s Guild of America’s (EGA) museum in Louisville, Kentucky, July 1 through September 23, 2009.