On Tips and Tea on Tuesdays, I will cover a topic and hopefully provide you with some tips that will be helpful! And just as an afterthought, tea may occasionally be a cup of Joe!

Sitting here and listing to Simon and Garfunkel, with my cup of Darjeeling, thinking, hmm everything IS Groovy! Today I want to share some before and after pics of one of my favorite pieces, Bouncing Button Balloons. This piece was featured in my book, The Embroidery Book, by C&T Publishing.

Tip: Take photos before, during, and after.
I always, well almost always, take a picture of the finished base, and then the threads and embellishments I have set aside to use on it. The focus of this piece, was going to be the buttons, which are two fabric, and vintage celluloid. Here you can see all of the different fabrics, and vintage laces that were used to create the base. The embroidery for this piece was worked in three colors of Wildflower Thread, by the Caron Collection, with seed bead embellishments.
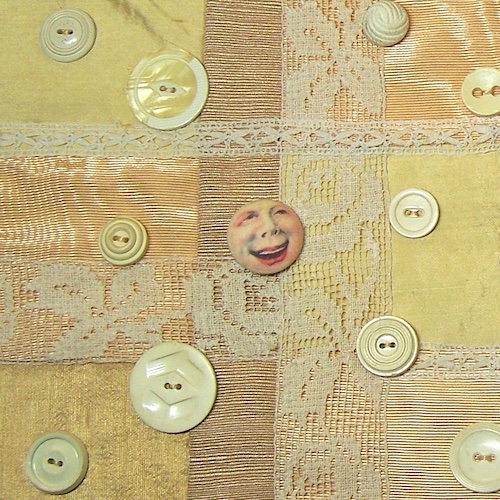
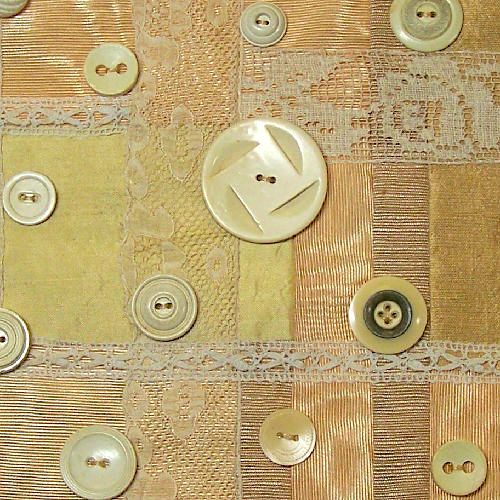
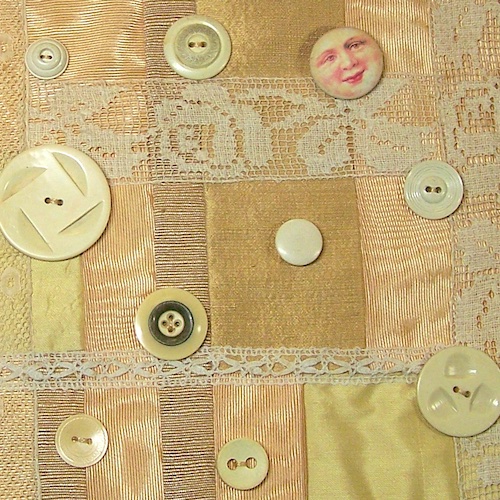
Tip: Before you stitch buttons and embellishments in place, audition them on the base. Once you have your design, and the audition is complete, take a photo with your phone, that way when you go to stitch them in place, you will have something to refer to.

Tip: When embroidering around a button, use stitches that will curve easily, like the blanket and the chain stitches. Here, I embroidered through the buttonholes first, then around the base of each button. I stitched the detail stitches with the lazy daisy, fly, French knot, and single bead stitches Then I embroidered the feather stitch coming out of each balloon, to look like the attached string.
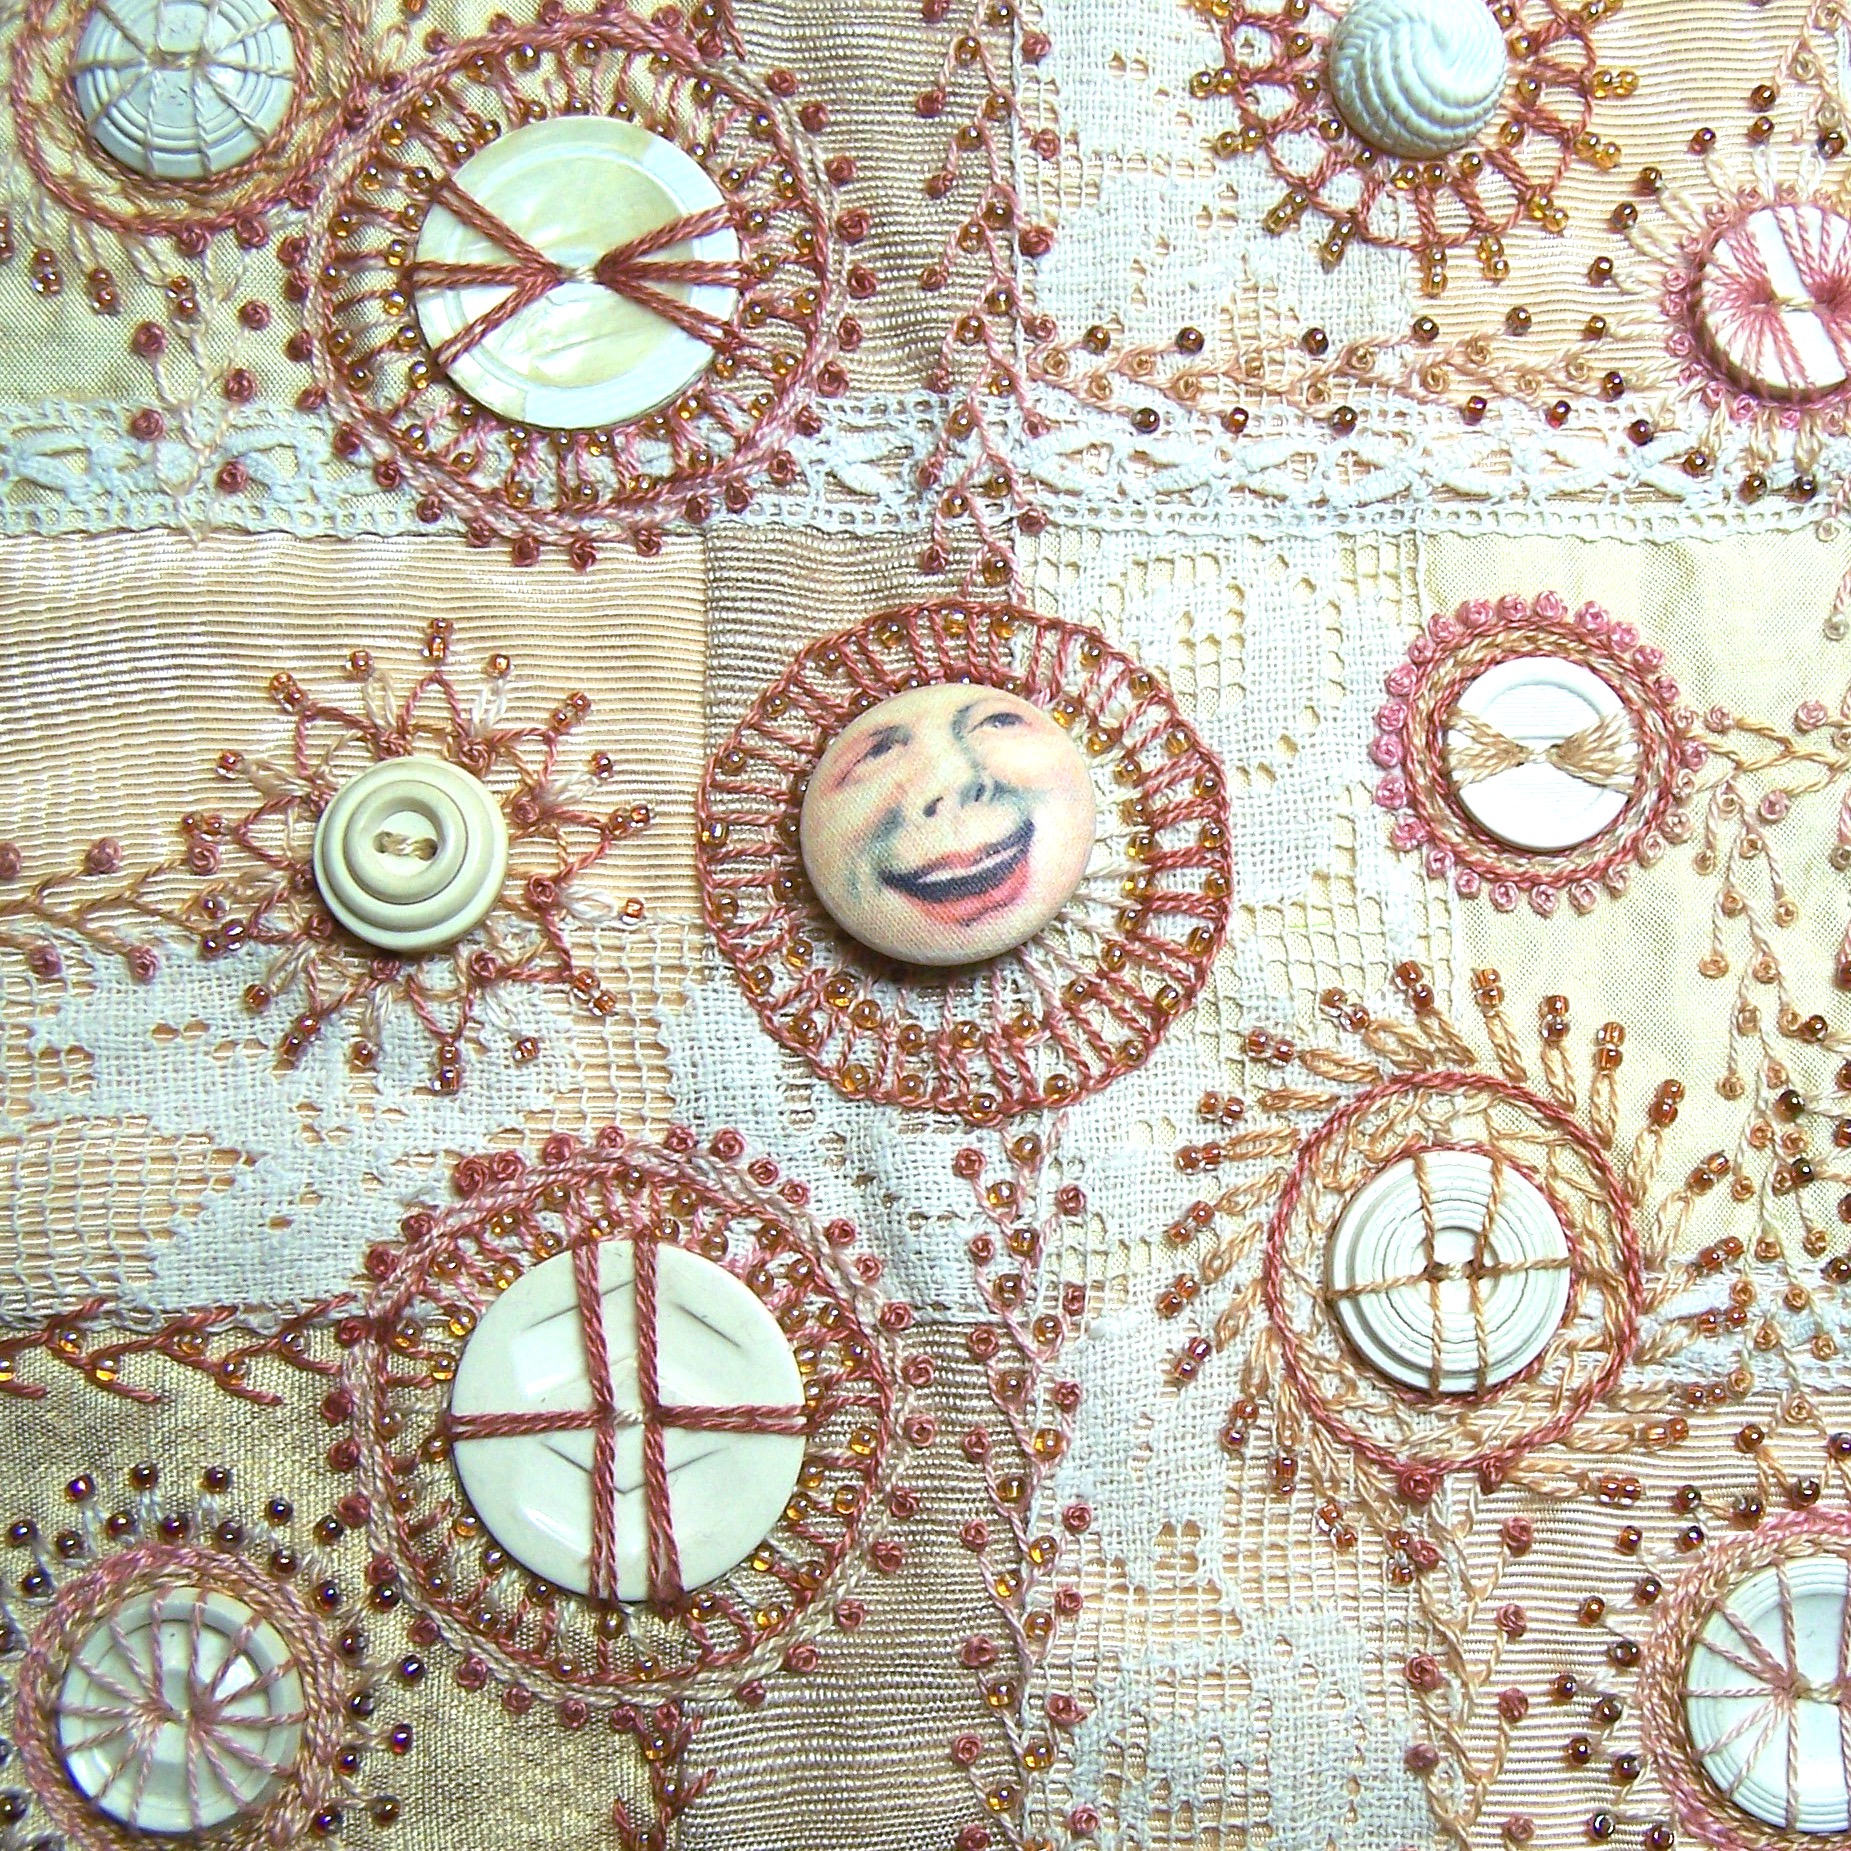
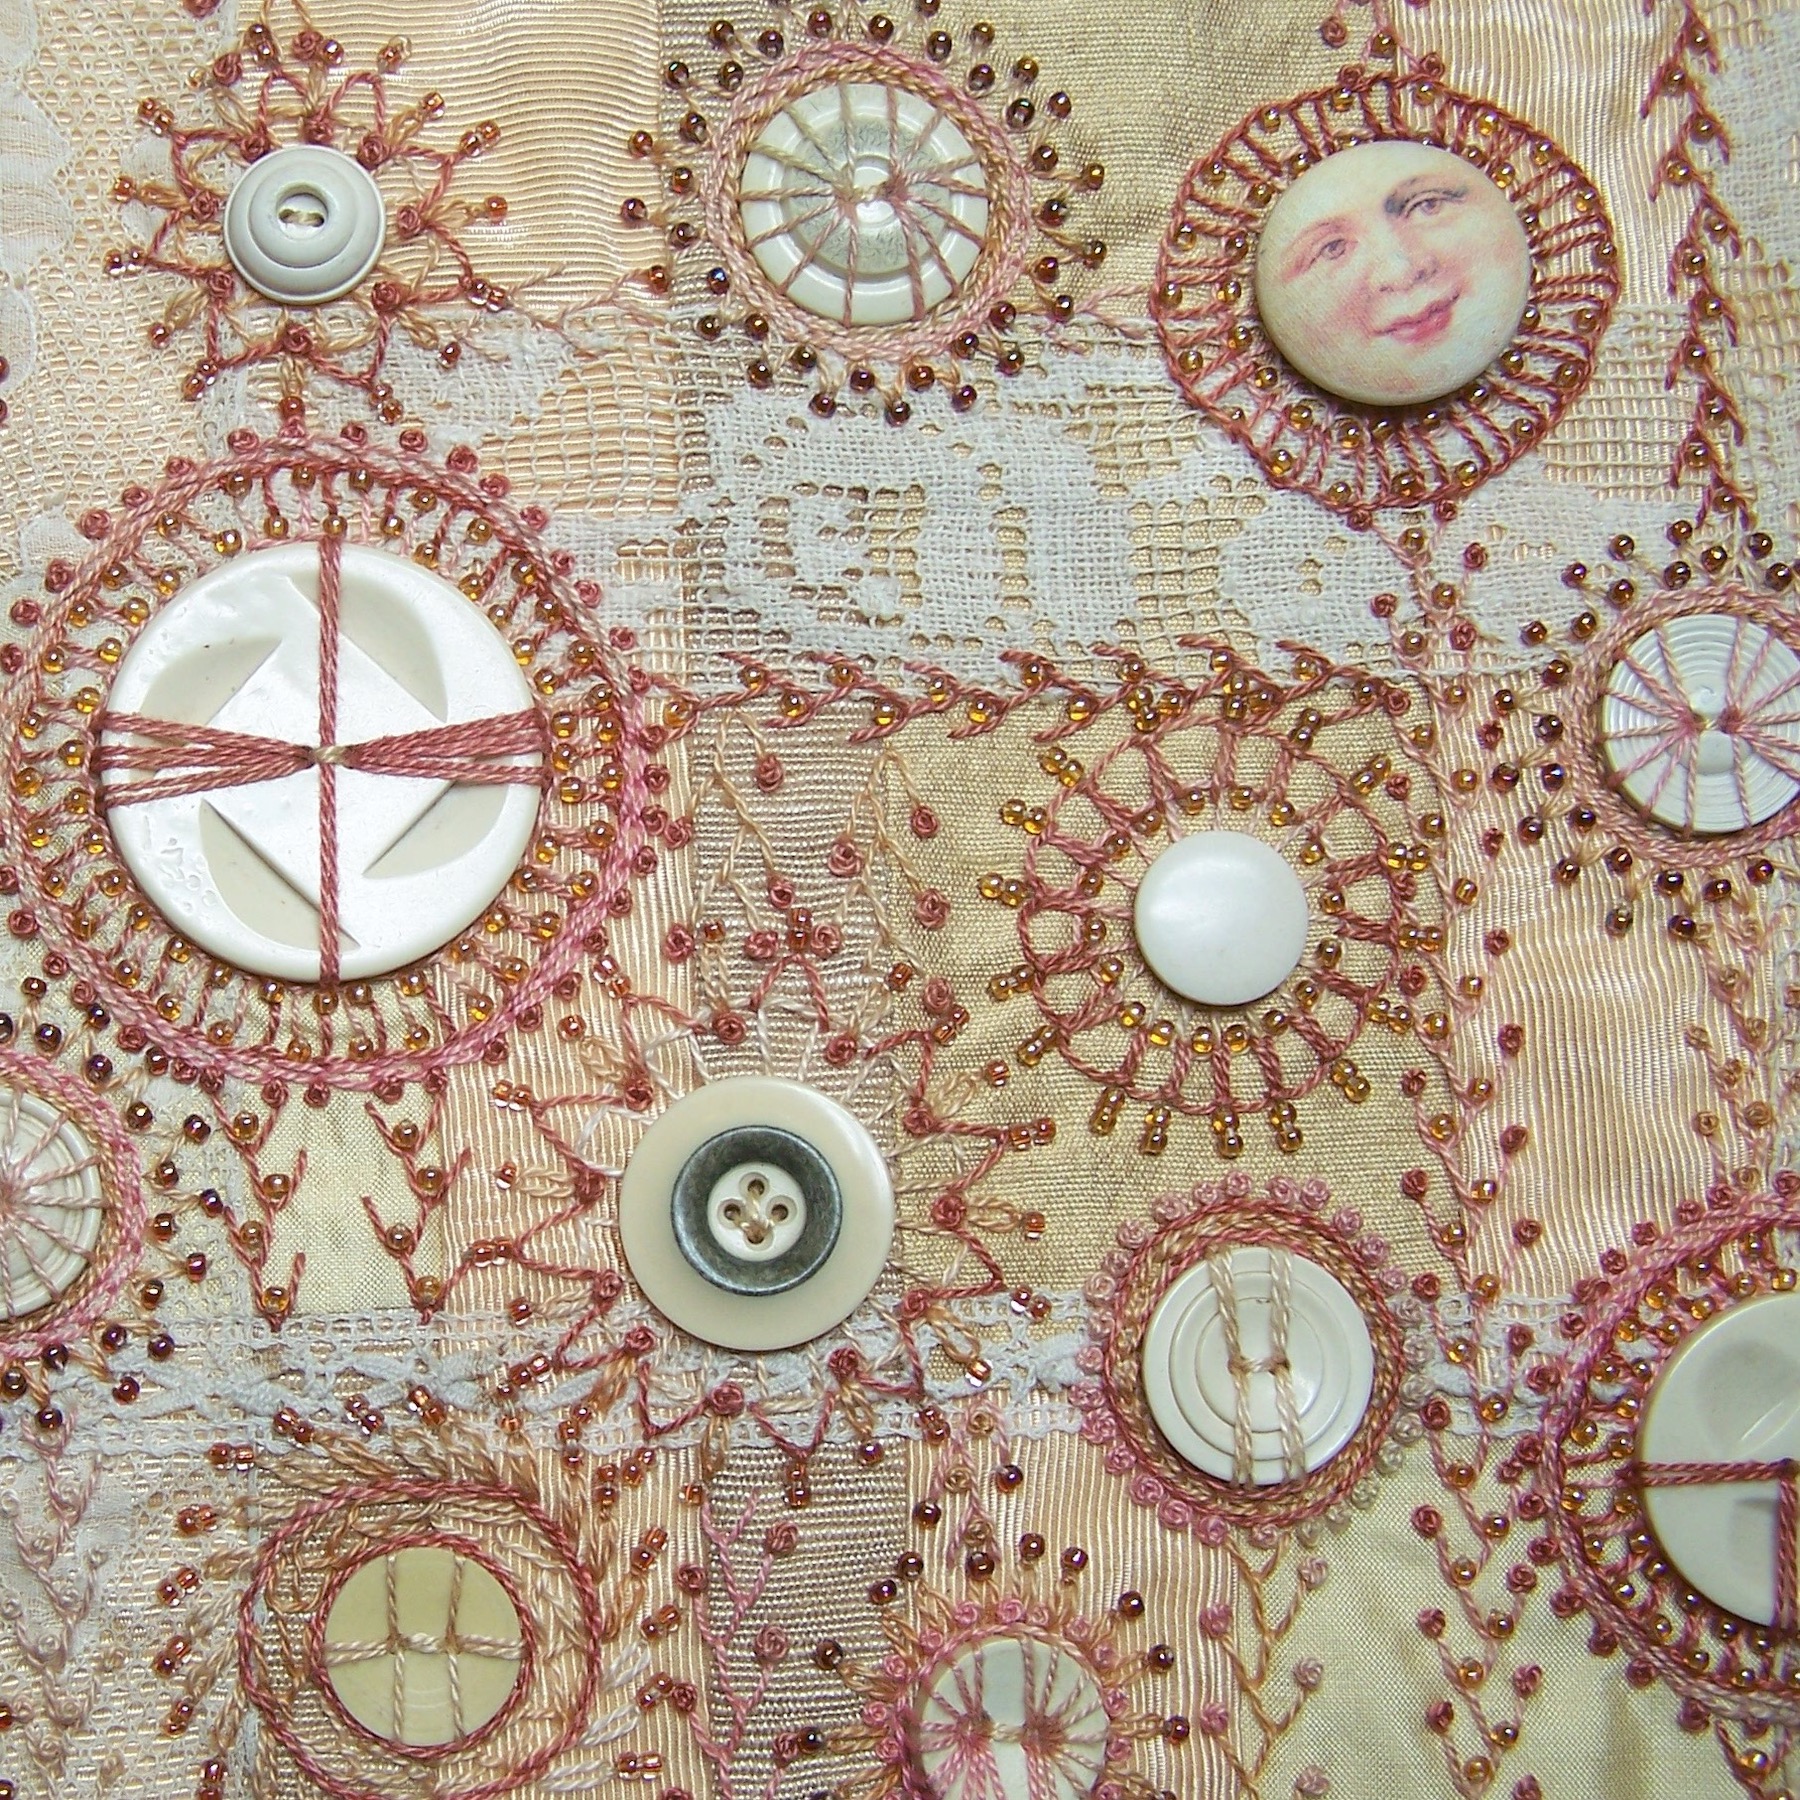
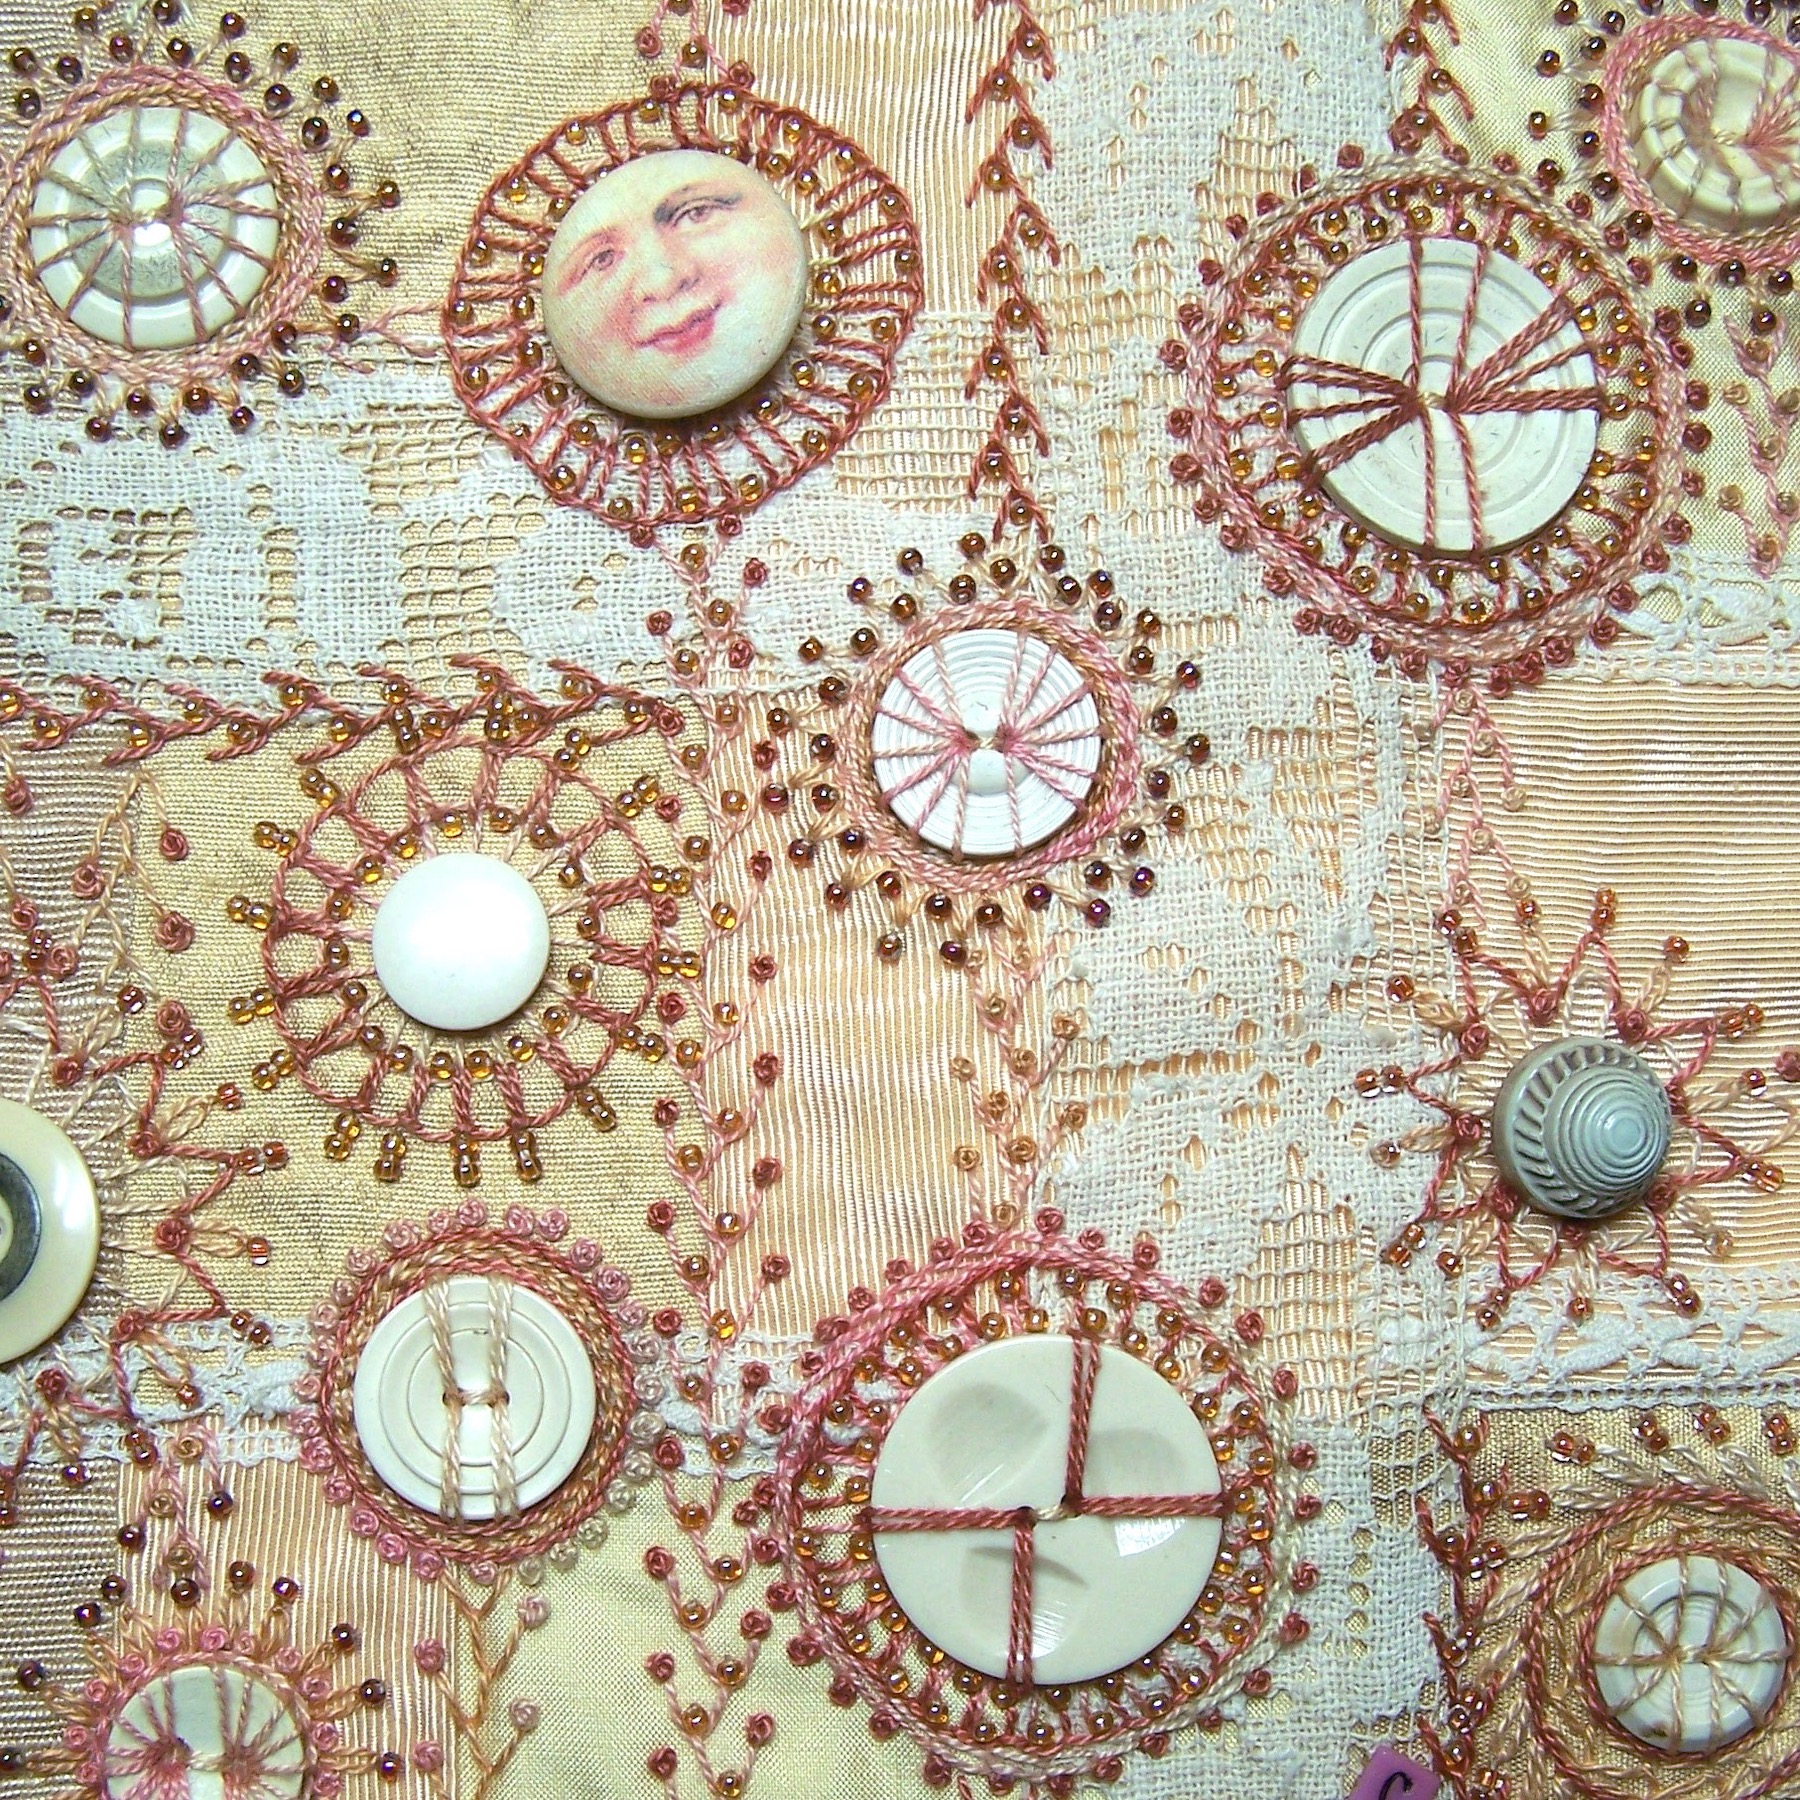
Here is a close-up of the embroidery and embellishment stitches. This was a fun piece to work on, and it gave a new life to some old, funky, buttons!
Happy tea drinking and stitching to you! ~Christen
PS: If you have any questions or thoughts, just leave a comment! See Tips, Tricks, the Basics, for more helpful ideas.

I can’t wait for your new book to be mailed to me. All of the projects look amazing! Thanks for all of the ideas for incorporating buttons as I have quite a few! The Christmas button tree was a big hit. Thank you!
This is a delightful, high-energy piece, Christen.
Question: In your book Embroidered & Embellished you have a note on page 81 that says, “If you are working a cluster of roses, stitch all of the bases at one time.” What is the purpose of this?
Hi Carolyn, Great question!
If you look at the Silk Roses Etui, on page 85, you will see in the top and bottom portion of the design a group of purple woven ribbon roses. The base of each rose is made from perle cotton, the petals from silk embroidery ribbon. I am simply suggesting to work with one material at a time, in this case stitching all of the bases first. I feel that it is easier than stitching one complete flower, then another, and so on.
~Christen
Thanks for clarifying.